Resources
Introduction
It's common for teams to use the same piece of information in multiple actions. For example, a list of known-good domains. If this information were stored directly inside the actions' options and changed (a new known-good domain is added), every action would need to be updated individually. Resources provide a way to store information in a single, centralized location, so it can be accessed from any action in any story in your team or teams it has been shared with.
Resources are similar to global variables↗ in software development.
Creating a Resource
Within your team, select your team name on the top left and then select "Resources".
On the Resources page, you will see a list of existing Resources in your team. To create a new one, select + New in the top right corner. Resources can be plaintext, a JSON object such as an array, or a file. There is a 5MB size limit on Resources. Enter your desired information and select Save resource.
An alternate way to create a Resource is from the storyboard. On the right hand panel, identify the Resources section. To create a new Resource, select the + next to the word Resources.
Using a Resource in an action
To use a Resource, reference it with the RESOURCE key in formulas in your desired action. When the action runs, the Resource placeholder will be replaced by the contents stored in the referenced Resource.
Test details tab
If you are using change control in a story, you may want to test changes with your developer environment before deploying them to the live story. You can define Test Resource data in the Test Details tab of the Resource. In stories with change control enabled, the Test Resource will be used in any draft of the story by default. See our change control documentation for further details.
Controlling who can view and edit Resources
Access to a resource is set by a team member's role, not on the resource itself. A resource is visible to anyone with read access to the team — and unlike credentials, its contents are shown in full.
Viewer — read-only. Can open and reference a resource, but can't edit, move, or delete it. Use this for view-only access.
Editor — can create and update resources.
Team admin — can also move, delete, and change sharing settings.
With custom roles, enable Read and leave Resources → Update and Resources → Manage off for view-only access. To stop everyone from editing a resource, lock it instead (see Resource locking).
Sharing a Resource
Resources are, by default, only accessible to the Team they are created within. Resources can be configured to be shared with all other teams in the tenant by selecting the 'All teams' access option; this will include personal teams. Additionally, Resources can be shared with other teams specifically by selecting the desired team name.
Using a shared resource
Resources with the same name as Resources shared across multiple teams will use the Resource located within the same team as the story.
You can view all Resources shared with your team by clicking the "Shared with this team" section in the Resources page. You will not be able to modify the contents of the Resource unless you have the relevant permissions in the team that owns the Resource.
Resource locking
Resources can be locked, meaning that they cannot be edited. This ensures that the contents of a Resource will remain static, which can be essential for Resources that are used by multiple high priority stories. Only team admins and users with permission to manage Resources are allowed to lock or unlock resources.
A resource can be locked by clicking the Lock resource button on the top-right of the resource modal.
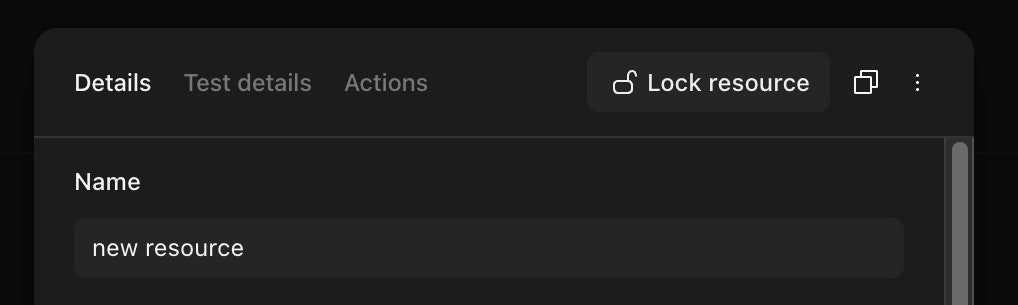
While locked, it won't be possible to edit any of the Resource's contents.
Afterwards, clicking the Unlock to edit button will temporarily unlock the resource. This will allow this user to edit the Resource once. The Resource will not be unlocked for anyone except the user who clicked the unlock button, and if they exit without editing the Resource it will be locked again.
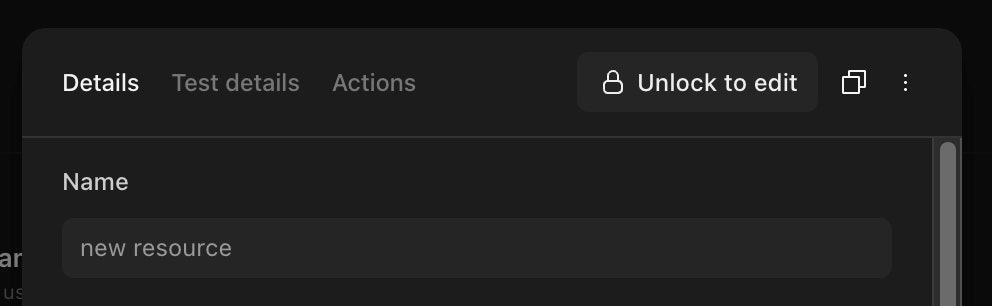
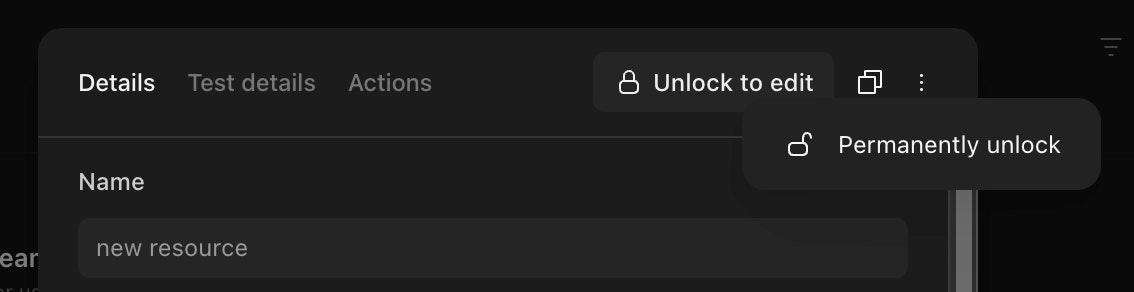
If a user wants to permanently unlock the Resource for all users, they can do so by selecting Permanently unlock from the dropdown.
Handling concurrent updates
When several story runs update the same resource at the same time — for example, stories that run on a schedule at overlapping intervals, or a story that processes events in parallel — their changes can overwrite one another. Tines does not queue writes to a resource, so if two runs each read a resource, modify it, and write the whole value back, whichever run writes last wins and the other run's change is lost.
Update individual elements
Rather than replacing an entire resource value, use the append, replace, and remove element endpoints. Each of these changes a single array element or object key on the server, so you don't need to fetch the current value first. This avoids the lost-update problem that happens when multiple runs read and rewrite the whole value.
Compare-and-swap (conditional updates)
The replace and remove endpoints accept an optional if_value parameter. The operation only proceeds if the current value at the specified key or index still matches if_value. Otherwise, the request returns a 422 error that includes the current value, and the resource is left unchanged.
This lets you make conflict-free updates without a separate read. A common use is a counter: read the current count, then send a replace with the new count and if_value set to the value you read. If another run changed the value in the meantime, your request fails and you can retry with the latest value.