Connecting tools
Configuring the HTTP request action
Referring to the API docs
Translate the API call to an HTTP request action
URL endpoint
Method type
GET / POST / PUT / DELETE
Required payload
i.e. channel name, text
Authorization Headers
Does it require an API key?
Follow API instructions to get the API key
Permissions?
Does the API call require special permissions that need to be set in the tool?
i.e. Setting permissions to "read.message" , etc
Will typically note it directly in API docs for the API call
Test the HTTP request action
Click run
200 HTTP status code means we've made the request successfully
Check the payload, does it look the way you anticipated?
In most cases, API docs will not only show you what is needed to configure but also share examples of what a successful request/response looks like
Rinse and repeat for every tool you want to / need to connect to for your desired outcome
Create the flow of actions
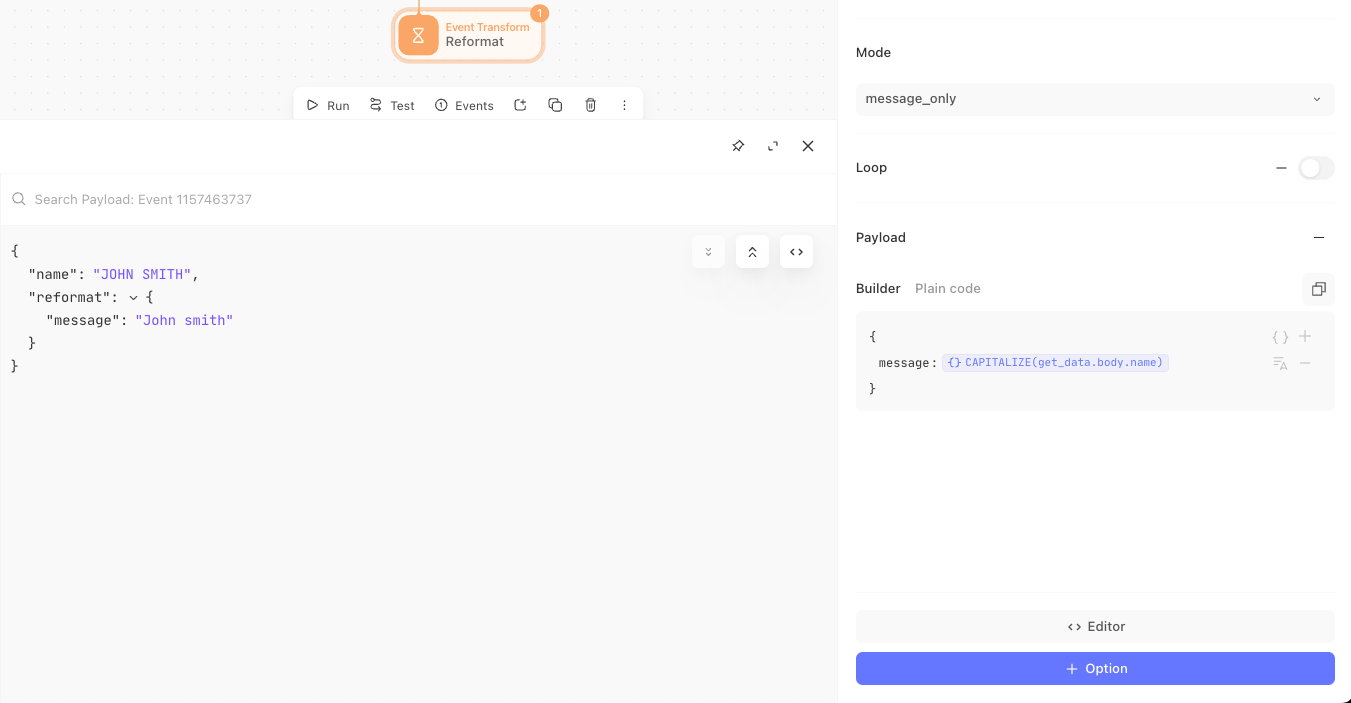
Event transform action - modify your payload
Leverage event transform action to modify your event data.
As you connect to a tool using the HTTP request action, you'll get a response with a bunch of data. We can refine that data down to what we need. Then take that data and perform any kind of modifications.
"body":{
"name":"JOHN SMITH",
"system-roles":
  [
  "Admin",
  "Editor",
  "Viewer"
  ],
"email":"jsmith@example.com"
}
For example, taking something as simple as taking JOHN SMITH and making it into John Smith using the CAPITALIZE() function. This could also be reformatting your data structure like we learned in a previous lesson.
When using your Event Transform action, you can reference different HTTP request actions upstream to pull in the data that you need. This could include getting a user's full name from one API call using their email, then a separate API call to get their current status in the system using their email. These two actions would connect to a final event transform action to build the results with Email / Name / Status.
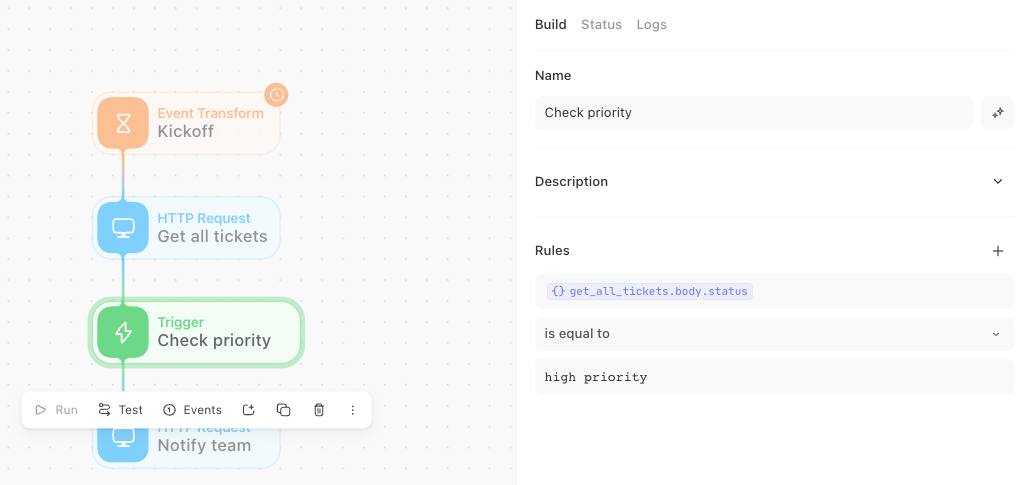
Trigger action - conditional
Continuing the story
Leverage triggers to determine if the story should continue. This could be a story that runs every hour and has a trigger that checks if any cases are marked as a high priority, and if there are, then notify the appropriate team to take action. If there are no new high-priority cases, then don't continue the story.
Triggers give us the power to create circumstantial events.
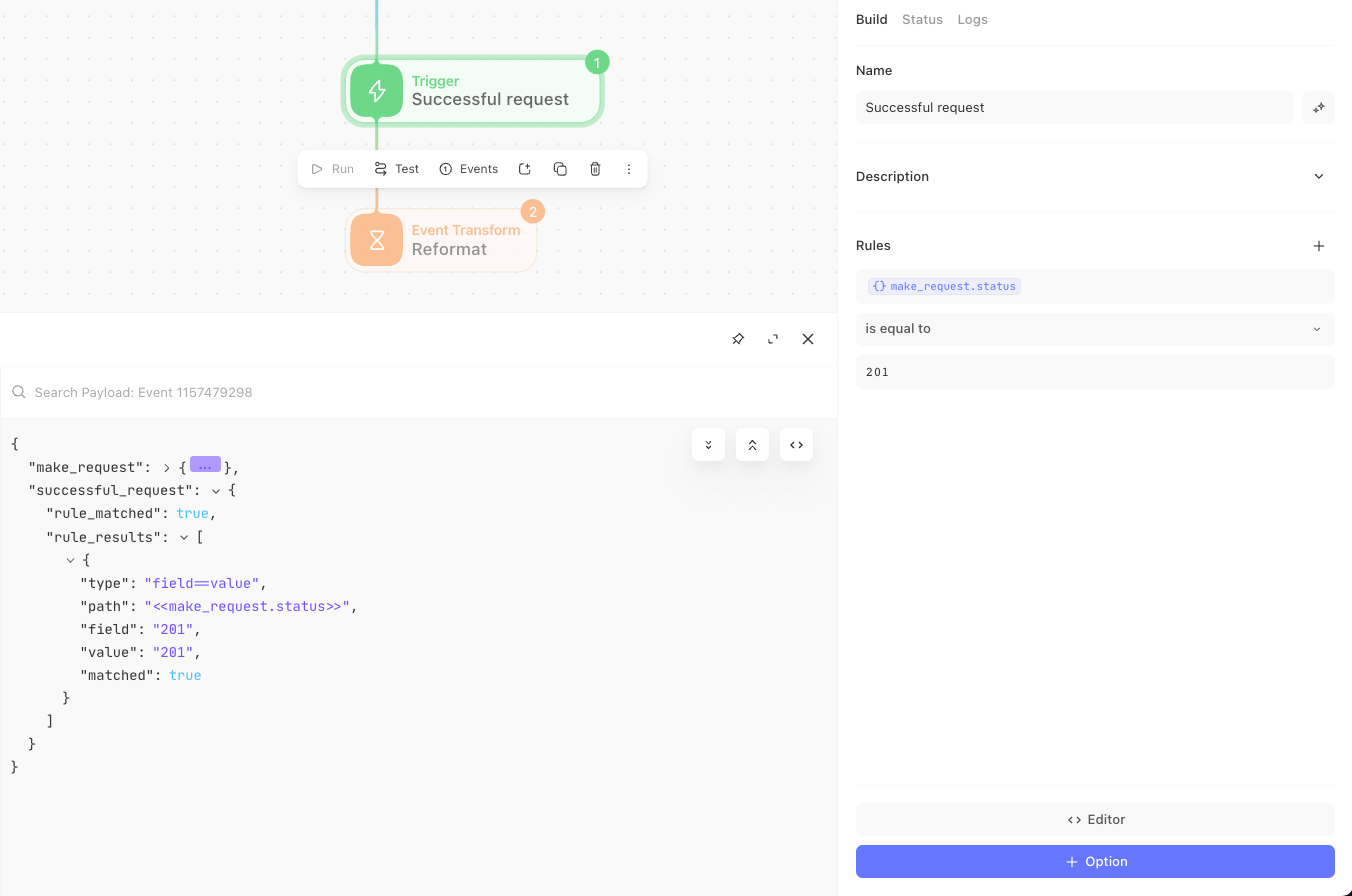
Error handling
There will be scenarios where our stories don't work the way we want them to. For example, if we reach out to a service and it is unavailable.
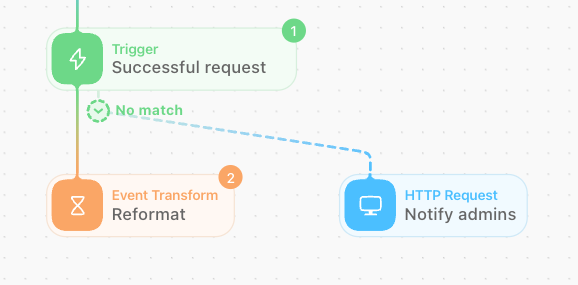
Whenever we use our HTTP request action, the status code can tell us if it was a successful API call. If a critical service isn't available when we need, it may be worth creating a trigger to check the status. If the status is anything other than 200/201, then notify our admins. If the service show status 200/201, then continue the story.
It's worth noting that with Tines you can dynamically retry your API calls using the retry on status option from the HTTP request action, allowing for some buffer room.
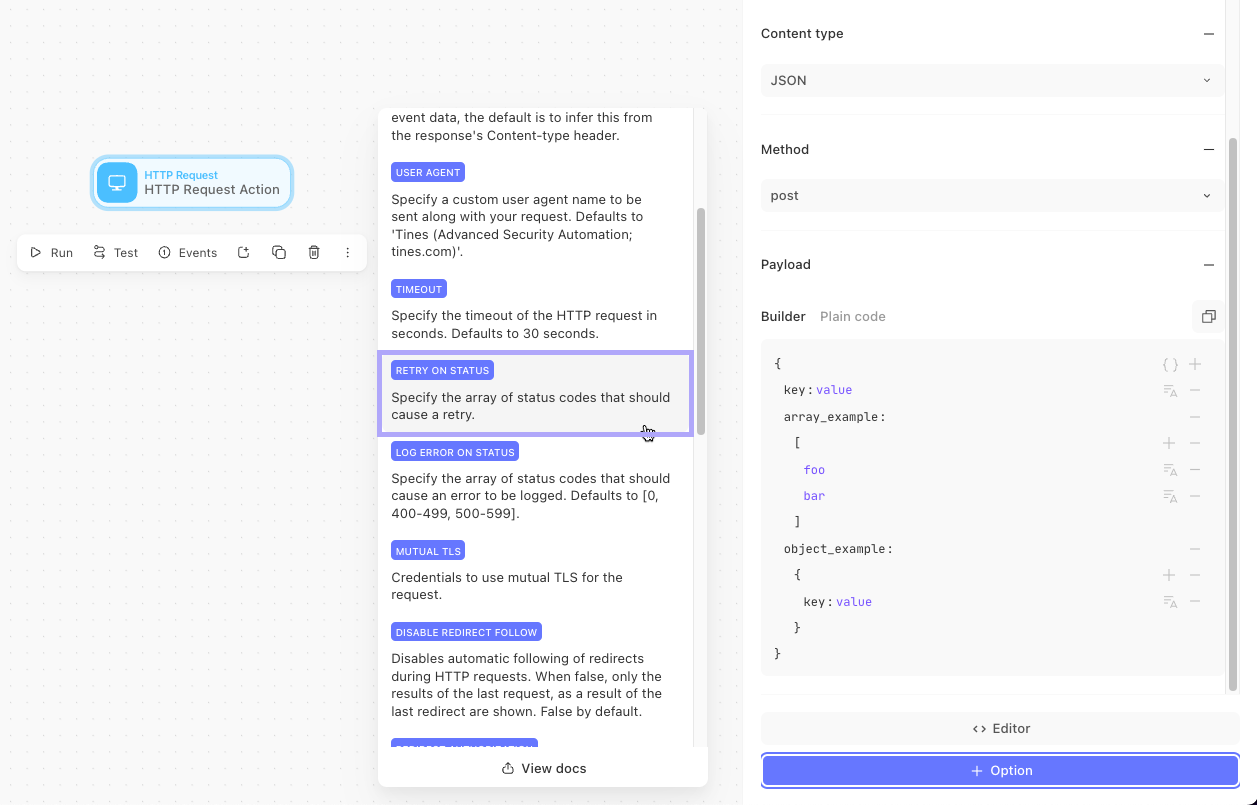
Sometimes requests may be dropped when a tool is getting too many at a given time. This built-in failsafe method to retry after attempts reduce the need for additional manual error handling in a story.
If a service's status is "unavailable" then notify your admins, if "available" then continue the story.
Add error handling
i.e. If the user status is "unavailable" then notify your admins, if "available" then continue the story.
We can drag the "No match" from the bottom of the action for whenever our trigger request does not match the trigger condition
Monitoring
Any given action (or all actions) within a story can be monitored. Users can be notified upon failure or if the action hasn't run in x amount of time.
All we have to do is:
Select the action
Click the status tab on the properties panel to the right
Check off the desired item to monitor
No events emitted within X day/hour/minute
Notify with all events
Notify when action fails

After you've set up your action monitoring, you can modify the email address it sends to by clicking off of the action into the storyboard. You can add more emails by clicking the + to the right of the email. There is also the option to set a webhook URL, giving you the opportunity to have it kick off another story with a webhook action.
