
⚠️Warning
This blog is a continuation of our series on working with chatbots leveraging Microsoft Teams. In Part 1 of this series, we examined how to set up a chatbot within Microsoft Teams. In Part 2, we explored how to send rich notifications using Cards and use the Microsoft Graph API and the chatbot to proactively find and contact users within Microsoft Teams.
Since those blogs were written, the Tines platform has significantly evolved in many areas. One major enhancement was to our credentials vault. Previously, as suggested in Part 1, authenticating with Microsoft required leveraging HTTP Request Actions within a Tines Story to manually perform the client credentials flow and request a bearer token from Microsoft. Thanks to an update, the client credentials flow can now be handled directly within our credentials vault. This blog will walk through how to set up a chatbot within Microsoft Teams, authenticate the chatbot leveraging the client credentials flow natively from within Tines, and provide a security analyst the ability to respond to an alert via Microsoft Teams.
The automation Story that we are going to build looks like this:
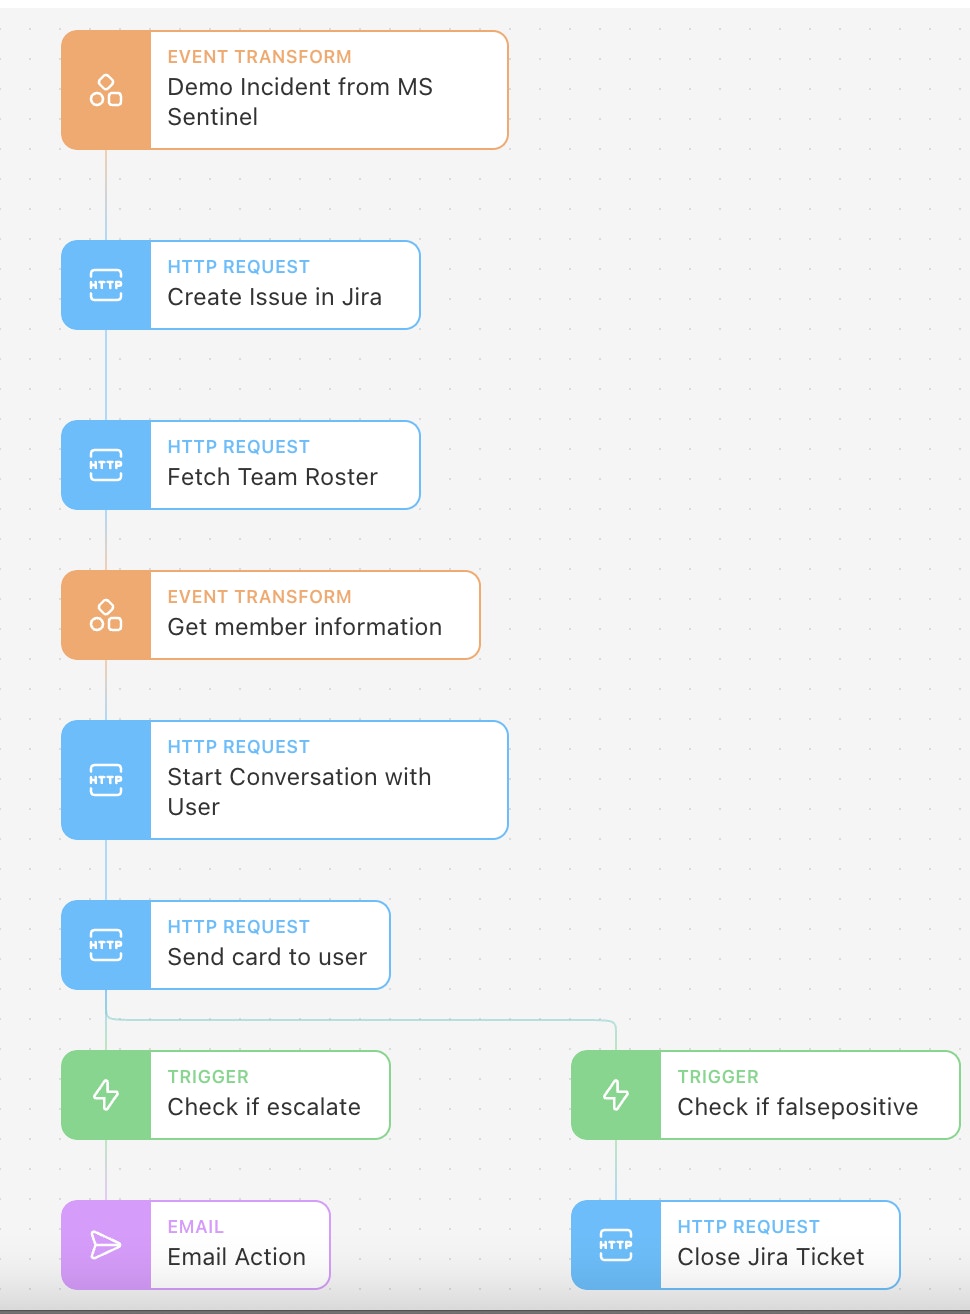
This particular Story, which is available to download and import at the end of this post, leverages an alert from Microsoft Sentinel, but we could use any SIEM or incident source with a publicly accessible API. Tines offers preconfigured Action templates that allow end-users to swiftly connect to many popular tools. After the alert comes into Tines, this Story will create a JIRA ticket. Again, Tines can connect to any case management tool with a publicly accessible API - preconfigured templates are readily available for leading vendors. Once the incident ticket is open, we will alert the proper security analyst on Microsoft Teams and prompt them to take action directly with their chatbot!
Creating a chatbot in Microsoft Teams
To begin, we will create our chatbot.
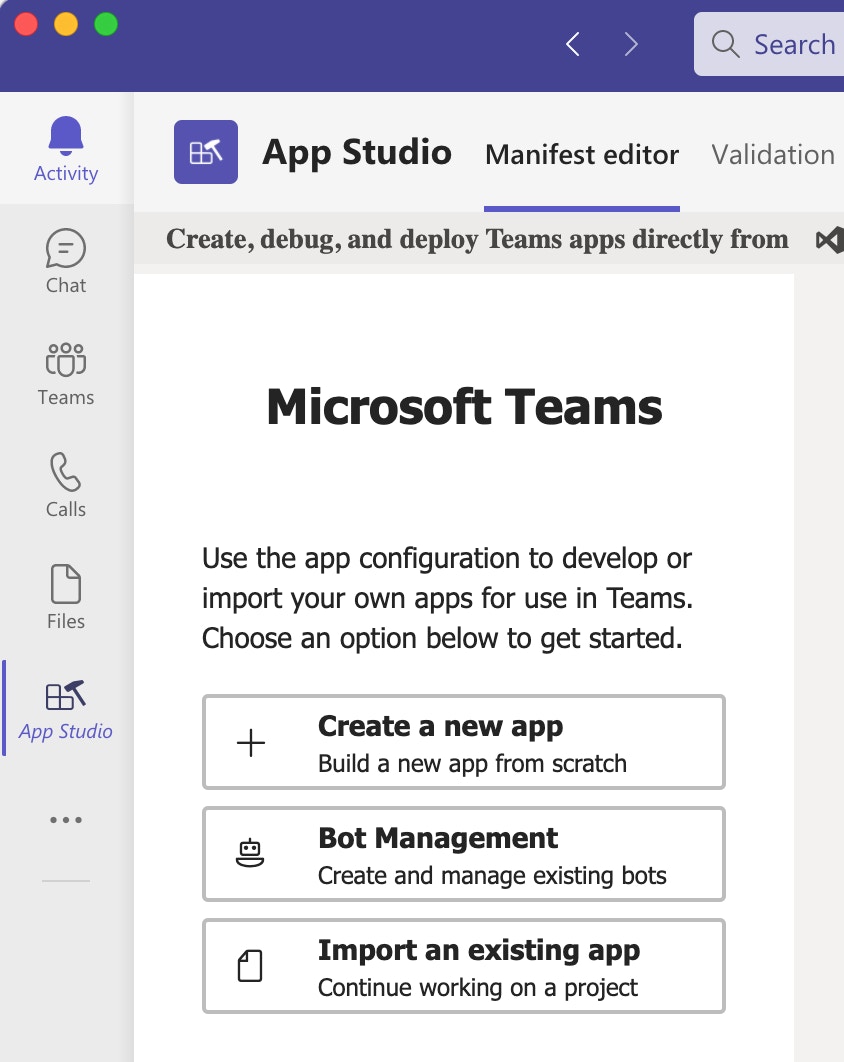
The first step is to install App Studio. Microsoft has detailed instructions on this process here.
Once App Studio is installed, we will create a new bot within Microsoft Teams. Use the sidebar of Microsoft Teams to navigate to App Studio —> Manifest editor —> click "Bot management."
3. Give the bot a name and click "Create."
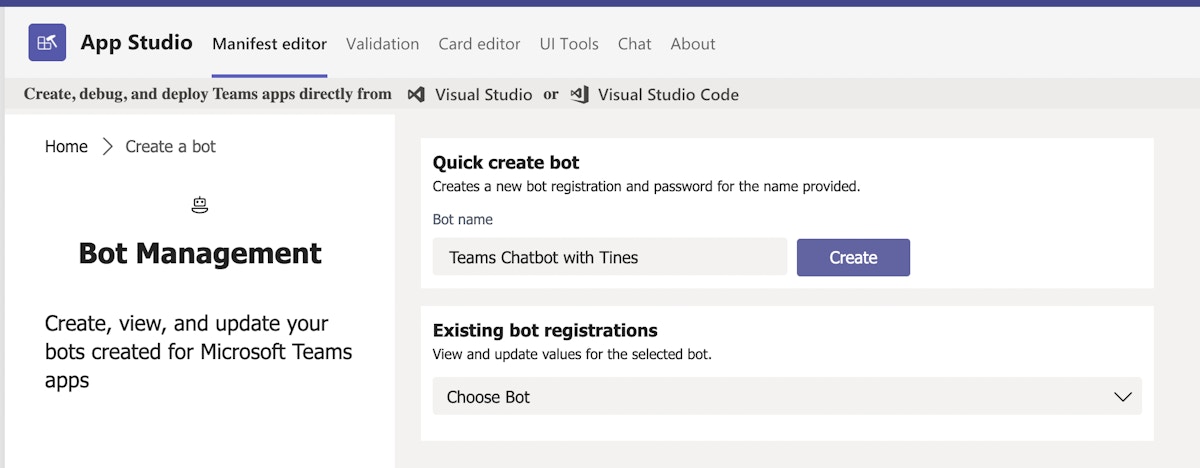
4. After creating the bot, we should see a success message with the bot's Name, Bot Id, and Password. Note these values down somewhere safe for future reference.
We have successfully created a chatbot within Microsoft Teams.
Create a new Microsoft application
The chatbot needs a Microsoft application associated with it. This is ultimately what we will authenticate against.
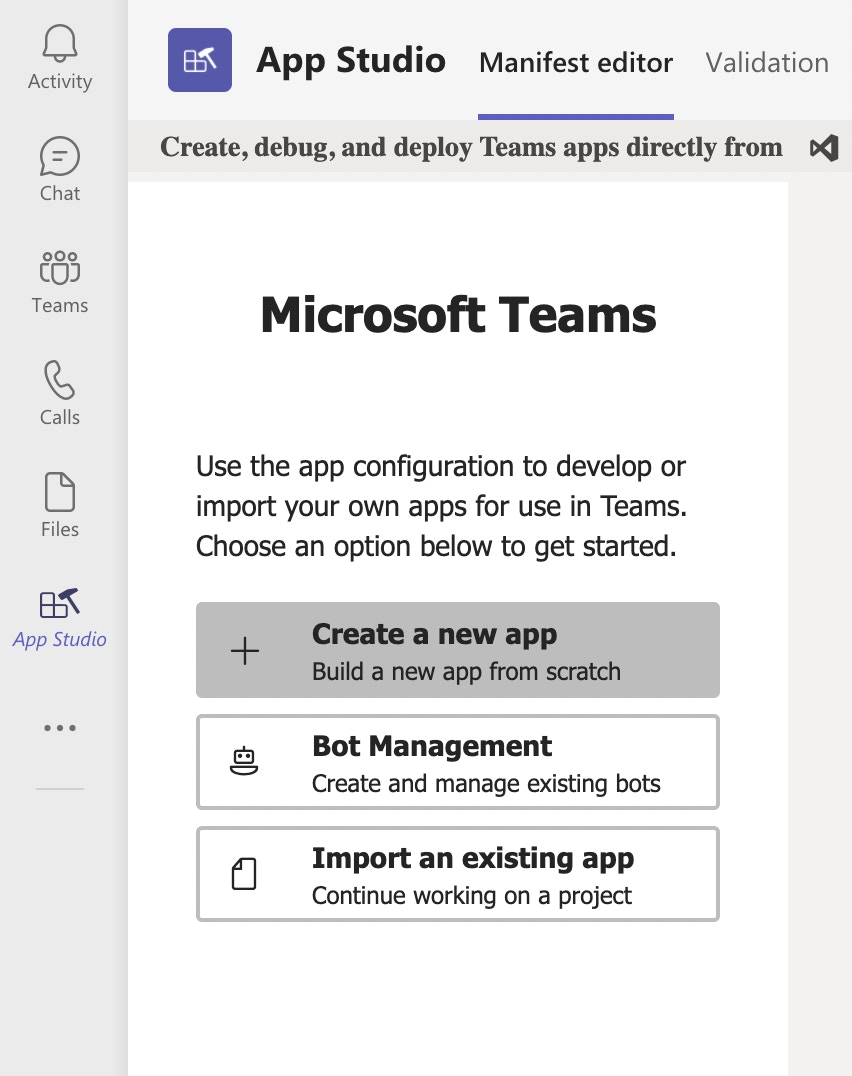
Within Microsoft Teams, navigate back to the App Studio home and, this time, create a new application.
2. Enter a short name, full name, generate an App ID and fill in the Package Name (com.tines.io.app) and Version Number (1.0.0). Note down the App ID somewhere safe for easy future reference.
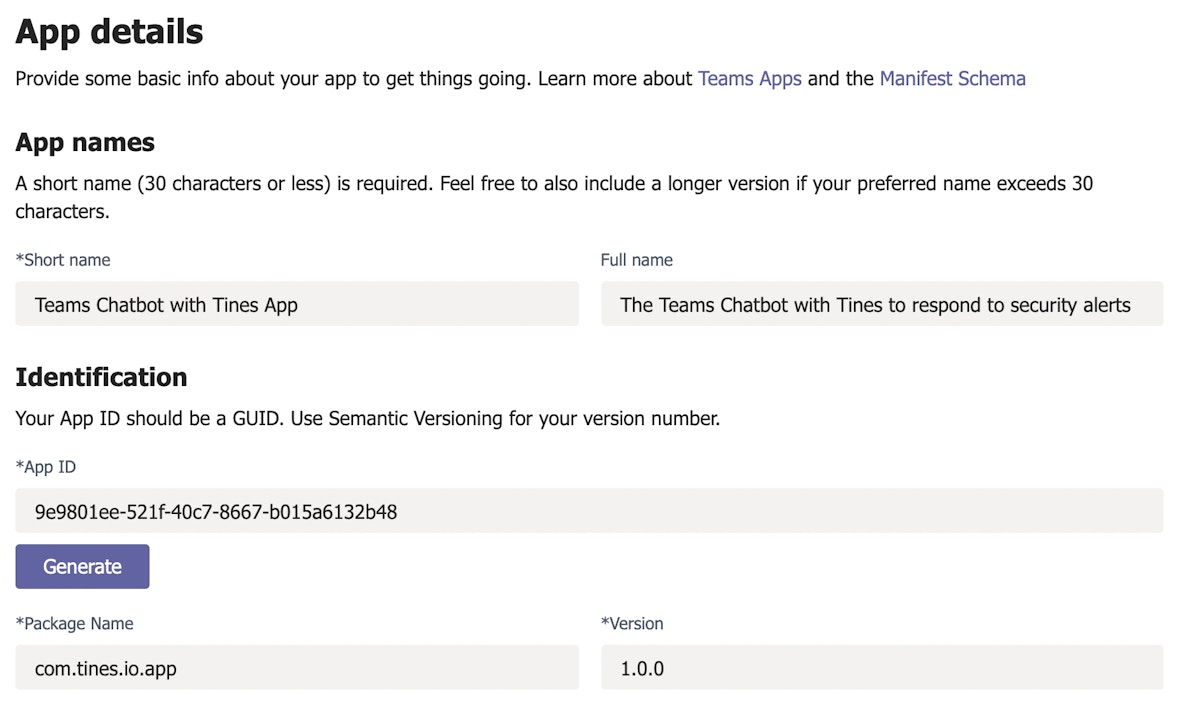
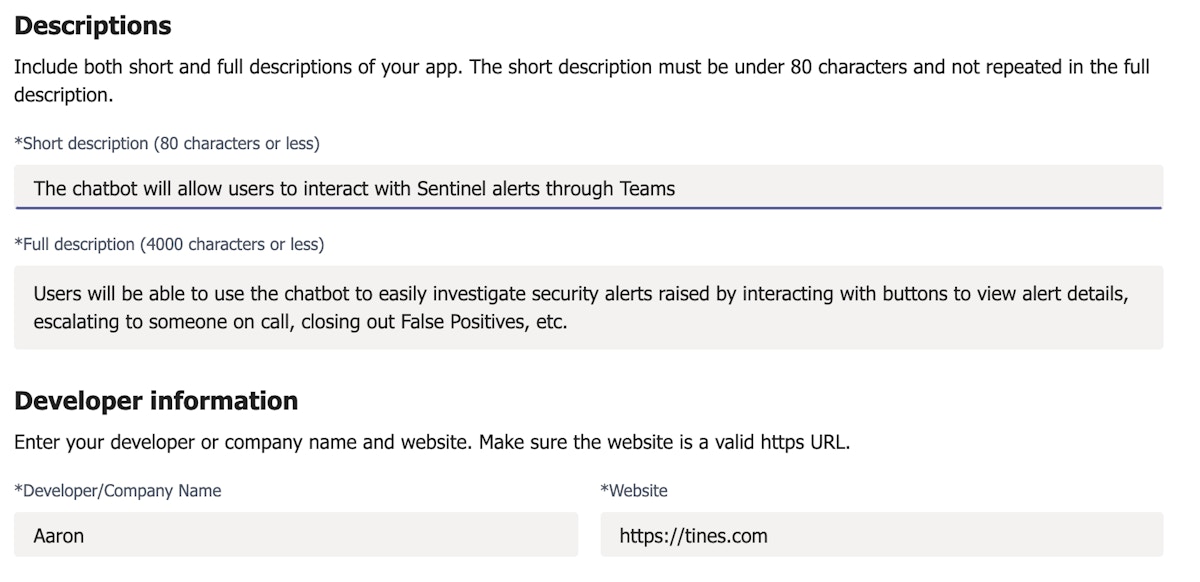
3. Enter a description and developer information for your app.
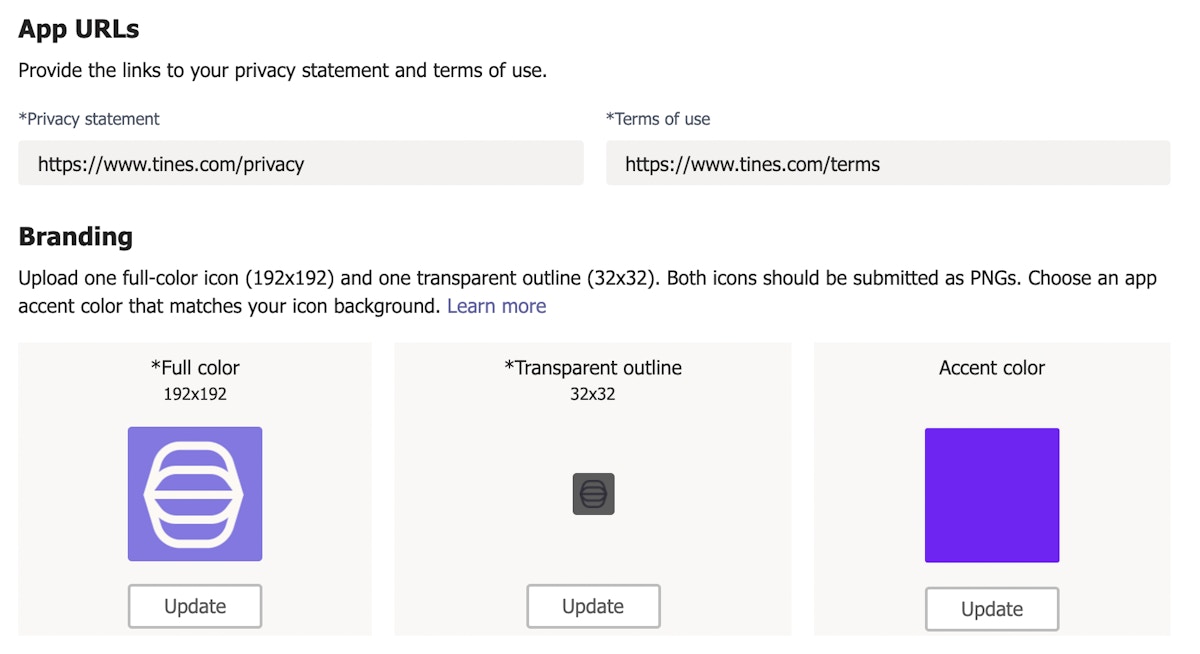
4. Enter the privacy statement, terms of use, and required branding information for your app.
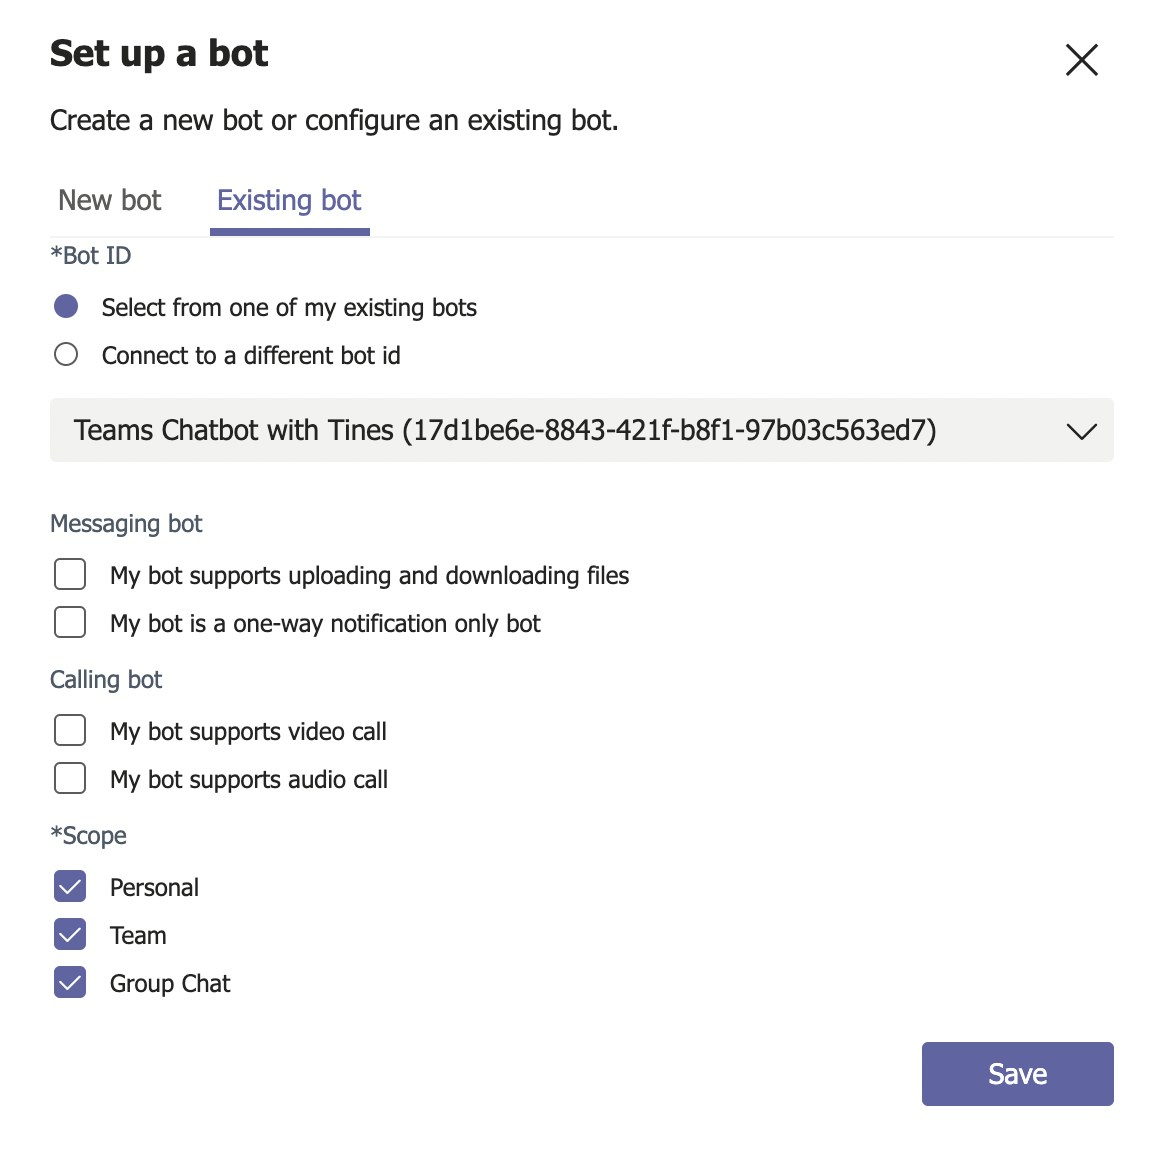
5. Click the bots tab in the left-hand menu and click "Set up."
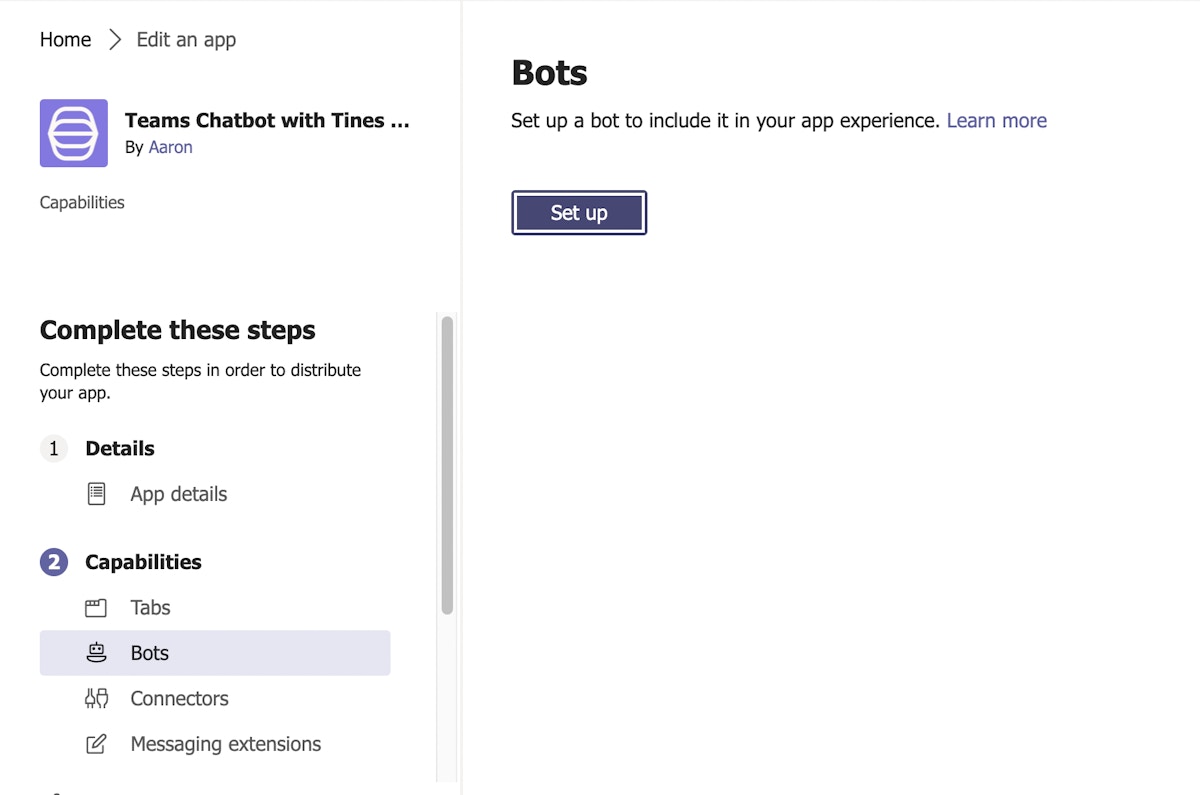
6. Choose "Existing bot" along the top and "Select from one of my existing bots." For Scope, enable all three available scopes (Personal, Team, Group Chat) and click "Save." This step links the bot we created with the new app.
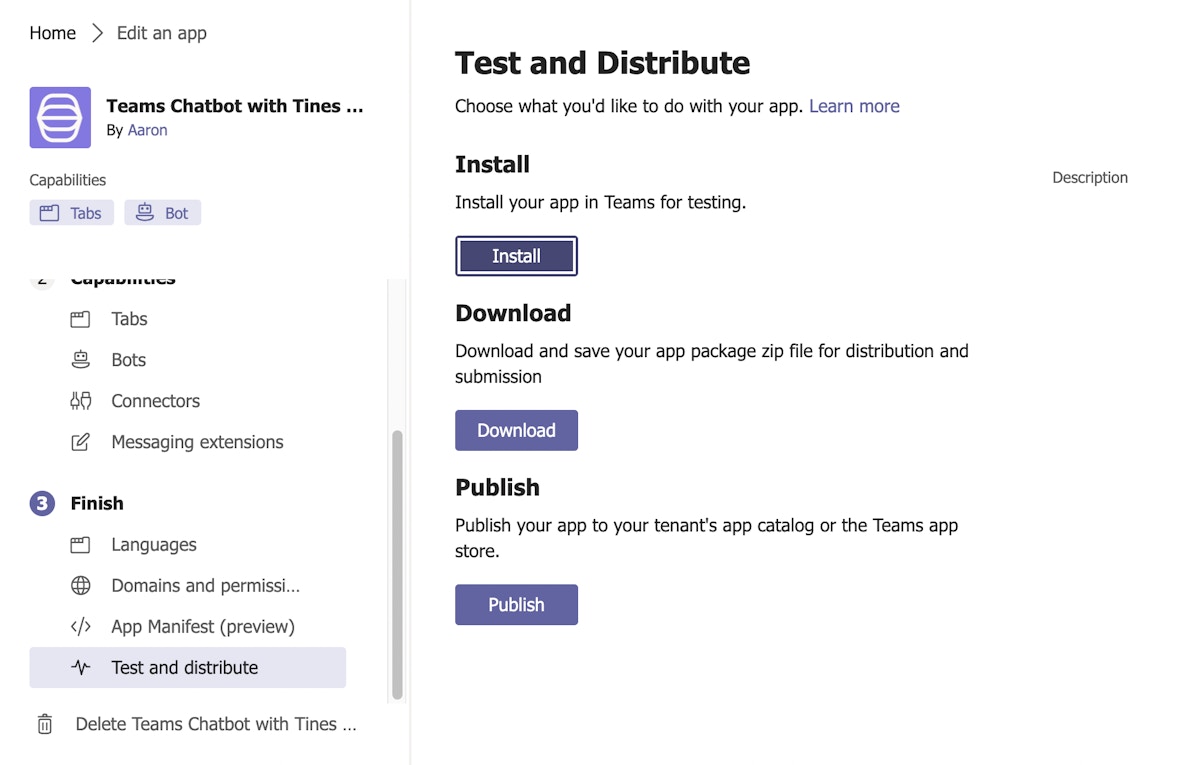
7. Navigate to Finish —> Test and distribute —> and click "Install."
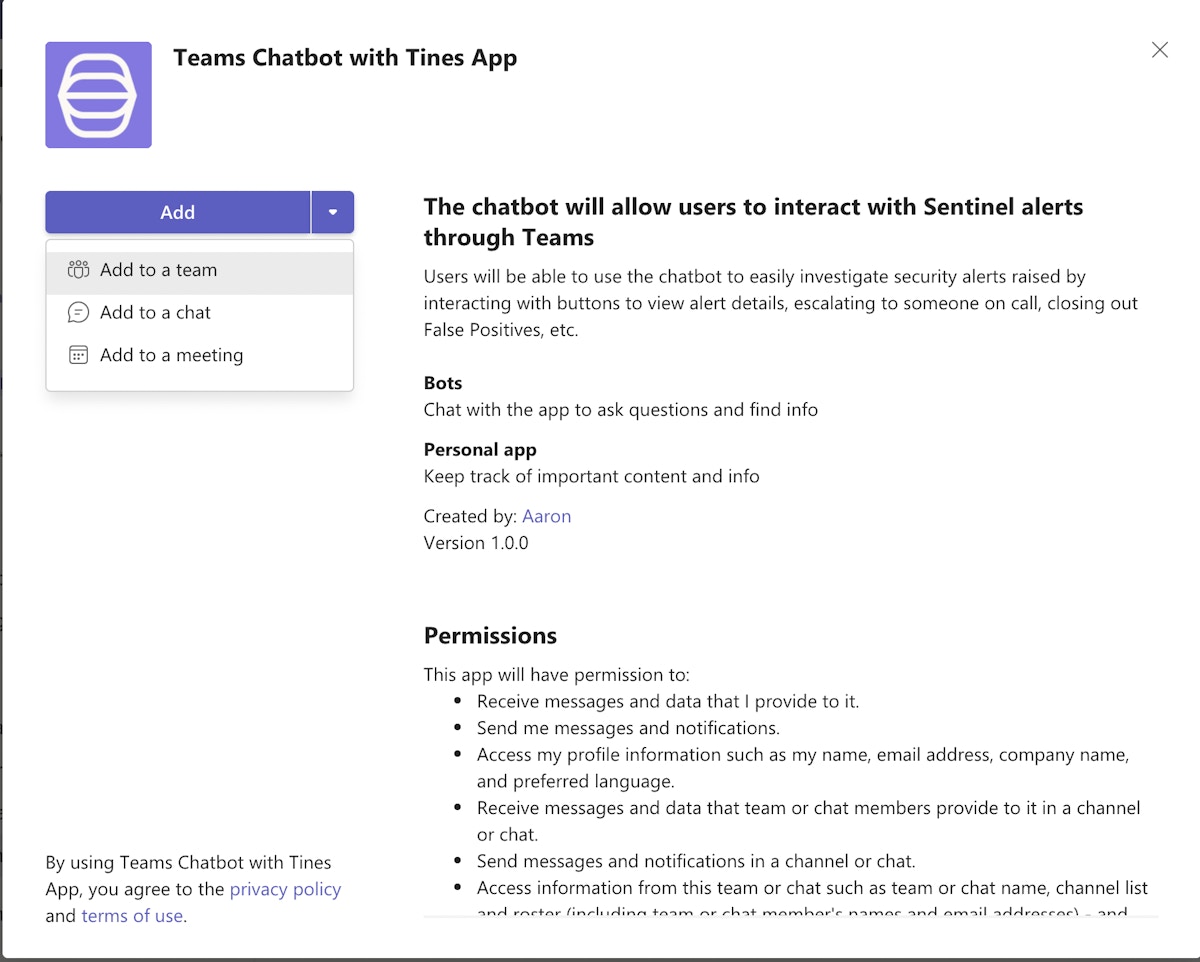
8. Click the drop-down next to "Add" and select "Add to a team."
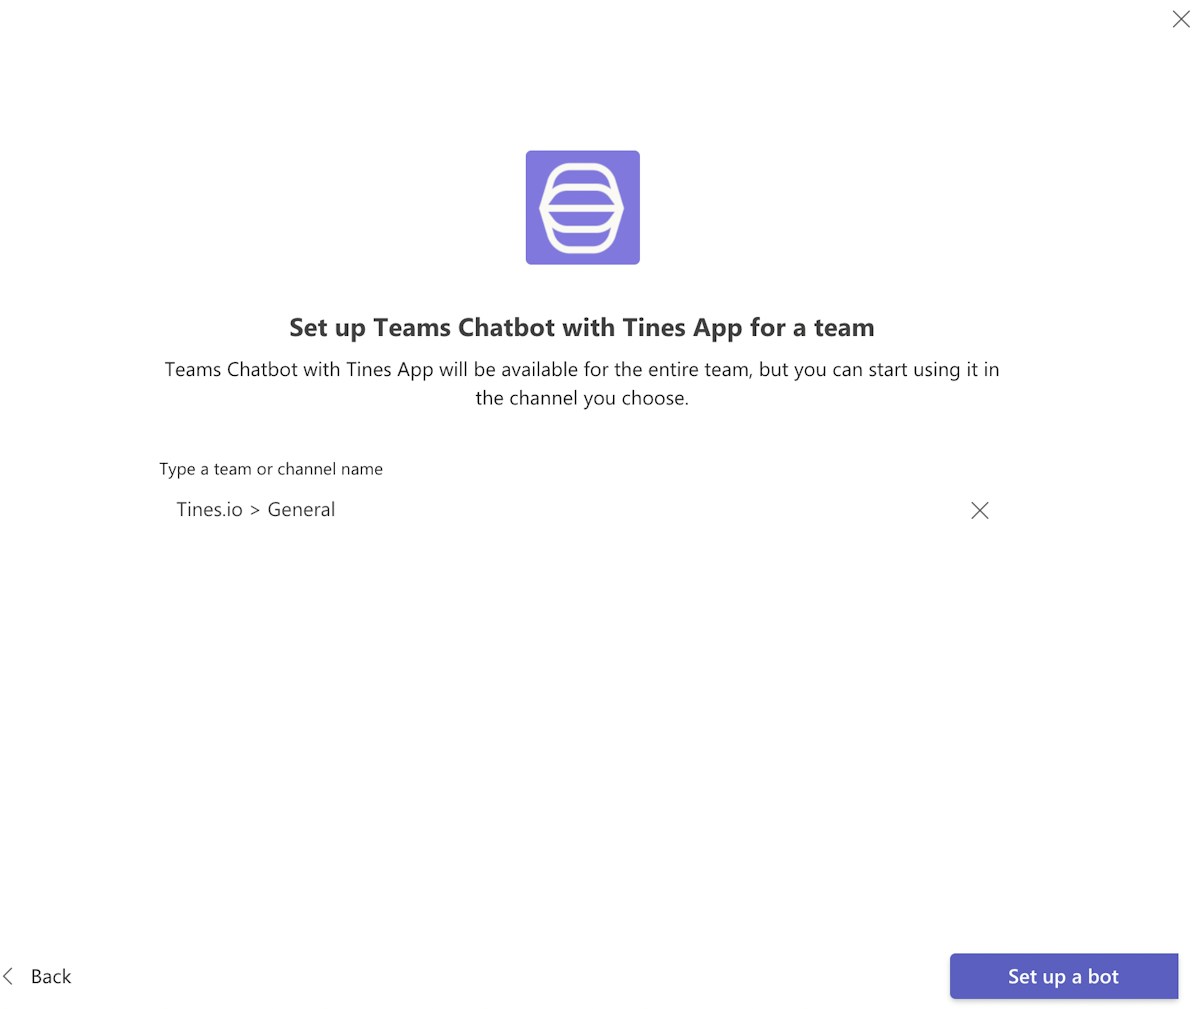
9. Choose the team and click "Set up a bot."
Setting up credentials in Tines
This section covers new Tines technology that was not yet available when Part 1 of this series was written. Here we will be using the client credentials flow built into the Tines tenant to fetch a bearer token from Microsoft rather than chaining HTTP Request Actions together as stated in the original blog. For this section, you will need to start by logging into your Tines tenant. If you're new to Tines, you can sign up for the free, fully-loaded Community Edition here.
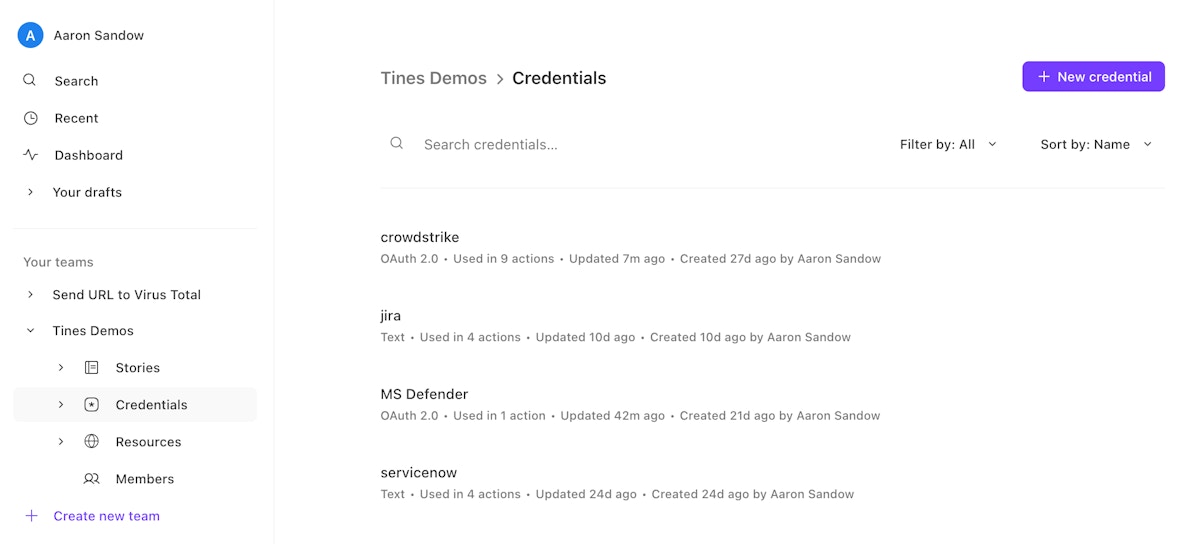
Log in to your Tines tenant and either navigate to an existing team or create a new team. Once in the appropriate team, navigate to credentials and click "New credential" on the top right.
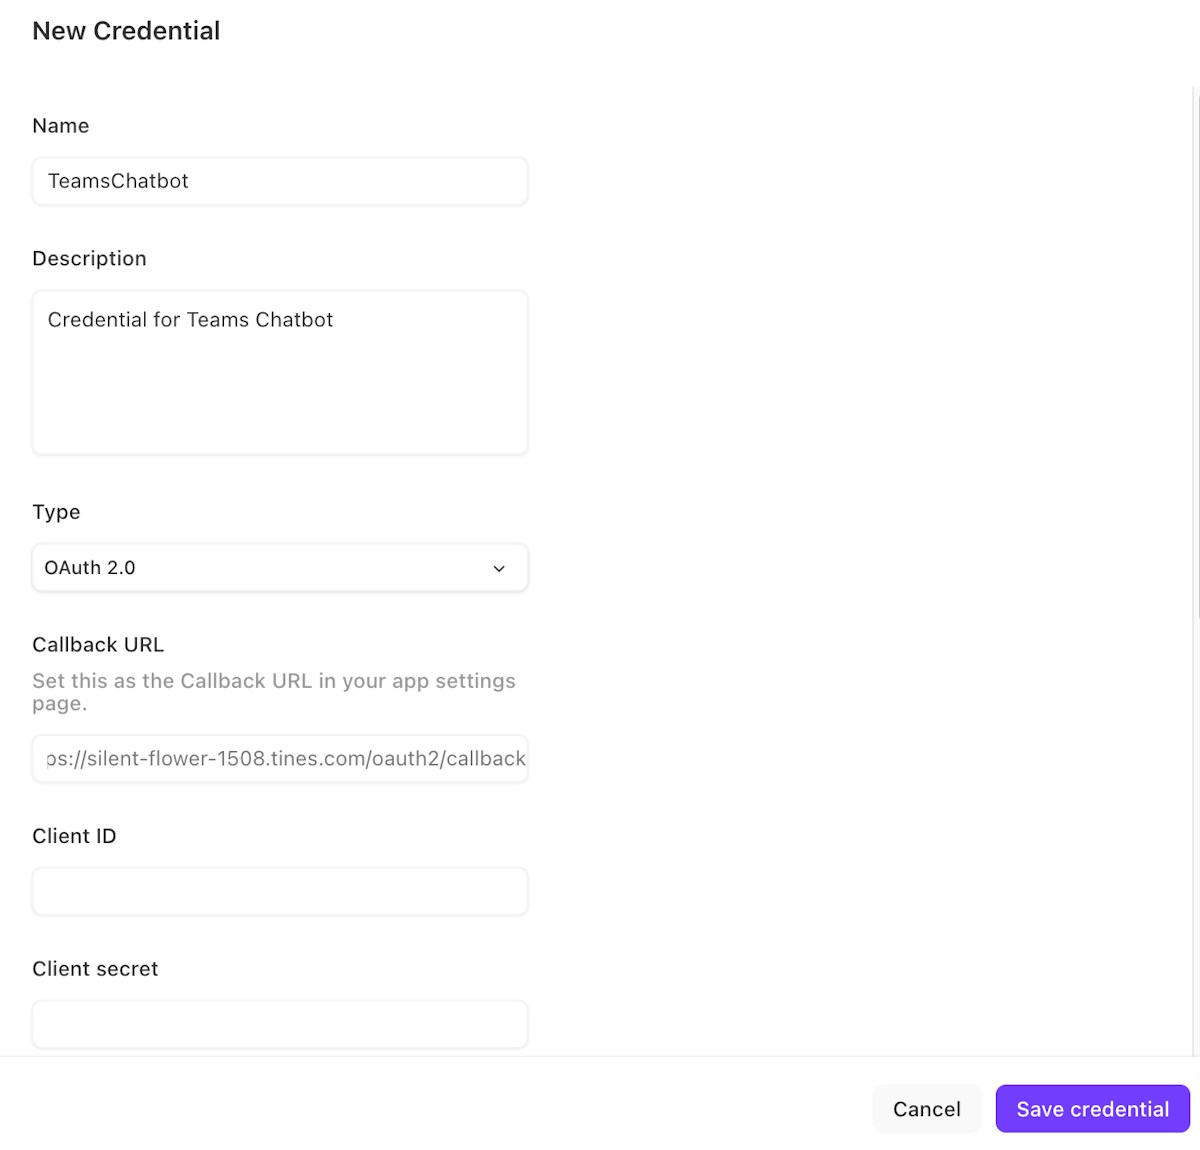
2. Enter the following information:
a) Name: Any name that describes the credential (e.g., TeamsChatbot is used in the Story attached and can be leveraged for consistency)
b) Description: Description for the credential
c) Type: OAuth 2.0
d) Callback URL: Copy this locally for easy reference https://{Tines_Tenant}.tines.com/oauth2/callback
e) Leave this tab open
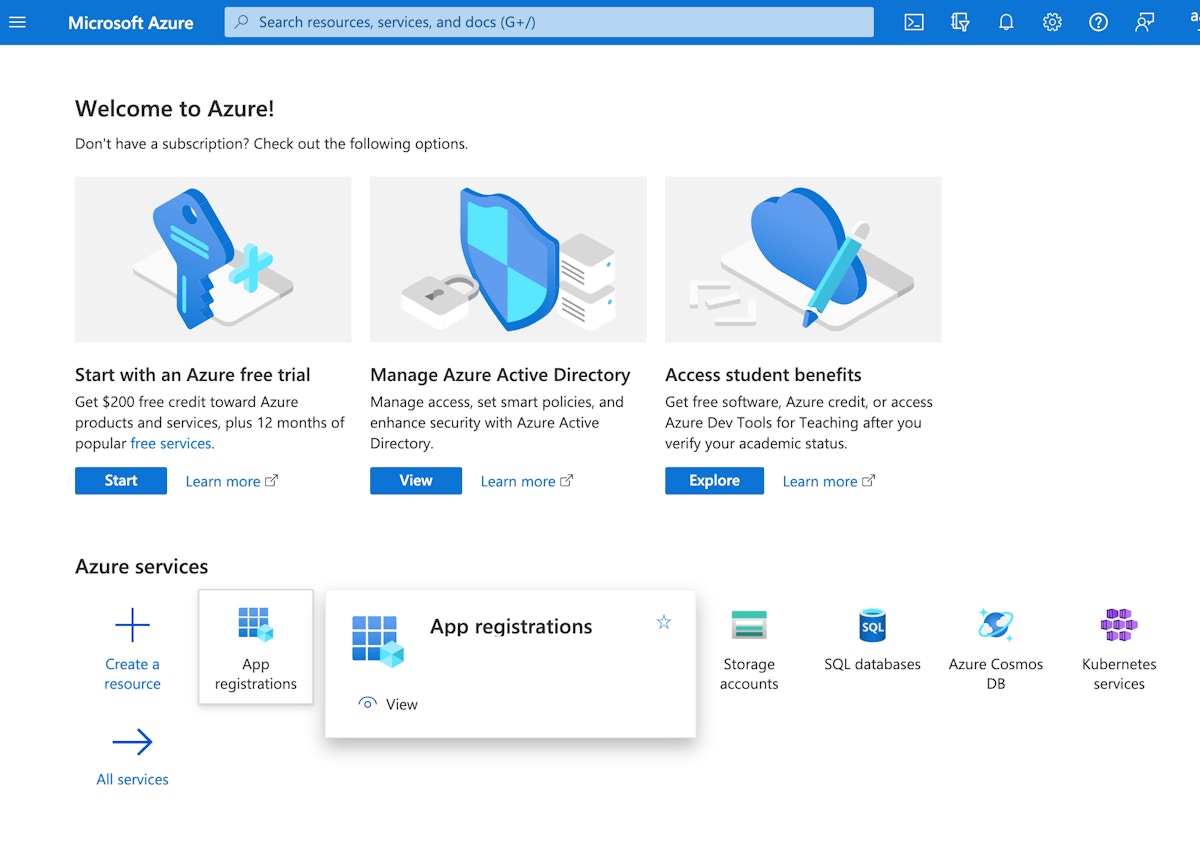
3. In a new browser tab, navigate to your Azure Portal, then click on "App registrations."
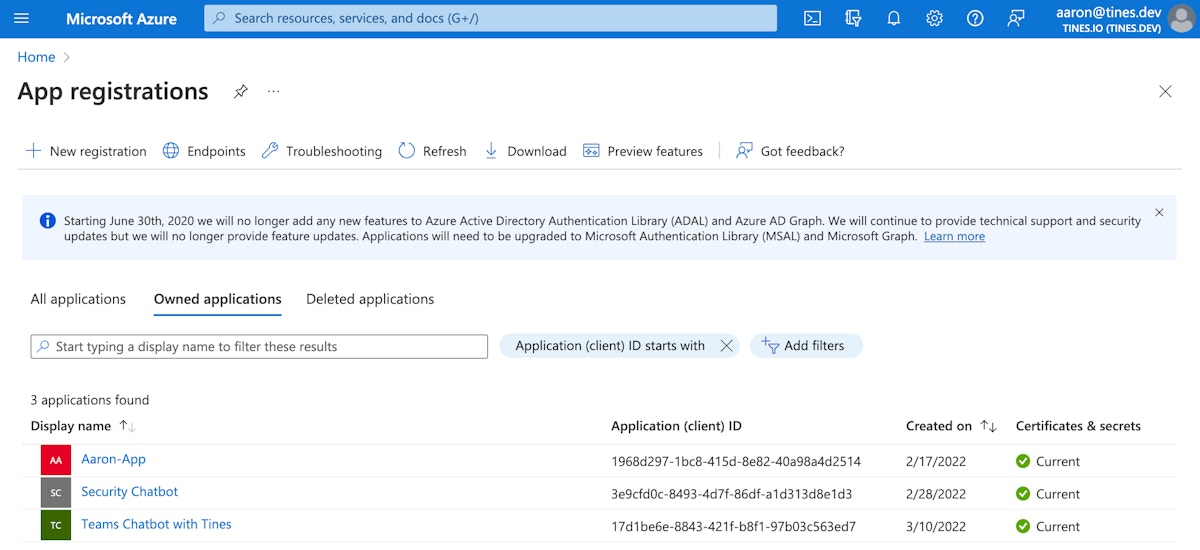
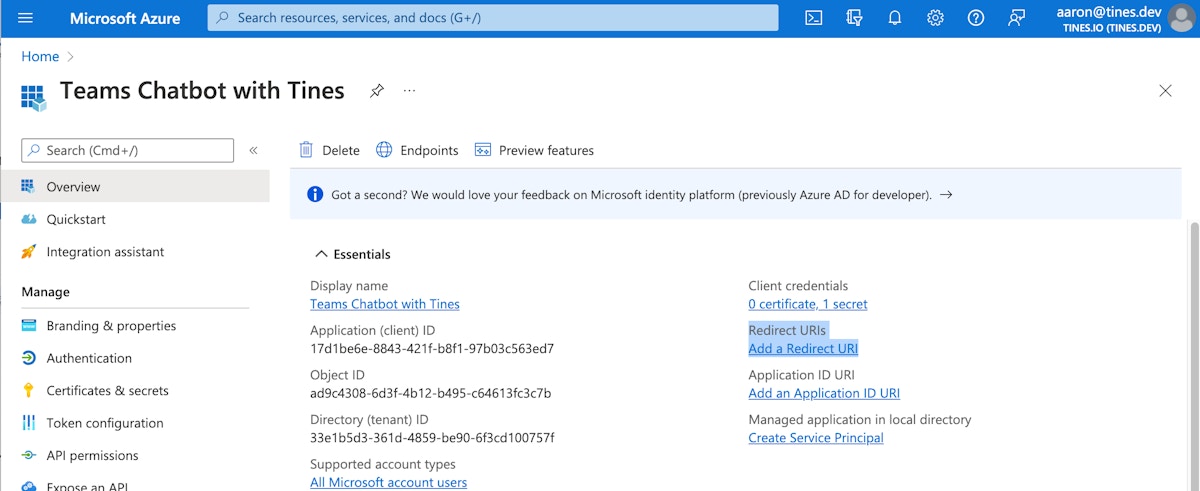
4. Click on the chatbot that was just created. Reference the Application (client) ID to ensure you navigate the correct application. The Application (client) ID was acquired in step 2 of the 'Create a new Microsoft Application' section above.
5. Click "Add a Redirect URI."
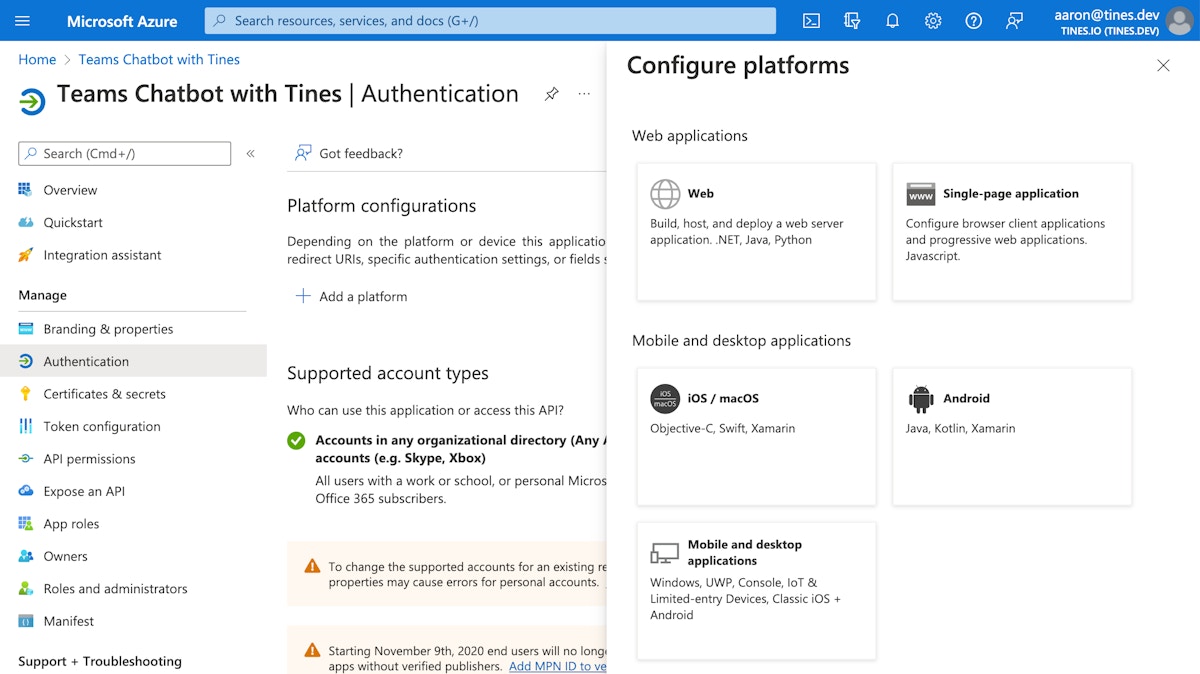
6. Click "Add a platform" —> Web.
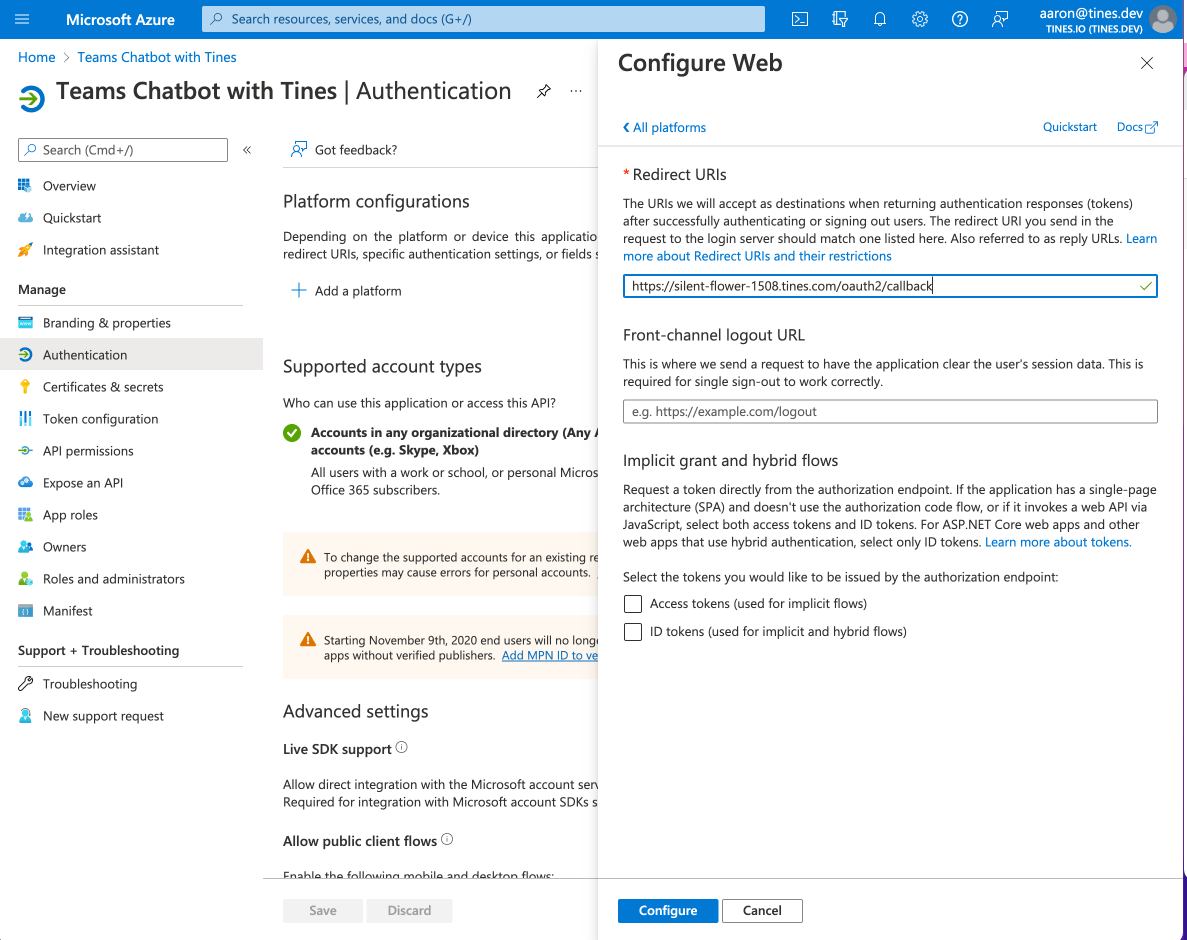
7. Paste in the Redirect URI (callback URL acquired in step 2.d. of this section) and then click "Configure" at the bottom.
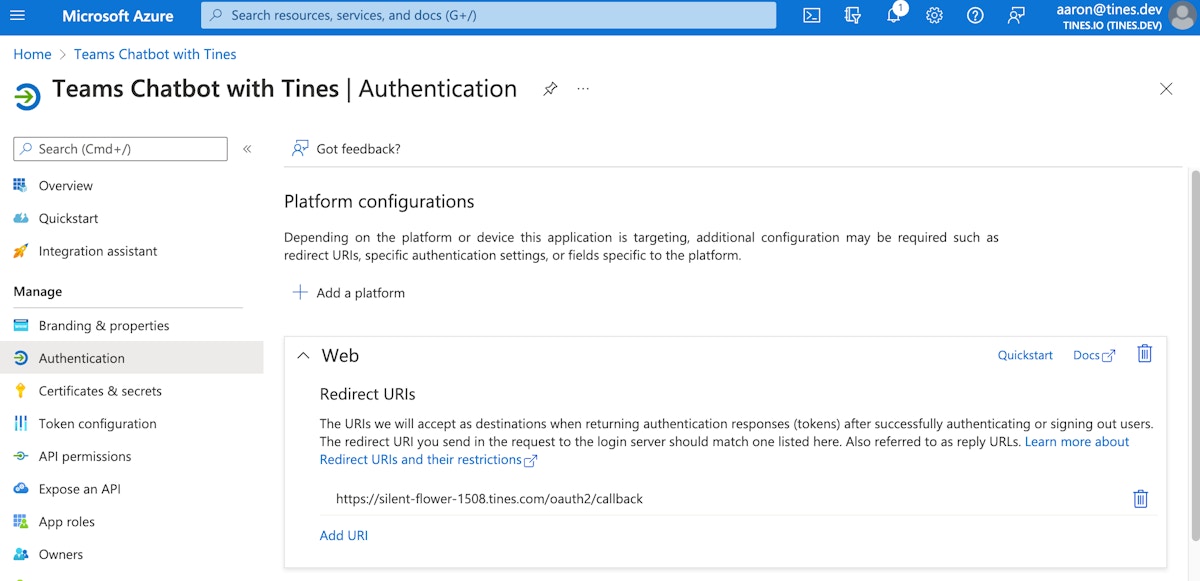
8. You should see the Redirect URI populate in the middle of the screen under the "Add a platform" button.
9. Navigate back to your Tines tenant, and let's continue where we left off on step 2 of this section.
a) Name: Any name that describes the credential (TeamsChatbot is used in the Story attached and can be leveraged for consistency)
b) Description: Description for the credential
c) Type: OAuth 2.0
d) Callback URL: Copy this somewhere for easy reference https://{Tines_Tenant}.tines.com/oauth2/callback
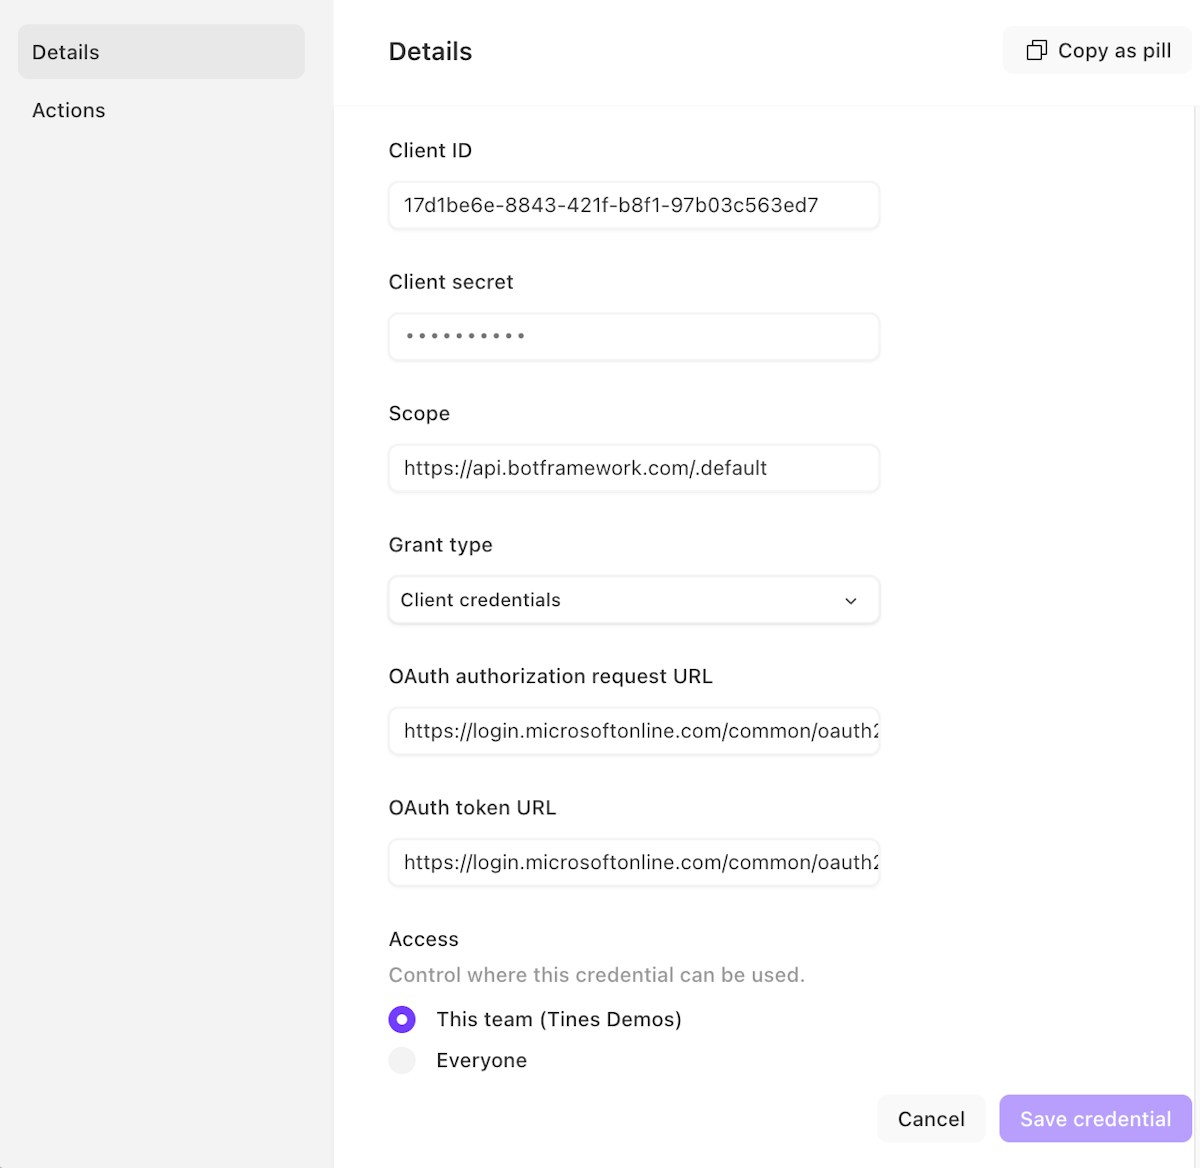
e) Client Id: This is the Bot ID from step 4 of 'Creating the chatbot in Microsoft Teams.'
f) Client Secret: This is the password from step 4 of 'Creating the chatbot in Microsoft Teams.'
g) Scope: https://api.botframework.com/.default
h) Grant type: Client credentials
i) OAuth authorization request URL: https://login.microsoftonline.com/common/oauth2/v2.0/authorize
j) OAuth token URL: https://login.microsoftonline.com/common/oauth2/v2.0/token
k) Access: Decide if you would like to make this credential available to everyone or only members of the specific Team within Tines.
l) Click "Save credential." If the proper values are entered, the credential will save.
Setting up resources in Tines
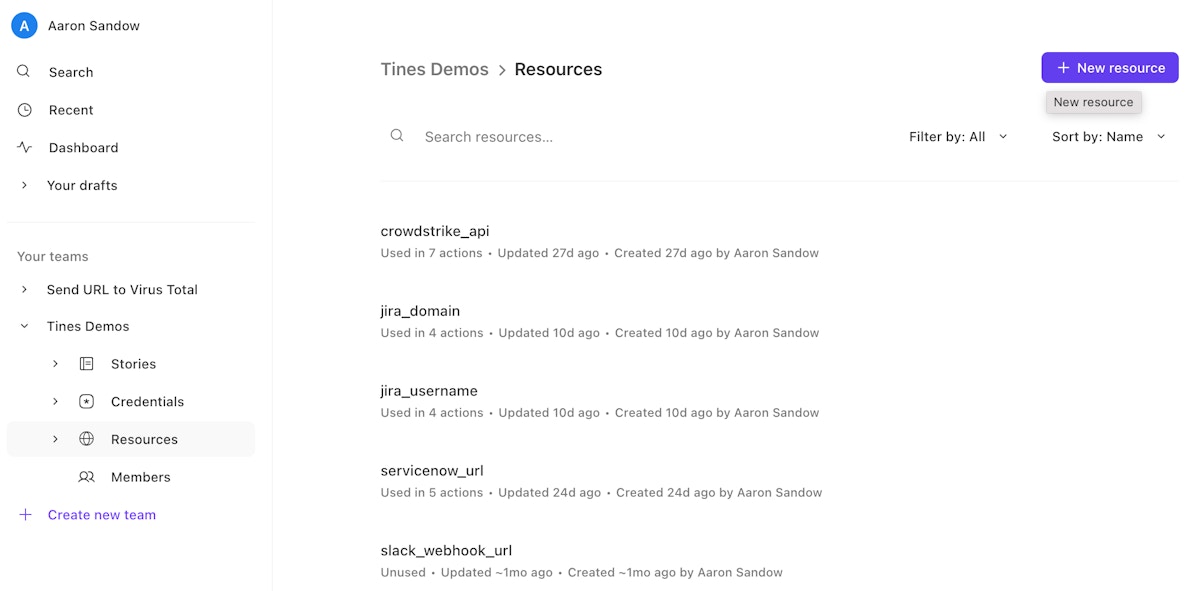
Create a resource by clicking on "Resources" in the left menu then the “New Resource” button on the top right.
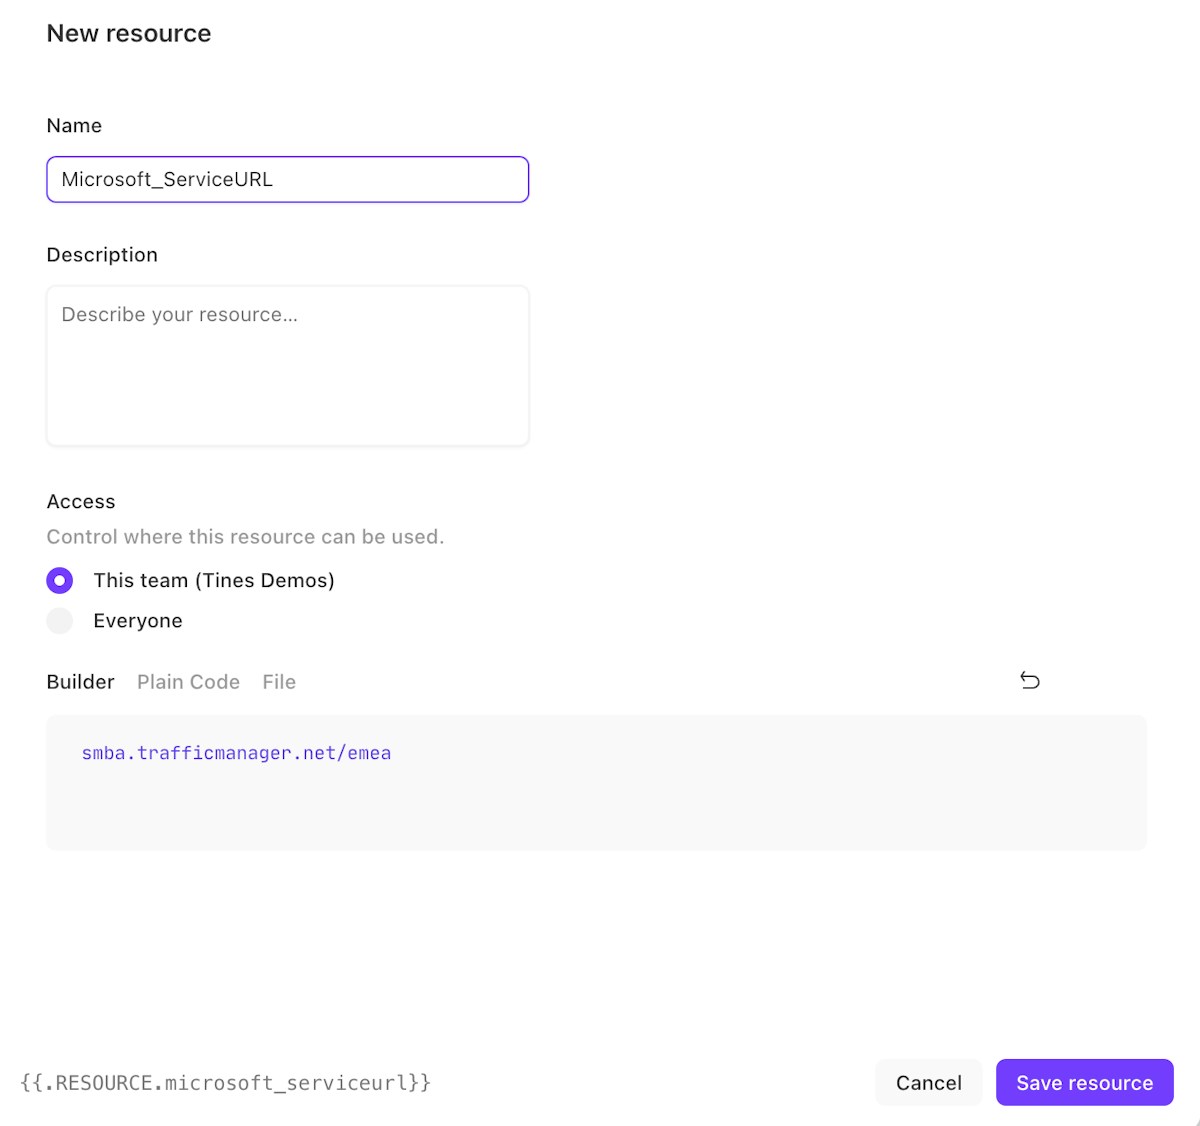
2. Enter in a Name (e.g., Microsoft_ServiceURL is used in the Story attached and can be leveraged for consistency), Description, decide Access for where this resource can be used, and enter the URL into the builder (your specific URL may end with something else like "amer"). Click "Save resource."
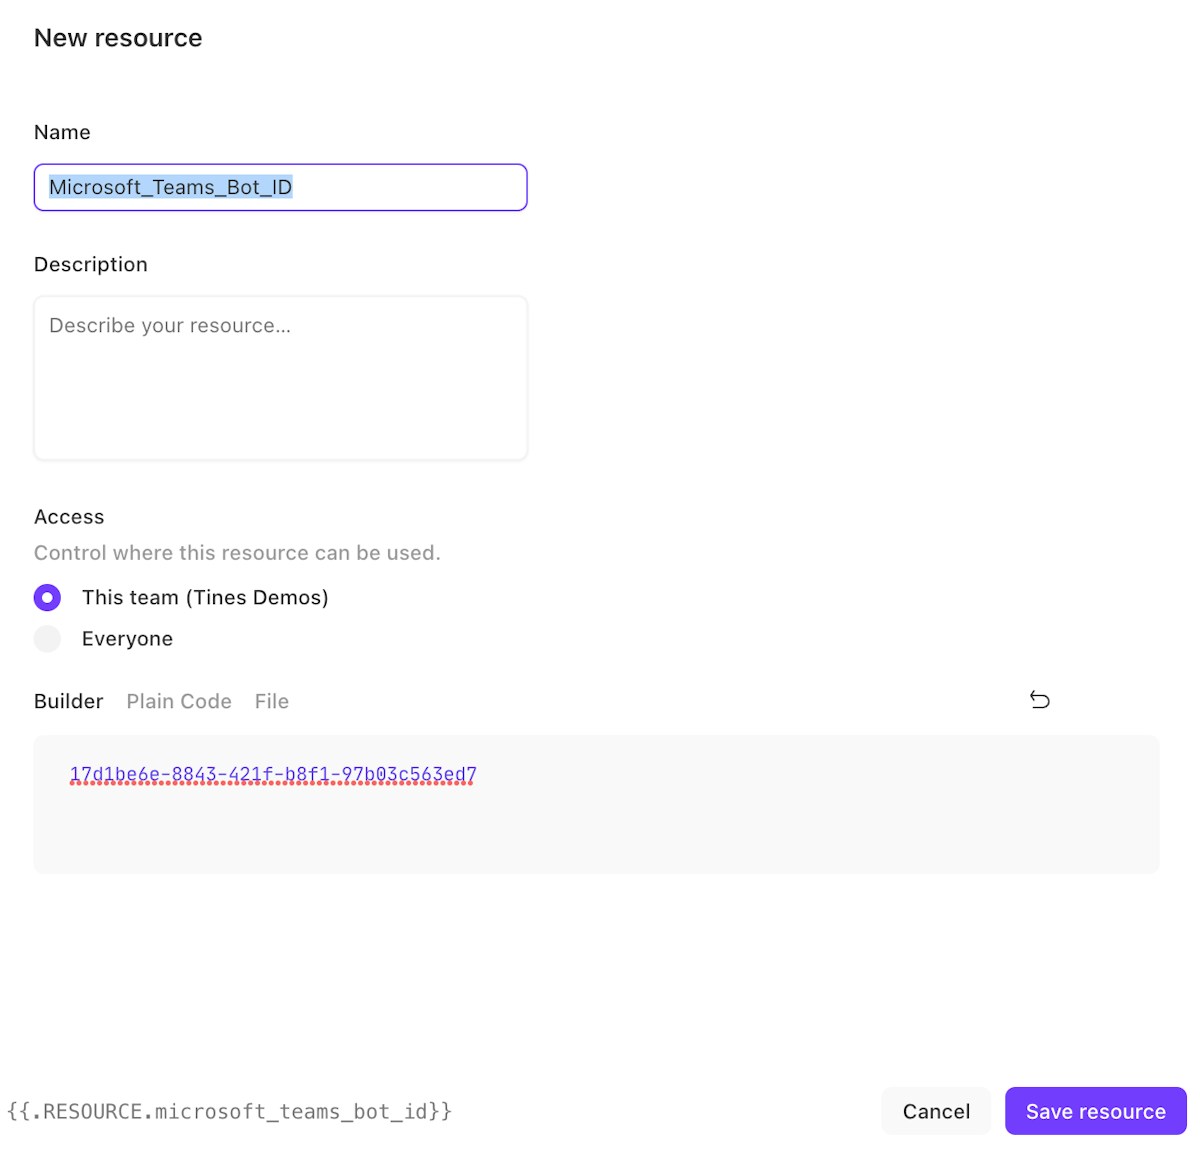
3. Create another resource identical to the step above (Name Microsoft_Teams_Bot_ID is used in the Story attached). The value should match the Bot ID from step 4 of the section 'Creating the Bot in Microsoft Teams.' Click "Save resource."
Sending a Teams card to the correct user
To learn how to send a card proactively to a specific user, see Part 2 of this series and refer to the section regarding 'Finding a User ID Proactively.' This section describes a few ways to identify the correct User ID. The example Story attached takes the approach of fetching the team roster.
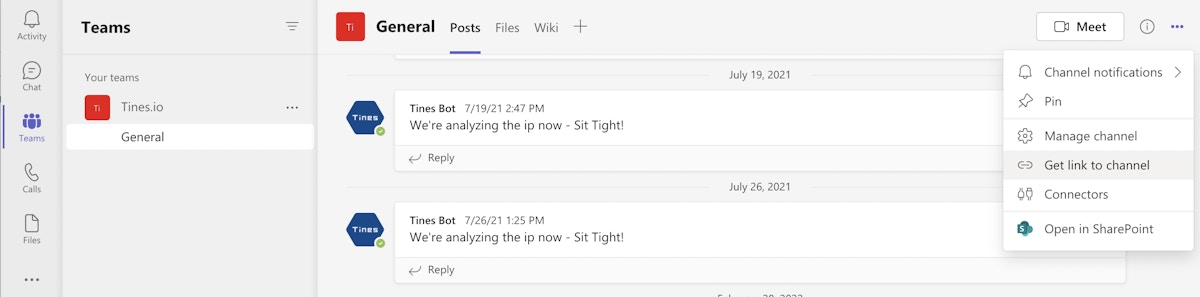
To do this, we created another resource (same steps taken in the "Setting up Resources in Tines" section above) in Tines named, "teams_tines_team_id." As stated in our previous blog, the Microsoft Team's teamId or internalId can be found within the Microsoft Teams UI. It is the parameter with the format guid@thread.MStool in the URL below: https://teams.microsoft.com/l/team/{{internalID}}/conversations/… The Team ID is also sent in all communications to the bot from the Team Chat within the Teams UI. This URL can be found by navigating to a team within Microsoft Teams and clicking on the three dots in the top right —> "Get link to channel."
2. To fetch the team roster, simply copy the JSON below and paste it into your Story in Tines. Assuming you named your resources and credentials the same as in the blog, this Action, and future Actions should work out of the box.
{
  "agents":
    [
      {
        "disabled": false,
        "name": "Fetch Team Roster",
        "options": '{"url":"https://{{RESOURCE.microsoft_serviceurl}}/v3/conversations/{{RESOURCE.teams_tines_team_id}}/members","content_type":"json","method":"get","headers":{"Authorization":"Bearer {{CREDENTIAL.teamschatbot}}"}}',
        "position": { "x": 345, "y": 180 },
        "type": "httpRequest",
      },
    ],
  "links": [],
  "diagramNotes": [],
}
3. Use an Event Transform Action to map the ID and tenantID for the member that you want to send the message to. We will use the results from the Fetch Team Roster Action to associate the correct information. Change the 'where' clause to match the name of the person you’d like to fetch the ID for. The name must match a name on the Team Roster returned from the Action above (Fetch Team Roster).
{
  "agents": [
    {
      "disabled": false,
      "name": "Get member information",
      "options": "{\"mode\":\"message_only\",\"loop\":false,\"payload\":{\"id\":\"{{fetch_team_roster.body | where: \\\"name\\\", \\\"Aaron Sandow\\\" | get: \\\"id\\\"}}\",\"tenantID\":\"{{fetch_team_roster.body | where: \\\"name\\\", \\\"Aaron Sandow\\\" | get: \\\"tenantId\\\"}}\"}}",
      "position": {
        "x":345,
        "y":255
      },
      "type": "eventTransformation"
    }
  ],
  "links": [],
  "diagramNotes": []
}
4. Start the conversation with the user leveraging the appropriate Bot ID, Member ID, and Tenant ID.
{
  "agents": [
    {
      "disabled": false,
      "name": "Start Conversation with User",
      "options": "{\"url\":\"https://{{RESOURCE.microsoft_serviceurl}}/v3/conversations/\",\"content_type\":\"json\",\"method\":\"post\",\"payload\":{\"bot\":{\"id\":\"{{RESOURCE.microsoft_teams_bot_id}}\",\"name\":\"Tines Bot\"},\"members\":[{\"id\":\"{{get_member_information.id}}\"}],\"channelData\":{\"tenant\":{\"id\":\"{{get_member_information.tenantID}}\"}}},\"headers\":{\"Authorization\":\"Bearer {{CREDENTIAL.teamschatbot}}\"}}",
      "position": {
        "x": 345,
        "y": 330
      },
      "type": "httpRequest"
    }
  ],
  "links": [],
  "diagramNotes": []
}
5. Send an adaptive card to the correct user via Teams.
{"agents":[{"disabled":false,"name":"Send card to user","options":"{\"url\":\"https://{{RESOURCE.microsoft_serviceurl}}/v3/conversations/{{start_conversation_with_user.body.id}}/activities\",\"content_type\":\"json\",\"method\":\"post\",\"payload\":{\"type\":\"message\",\"from\":{\"id\":\"{{RESOURCE.microsoft_teams_bot_id}}\",\"name\":\"Tines Bot\"},\"recipient\":{\"id\":\"{{get_member_information.id}}\"},\"attachments\":[{\"contentType\":\"application/vnd.microsoft.card.thumbnail\",\"content\":{\"title\":\"Security Alert\",\"subtitle\":\"A new alert has just been created in Jira\",\"text\":\"A new alert has just been created in Jira with the JIRA ID: {{check_crowdstrike_for_new_detection.JIRA_incident}}.{%line_break%}\\nMicrosoft Sentinel severity is {{demo_incident_from_ms_sentinel.properties.severity}}.{%line_break%}\\nMicrosoft Sentinel identified tactics are {{demo_incident_from_ms_sentinel.properties.additionalData.tactics}}.{%line_break%}\\nMicrosoft Sentinel incident Number: {{demo_incident_from_ms_sentinel.properties.incidentNumber}}.{%line_break%}\\nAdditionally the following information from Crowdstrike and VirusTotal is known.\\nCrowdStrike Severity:\\n{{check_crowdstrike_for_new_detection.['CrowdStrike Severity']}}\\n{%line_break%}CrowdStrike Behavior: \\n{{check_crowdstrike_for_new_detection.['CrowdStrike Behvior Description']}}\\n{%line_break%}VirusTotal Malicious Votes:\\n{{check_crowdstrike_for_new_detection.['VirusTotal Malicious Votes']}}\",\"images\":[{\"url\":\"https://logo.clearbit.com/tines.com\\",\\"alt\\":\\"Tines\\"}],\\"buttons\\":[{\\"type\\":\\"openUrl\\",\\"title\\":\\"View Sentinel Incident\",\"value\":\"{{demo_incident_from_ms_sentinel.properties.incidentUrl}}\"},{\"type\":\"openUrl\",\"title\":\"View Jira Incident\",\"value\":\"https://tinesio.atlassian.net/browse/{{check_crowdstrike_for_new_detection.JIRA_incident}}\"},{\"type\":\"openUrl\",\"title\":\"Escalate to On Call\",\"value\":\"{% prompt escalate %}\"},{\"type\":\"openUrl\",\"title\":\"Mark False Positive\",\"value\":\"{% prompt falsepositive %}\"}]}}]},\"headers\":{\"Authorization\":\"Bearer {{CREDENTIAL.teamschatbot}}\"}}","position":{"x":345,"y":420},"type":"httpRequest"}],"links":[],"diagramNotes":[]}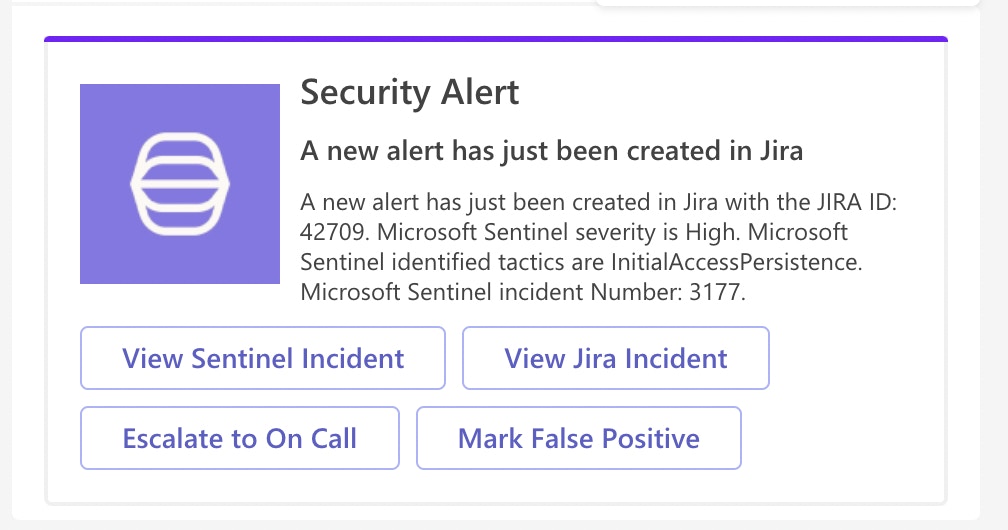
Putting it all together
The steps above successfully use the Microsoft APIs to fetch the team, identify a user, and send a card to a user. The Story in this post shows integrations with a Microsoft Sentinel alert and Jira. In reality, we could use any SIEM or other alerting mechanism to ingest information and kick off the flow. Additionally, case management systems can be leveraged to collect information, and third-party tools such as Urlscan or VirusTotal could be easily added to the Story for additional enrichment. Triggers and prompts are used in the Story to conditionally flow the events through unique branches and take conditional actions.
Download and import this Story here.