Bringing it all together
Now let's build a complete workflow that demonstrates everything you've learned. You'll create a story that receives a security alert, captures it as a record, checks for previous alerts from the same user, and escalates to a case if a pattern is detected.
Before you start
To follow along with this walkthrough, you'll need a Security Alerts record type with the following fields:
To see meaningful results when you test the workflow, load some sample data before you begin. Import or create at least 10 records with a mix of user emails, making sure some users have three or more alerts. This way, the workflow's escalation logic will have historical data to query against.
Step 1: Set up the Webhook
Create a new story and drag a Webhook action onto the storyboard. This is the entry point for incoming alerts.
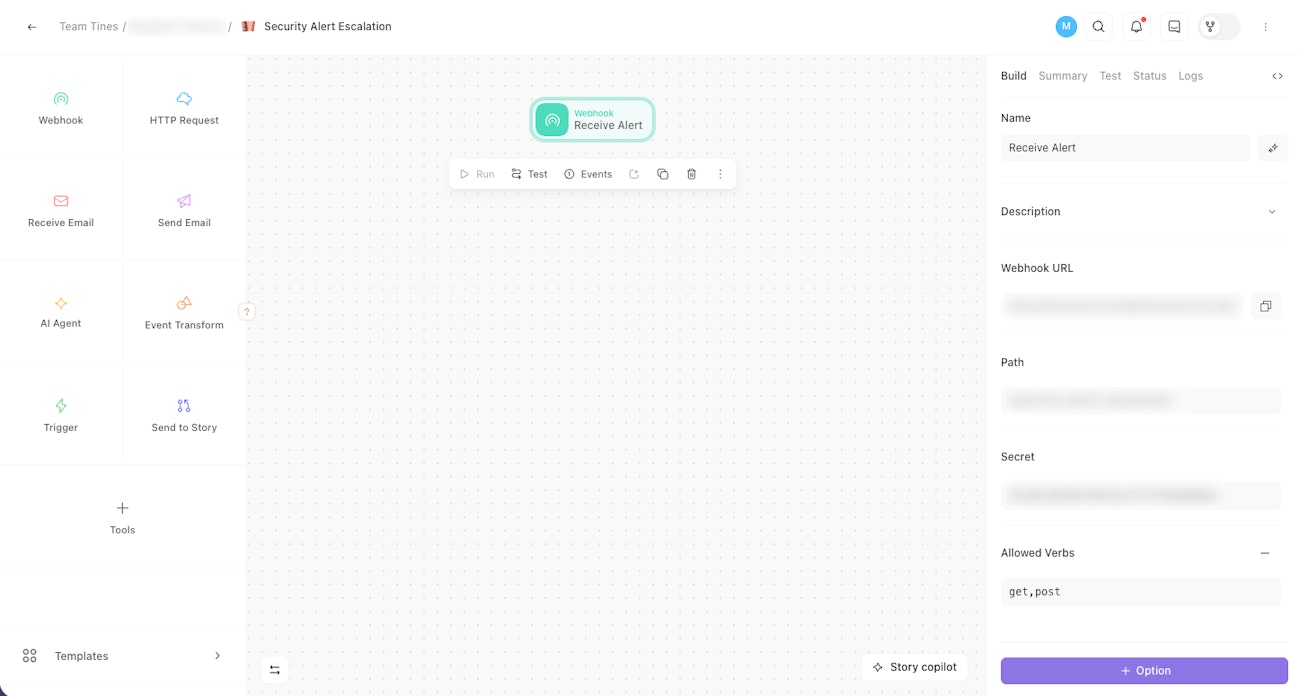
The storyboard with a Webhook action. The configuration panel shows the webhook URL.
🪄Tip
Step 2: Add the Capture Record tool
Drag a Record tool onto the storyboard and connect it to the Webhook.
Configure it as follows:
Mode: Create
Record type: Security Alert
Map the fields:
Alert name:
<<receive_alert.body.alert_name>>Severity:
<<receive_alert.body.severity>>User email:
<<receive_alert.body.user_email>>Alert source:
<<receive_alert.body.alert_source>>Resolved: leave blank

The storyboard with the Webhook connected to a Record tool. The configuration panel shows Create mode with field mappings for alert name, severity, user email, and alert source.
Step 3: Query for previous alerts
Drag a second Record tool onto the storyboard and connect it to the Capture Record tool.
Configure it as follows:
Mode: List
Record type: Security Alerts
Condition:
user_emailis equal to<<receive_alert.body.user_email>>
This queries for all previous alerts from the same user. The results will tell your workflow whether this user has a history of triggering alerts.
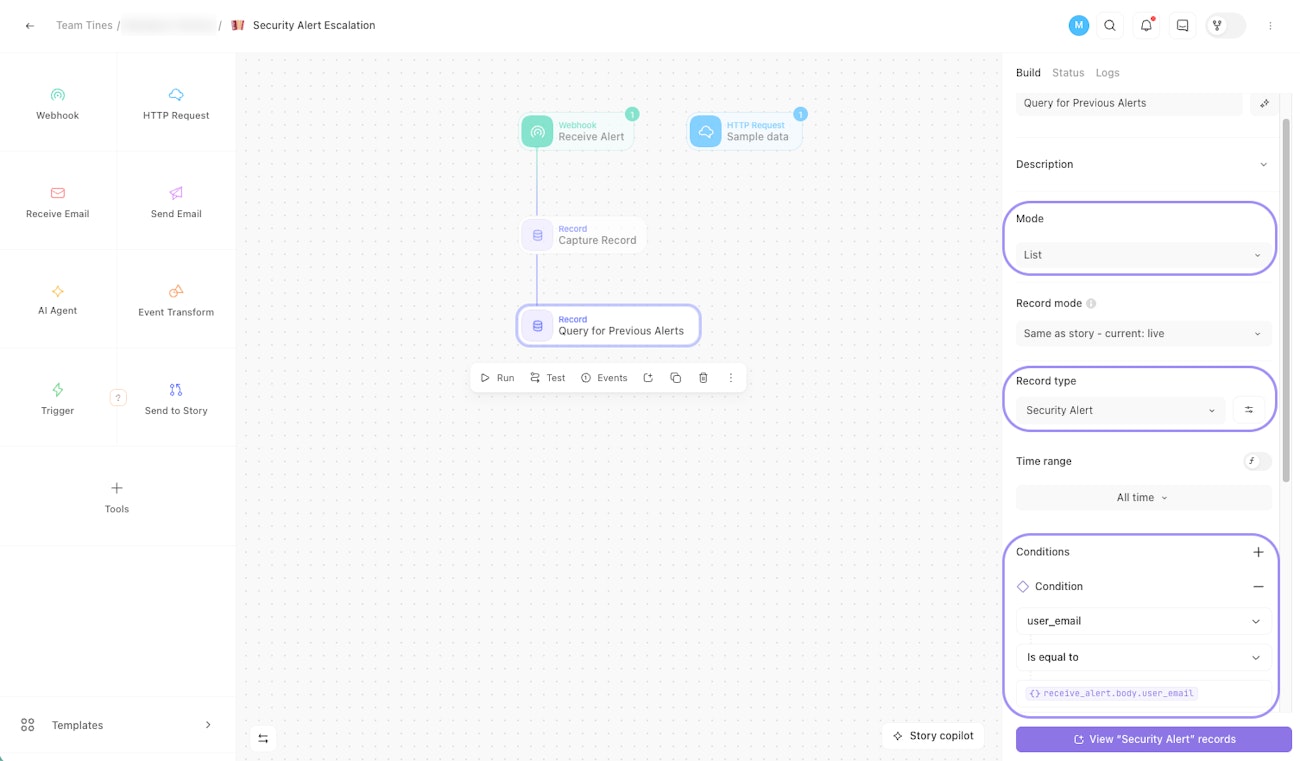
The storyboard with a second Record tool connected after the Capture Record tool. The configuration panel shows List mode with a filter for user email matching the incoming alert.
Step 4: Add the Trigger
Drag a Trigger action onto the storyboard and connect it to the List Record tool.
Configure the rule to escalate:
<<SIZE(query_for_previous_alerts.records)>>is greater than 2
If the user has more than two previous alerts, the workflow escalates. Otherwise, it follows the standard path.
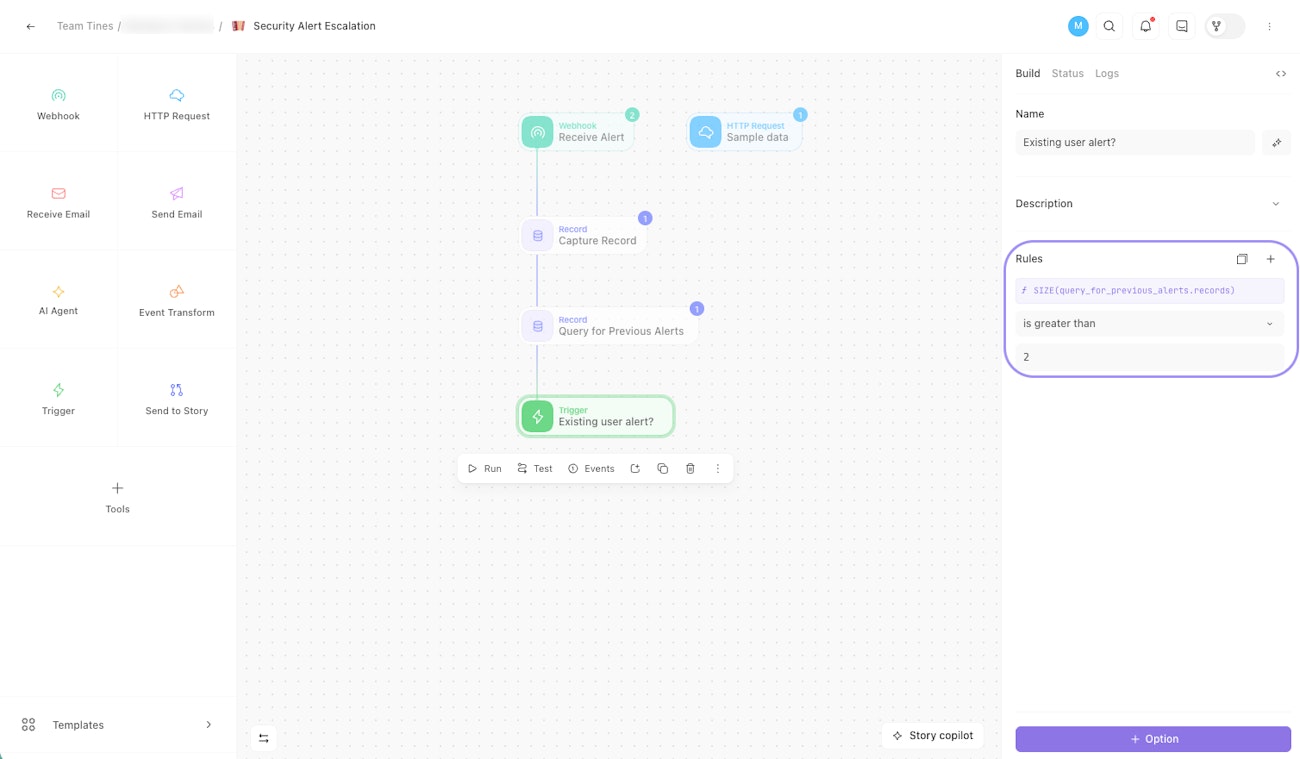
The storyboard with a Trigger action connected after the List Record tool. The configuration panel shows a rule that escalates when the query returns more than two previous alerts.
Step 5: Create a case on escalation
On the "escalate" path, drag a Case tool onto the storyboard and connect it to the Trigger's match rule.
Configure:
Case name:
<<receive_alert.body.alert_name>>Priority: High
Records:
<<capture_record.id>>Status: To do
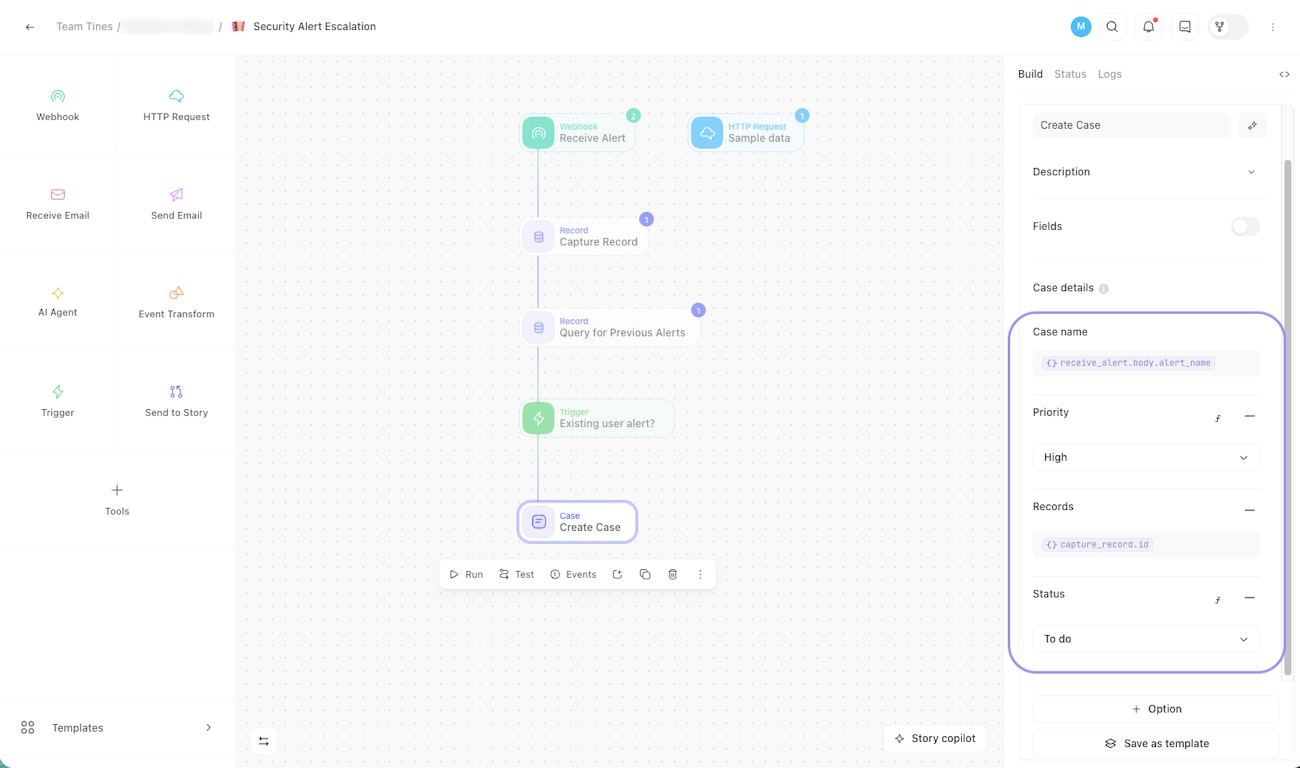
The storyboard with a Case tool on the escalation path. The configuration panel shows the case name, high priority, and the attached record ID.
💡Note
Step 6: Log the standard path
On the standard path (no match), drag an Event Transform action onto the storyboard and connect it to the Trigger's no match rule.
Configure it as follows:
Mode: Message only
Message: "Alert processed, no escalation required."
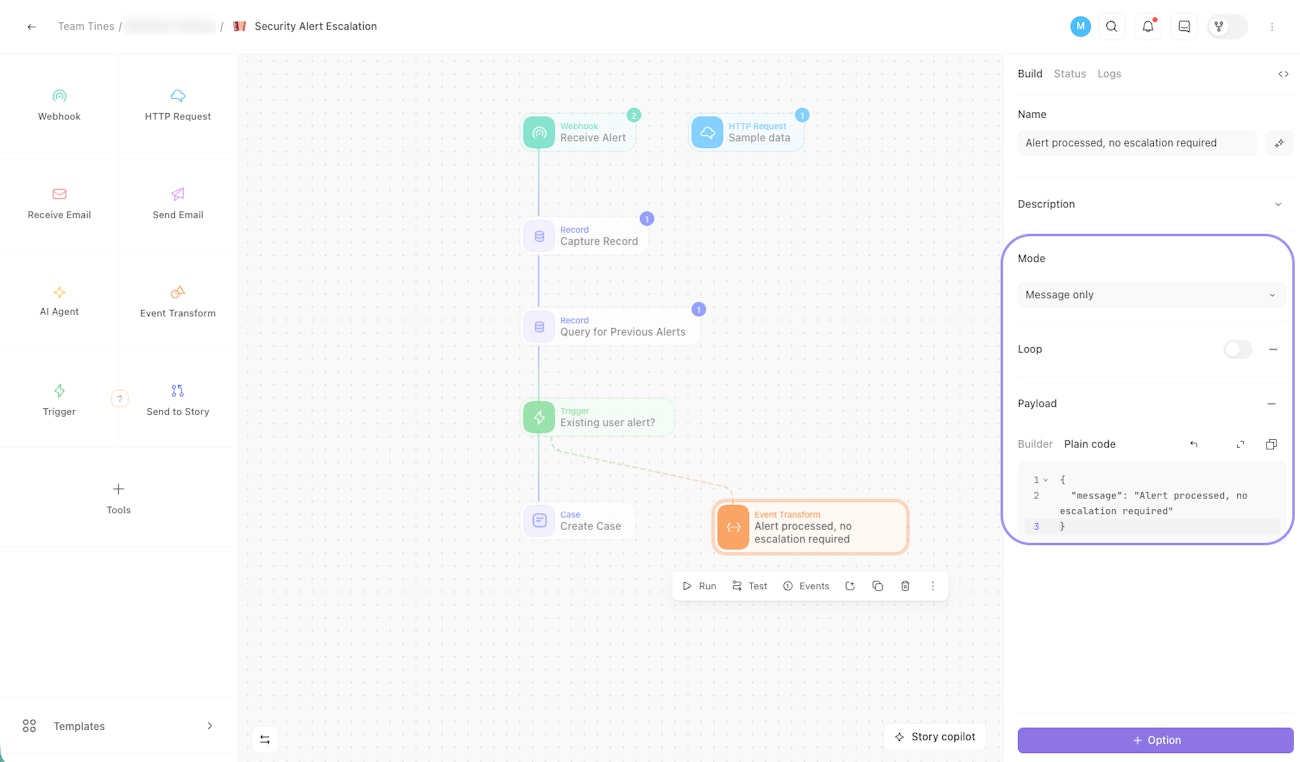
The completed storyboard with an Event Transform action on the standard path. The configuration panel shows message-only mode with a log message confirming no escalation was required.
Step 7: Test your workflow
That completes the story. Now it's time to test.
Using the HTTP Request action from the tip in Step 1, send the following payload. In our sample data set, Jane Doe already has multiple alerts, so the List query will return more than two results and the Trigger will escalate.
{
  "alert_name": "Unauthorized access to admin panel",
  "severity": "Critical",
  "user_email": "jane.doe@example.com",
  "alert_source": "Crowdstrike"
}
After sending, verify that:
A new record appears in the Security Alerts records table.
A high priority case was created with the attached record.
Now send a second payload. In our sample data set, Mike Chen has only one previous alert, so the Trigger will take the standard path.
{
  "alert_name": "Failed login attempt",
  "severity": "Low",
  "user_email": "mike.chen@example.com",
  "alert_source": "Sentinel"
}
After sending, verify that:
A new record appears in the Security Alerts records table.
No case was created.
The Event Transform action logged "Alert processed, no escalation required."