Tines supports two industry-standard SSO protocols: SAML and OIDC. Both accomplish the same goal: letting users sign in with their identity provider. But they work slightly differently under the hood. Most organizations will use whichever protocol their identity provider supports best.
Access authentication settings
To configure SSO, navigate to the tenant Settings and select the Authentication tab. From here, you can select either SAML or OIDC as your SSO method via the Sign-on settings section. You will need to click the Unlock to make changes button to make edits.
❗️Important
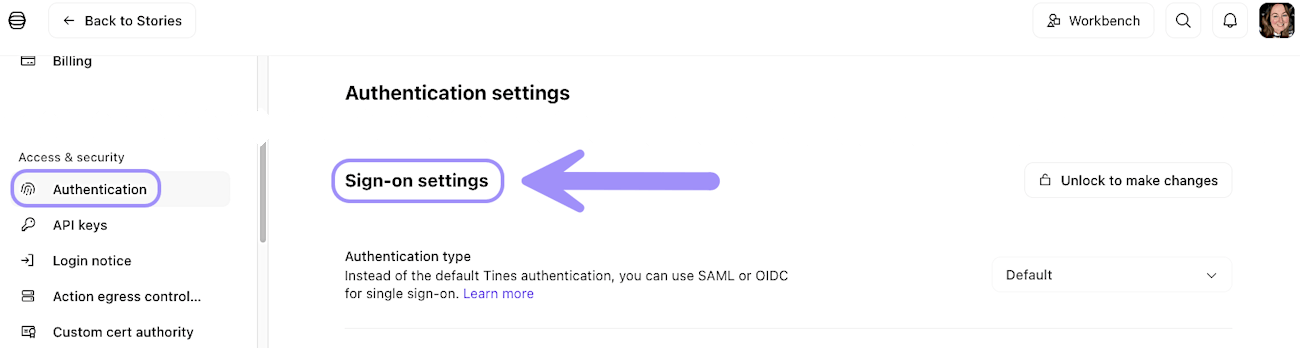
UI location to enable single sign-on (SSO) via SAML or OIDC.
Set up SAML
SAML (Security Assertion Markup Language) is a widely used protocol that works with most enterprise identity providers. To configure SAML, you'll need two pieces of information from your identity provider:
IdP URL: The web address where Tines will redirect users when they sign in.
X.509 certificate: Your identity provider's public certificate (preferred) or a SHA-256 fingerprint of the certificate.
Once you have these details, enter them in the Sign-on settings section of the Authentication settings. Tines will provide you with information to give back to your identity provider, including your tenant's audience URL and SSO URL. You will need to click the Lock to save changes button to apply your SSO configuration.
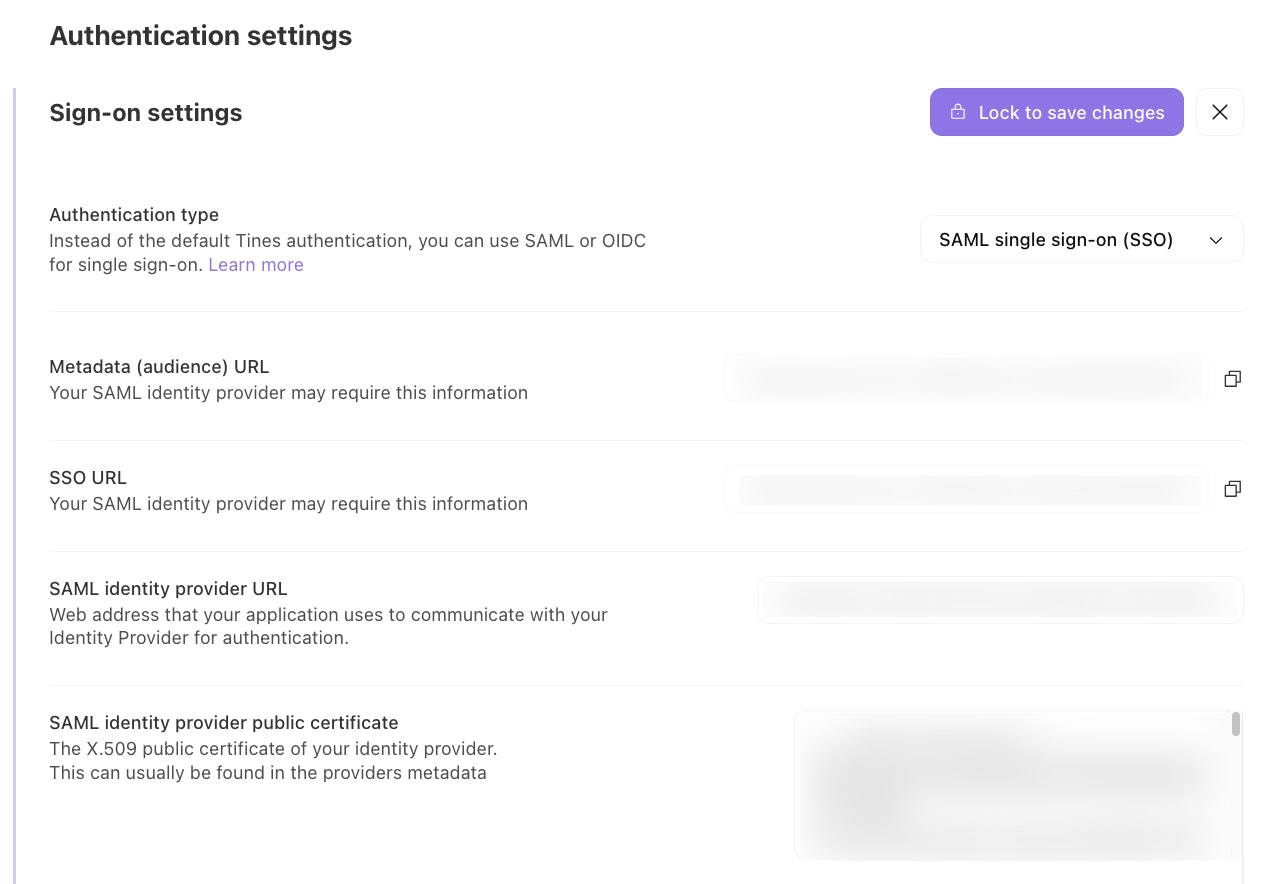
UI location to set up single sign-on (SSO) via SAML settings.
Set up OIDC
OpenID Connect (OIDC) is a protocol built on top of OAuth 2.0. It's particularly common with cloud providers like Google and AWS. Tines will provide you with your Callback/Redirect URL to apply in your OpenID provider. To configure OIDC, you'll need six pieces of information from your provider:
OAuth client ID: Your application's unique identifier
OAuth client secret: A confidential key for your application
Authorization endpoint URL: Where users are sent to authenticate
Token endpoint URL: Where Tines exchanges codes for access tokens
Issuer URL: Your identity provider's identifier
JWKS URL: Where Tines can find your provider's public keys
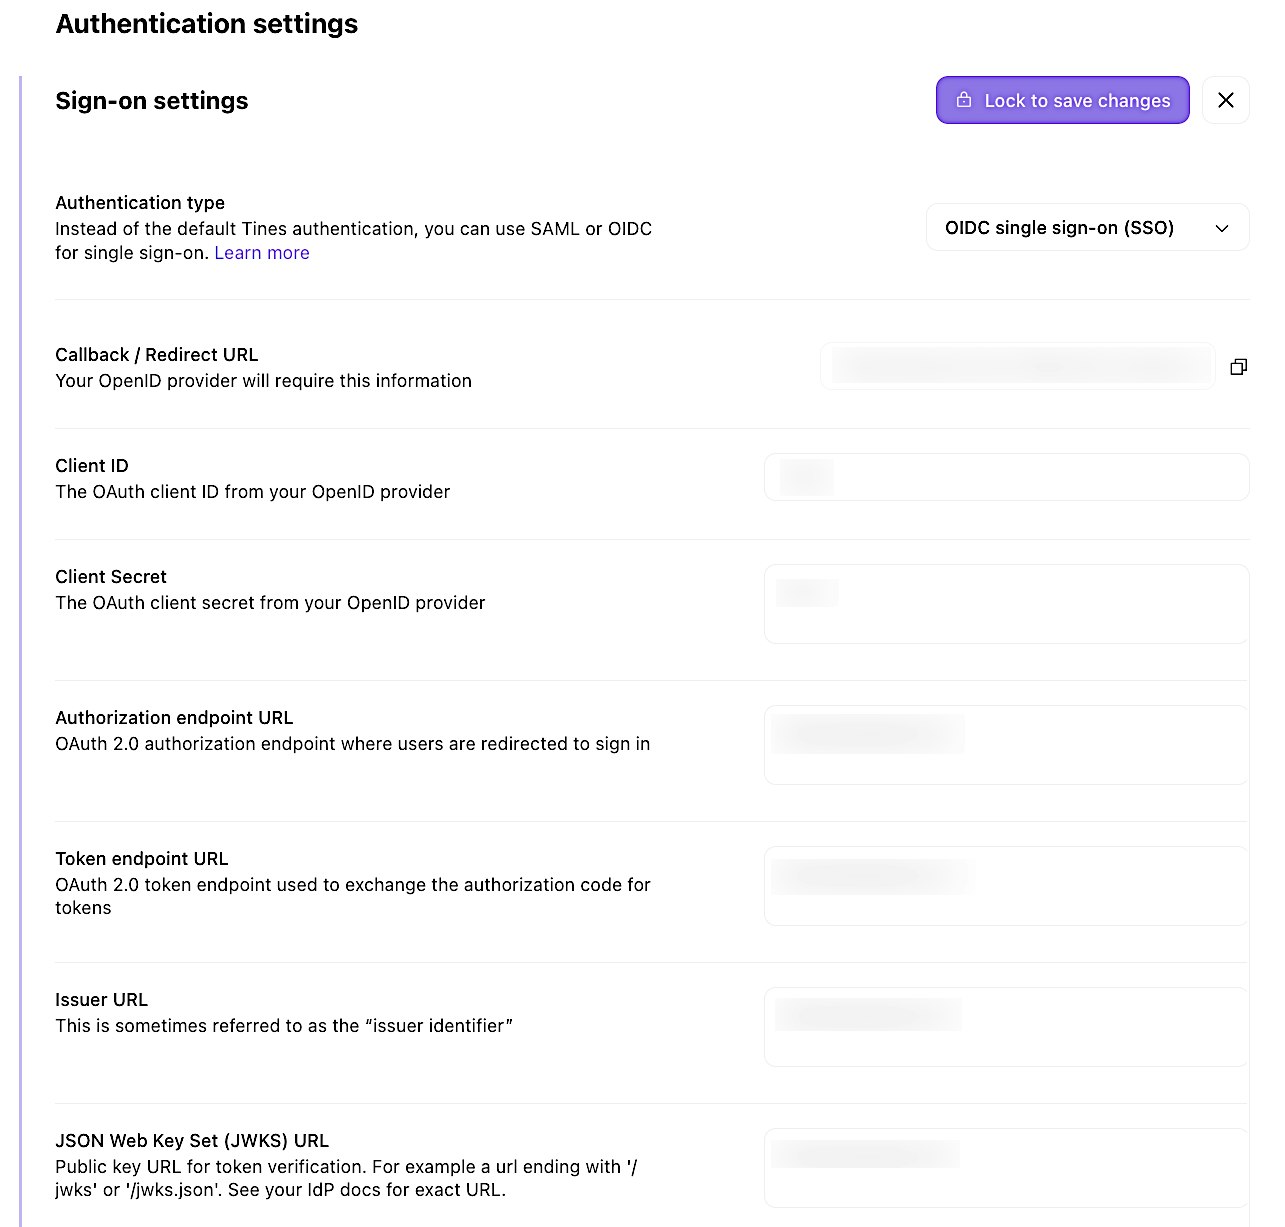
UI location to set up single sign-on (SSO) via OIDC settings.
Test and enable SSO
After entering your SSO configuration, save your settings. Tines will validate the connection with your identity provider. Once validated, SSO is active for your tenant.
When users visit your Tines tenant, they'll be redirected to your identity provider, where they can authenticate using their company credentials. After successful authentication, they're redirected back to Tines and are signed in.