Story design patterns in Tines
There are different ways you can design a story in Tines to achieve different outcomes. As we pull different actions into our storyboard, we may start out with a linear approach. As our stories evolve, they require multiple possible outcomes which we achieve through some trigger actions. This starts to evolve the way our stories look.
Let's take a look at a few examples of story design. Our key focus being how the actions are connected and where the event data may flow.
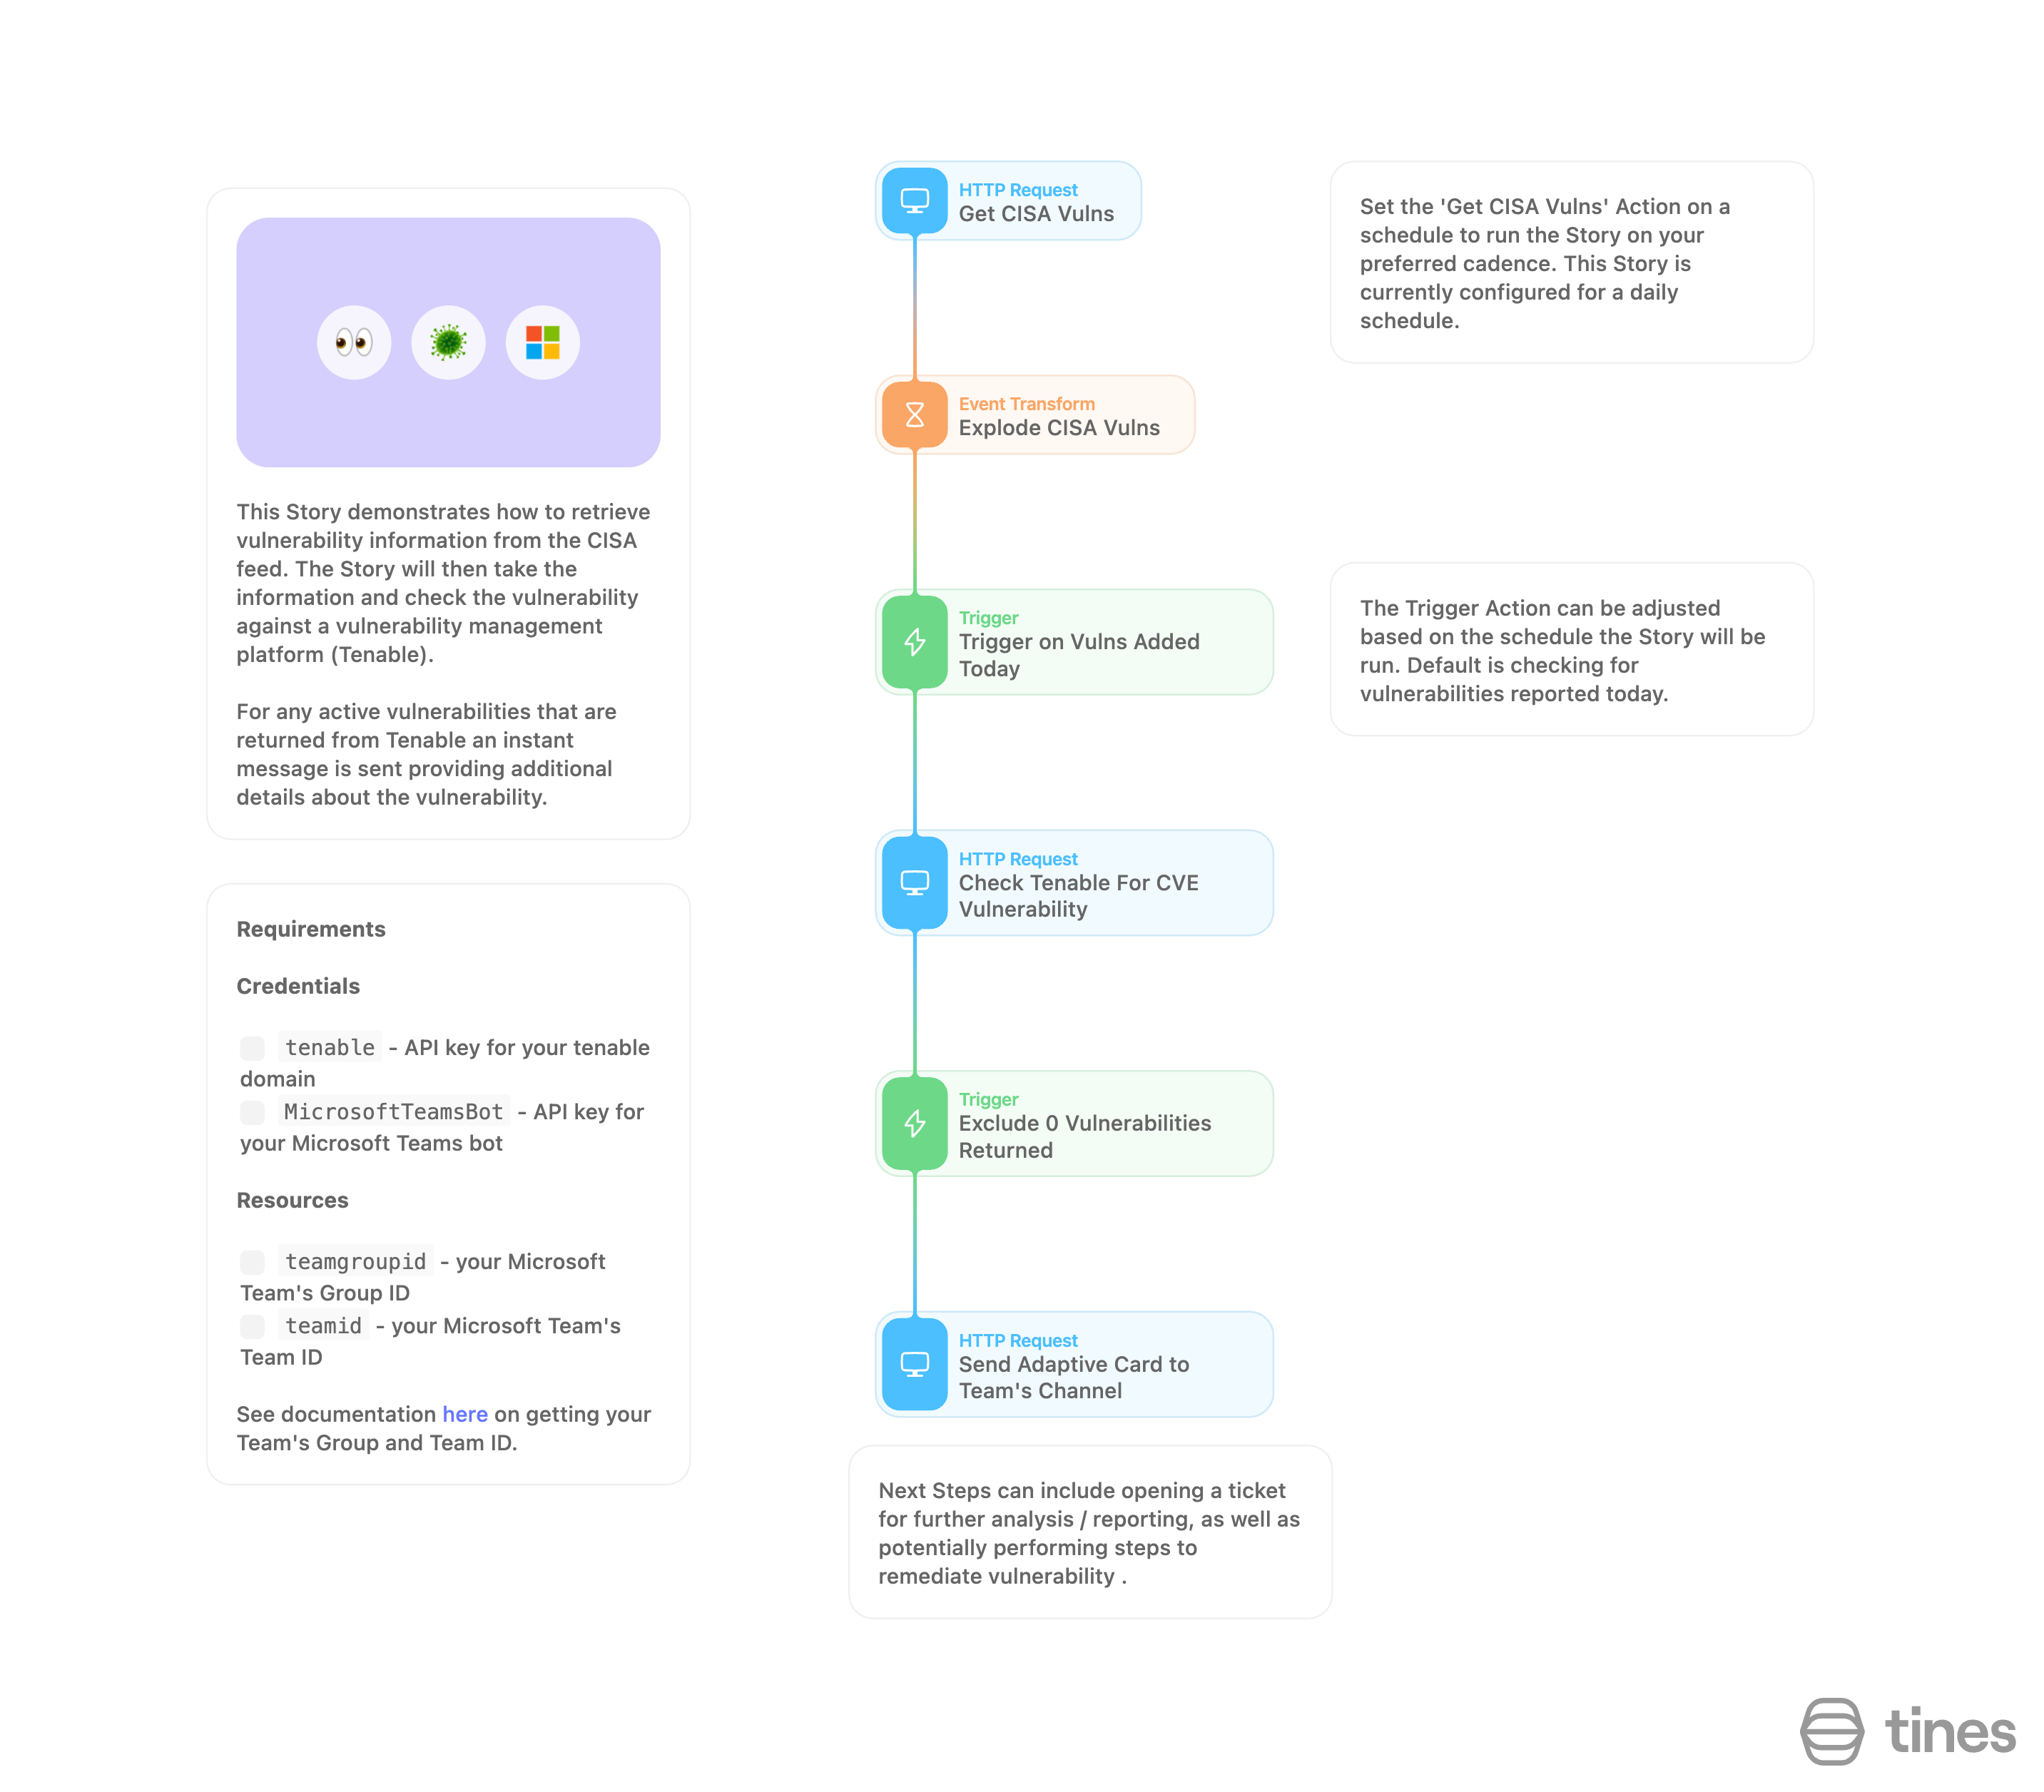
Linear design
A linear story design has actions that run sequentially from top to bottom without any branching. These are ideal for straightforward workflows where each action depends on the previous one.
Loading story...
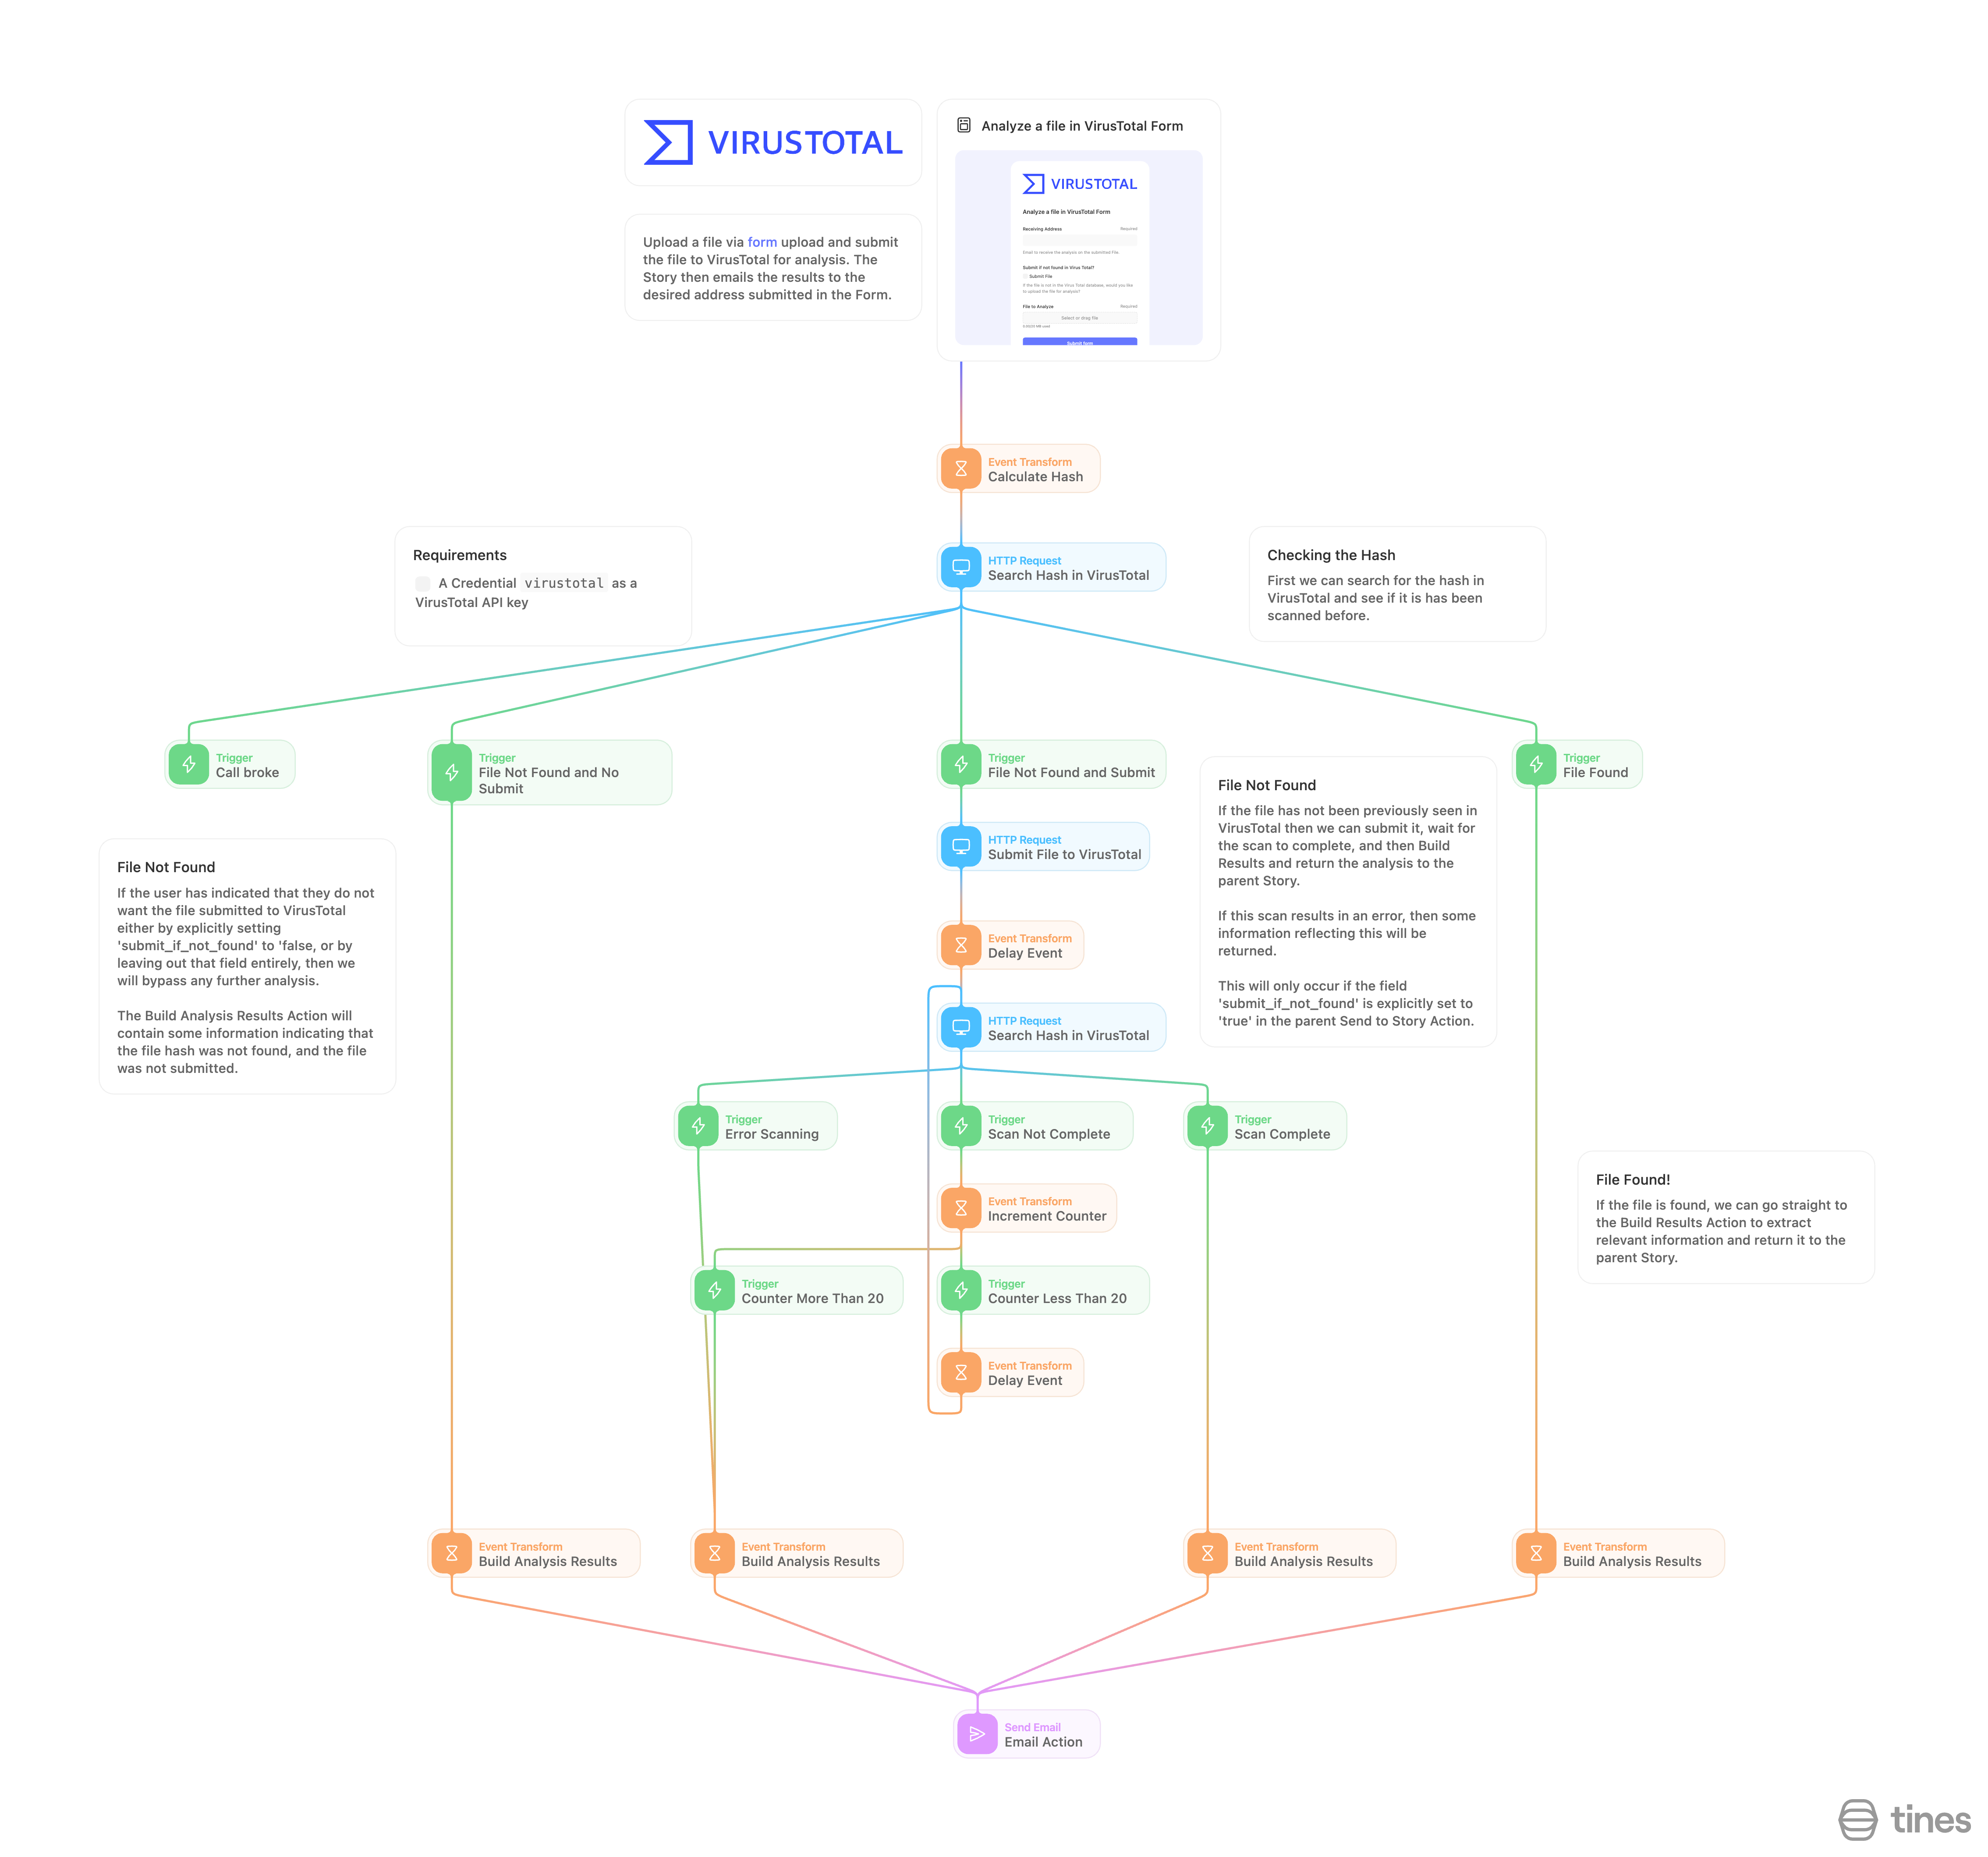
Branching design
A branching story design has multiple possible outcomes.
It uses triggers to determine which action comes next based on conditions.
This is useful for stories with multiple conditional paths.
Loading story...
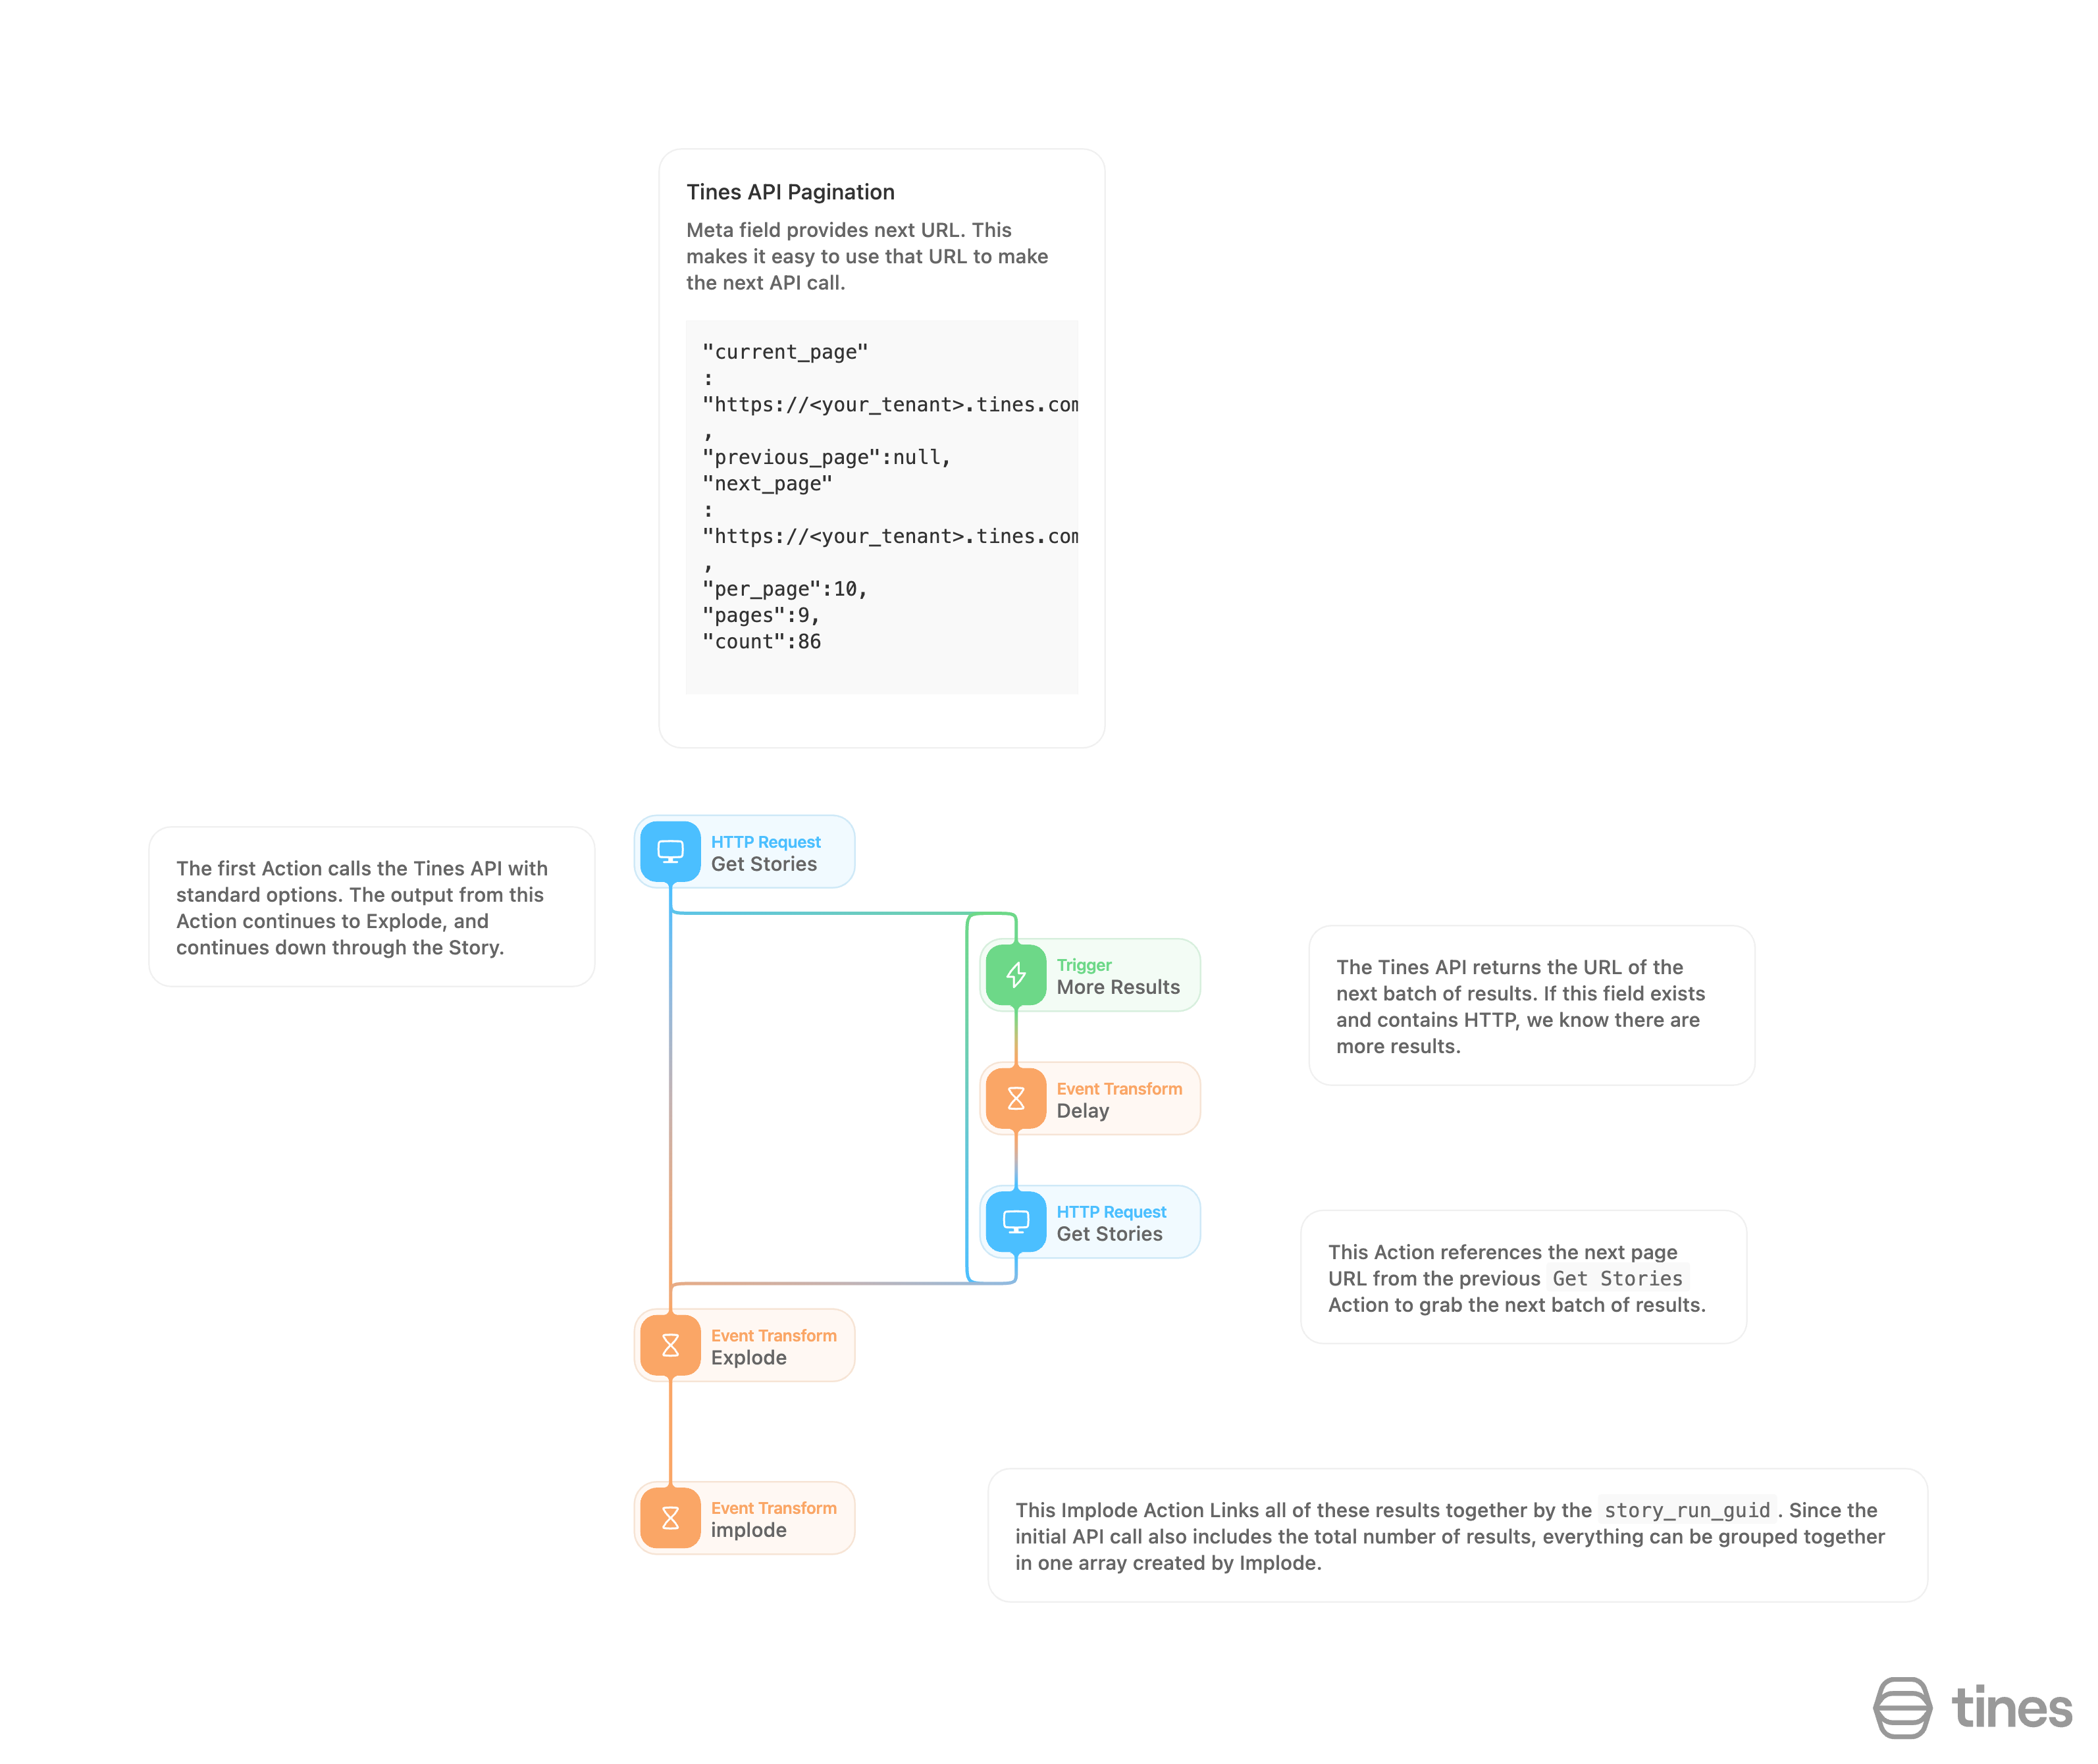
Pagination (looping)
Pagination is needed when an API only returns a subset of results per request.
You make multiple requests until you have all the data from the API.
This is useful for APIs that only return a certain number of results per page.
💡Note
Loading story...
🪄Tip
Developing stories with story design in Tines
Stories are an essential part of the Tines platform. They allow you to automate complex workflows and processes.
To develop effective stories in Tines, follow these steps:
Define the goal: Clarify what you want to achieve with the story and the overall workflow. This will guide your story design.
Identify the actions: Brainstorm the individual tasks or functions needed to achieve the goal. These will become your actions.
Create the actions: Build the actions in the Tines editor or import existing actions.
You can always use notes (hotkey: n) to lay out your story if you aren't sure which action you'll need as you start to design.
Connect the actions: Drag the actions onto the storyboard and connect them with events and connections. Test each action individually.
Test the story: Run the story end-to-end to ensure it works as intended and meets your goal. Debug any issues that arise.
Improve the story: Refine, optimize, and scale the story based on your learnings from testing.
Share the story: Export the story to share with teammates or import it into another Tines tenant.
By following these steps, you can develop effective, automated stories that achieve your desired workflows and processes.
Example:
Use case: I want to send an email to the support team from Zendesk anytime someone submits a request with the word "training".
User submits request
Page
configured with text element
Test if the request includes the word “training”
Trigger action
configured to test for "training"
Send an email to the support team using Zendesk
HTTP request action
configured to Zendesk
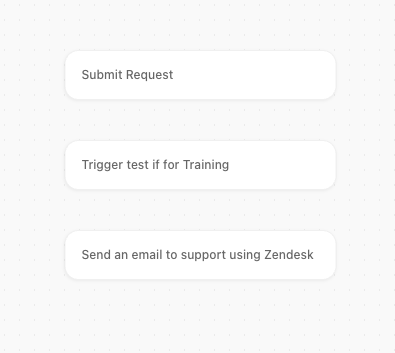
Step-by-step breakdown:
We can concept the above example using notes in Tines. Add as many notes as you need to begin to create the structure of your story. Later on, we can replace these notes with the appropriate action types.
Click
Non the keyboard to add a new noteSet
nameto “Submit Request”Click
Non the keyboard to add another noteSet
nameto “Trigger test if for Training”Click
Non the keyboard to add another noteSet
nameto “Send an email to support using Zendesk”