Creating an MCP server in Tines is straightforward. You'll use a template action that handles all the protocol details, so you can focus on configuring which tools to expose.
Use the MCP server template
To get started:
In your storyboard, navigate to the editor panel and open Templates.
Search for MCP.
Drag the MCP server template onto your storyboard.
In the action's properties panel, search and select MCP Server.

UI location to add an MCP server to a storyboard.
Once the action is on your storyboard, you'll see it looks similar to other template actions in Tines. The key difference is that this action doesn't run on a schedule or in response to events. Instead, it sits ready to respond to requests from MCP clients, similar to how our Webhook action listens for event hooks from services.
Add tools to MCP servers
Tools are the heart of your MCP server. They're the capabilities you're making available to AI clients.
Similar to the AI Agent action you learned in the last module, you can add three types of tools to an MCP server:
Templates: These are pre-built Tines actions from the public library or your private templates. For example, you might add a template that looks up user information in your HR system like BambooHR, or one that creates a ticket in your project management tool like Jira.
Send to Story: This lets you expose any Tines story as a tool. When an AI client invokes this tool, it triggers that story to run. This is incredibly powerful because it means any workflow you've built in Tines can become an AI tool.
Custom tools: These are action groups you can build specifically for your MCP server. They're useful when you want to create a tool that doesn't correspond to a full story, or when you want to bundle several actions together into a single tool.
❗️Important
To add tools to your MCP server:
Click the MCP server action tile on your storyboard.
In the properties panel, find the Tools section.
Click the + Add tool button.
Choose the type of tool (template, Send to Story, or custom).
Configure the tool's name, description, and parameters as needed.
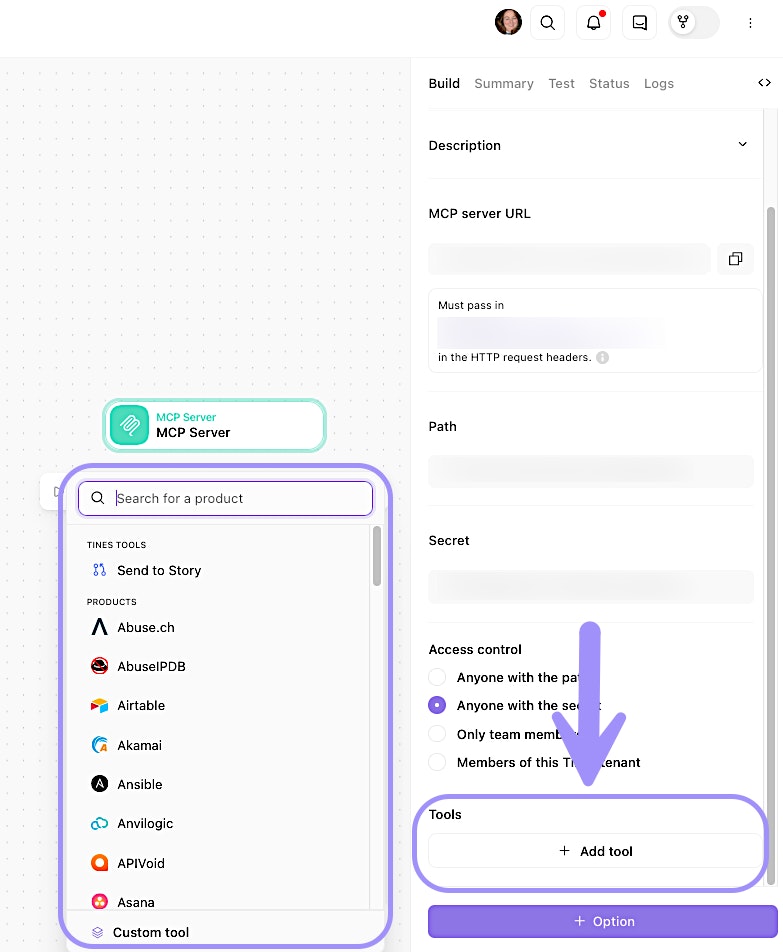
UI location to add tools to an MCP server.
🪄Tip
Connect clients to your Tines MCP server
Once you've built your MCP server and added tools to it, the next step is connecting AI clients to it. Tines makes this easy by providing ready-to-use configuration snippets.
Summary tab
In the Summary tab of your MCP server action, you'll find configuration examples for popular MCP clients. These snippets include your server URL and authentication setup, so you can copy and paste them directly into your client's settings.
The snippets are customized for your specific MCP server, so you don't need to manually fill in URLs or paths. Just copy, paste, and you're ready to go.
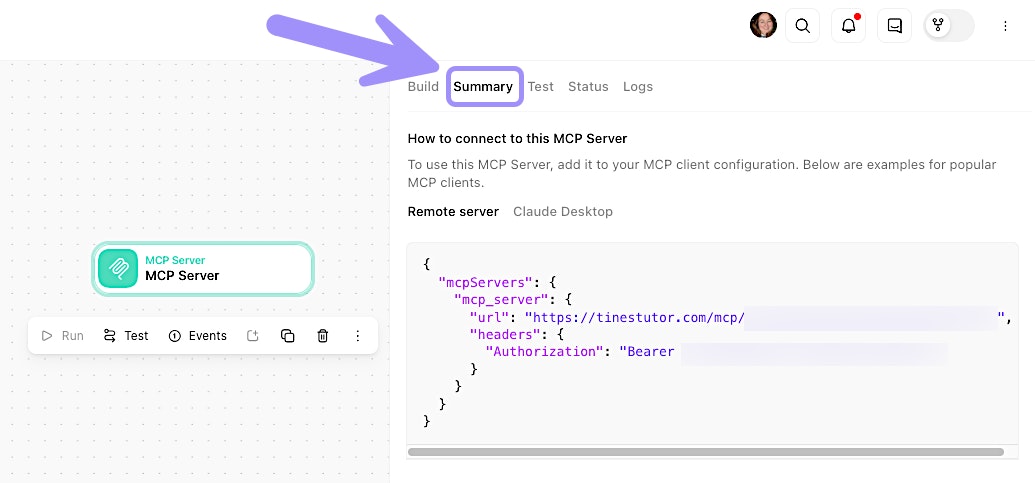
UI location of the MCP server's Summary tab.
🪄Tip
Streamable HTTP setup for remote clients
For clients that support remote MCP servers directly (like Cursor or VSCode), you'll use a configuration like this:
{
  "mcpServers": {
    "tines": {
      "url": "https://your-tenant.tines.com/mcp/your-path",
      "headers": {
        "Authorization": "Bearer your-secret-or-api-key"
      }
    }
  }
}
Replace your-tenant, your-path, and your-secret-or-api-key with your actual values (or better yet, copy them from the Summary tab where they're already filled in for you).
The exact location where you add this configuration depends on your client:
In Cursor, you'll add it to your MCP settings file.
In VSCode, you'll configure it through the AI extension settings.
In custom applications, you'll include it in your MCP client initialization code.
Use mcp-remote as a local proxy
Some MCP clients, like Claude Desktop, only support local (stdio) servers. These clients expect the MCP server to be running on your local machine, not accessible over the internet.
To bridge this gap, you can use a tool called mcp-remote. It acts as a local proxy, running on your machine and forwarding requests to your Tines MCP server.
🪄Tip
Debug MCP connections
If a client is having trouble connecting to your MCP server, the events tab is your first stop for debugging. Look for:
Missing initialize events: This suggests the client isn't reaching your server at all. Check the URL and network connectivity.
Authentication errors: These appear in the event details if the client is using the wrong credentials.
Tool invocation errors: If a tool is being called but failing, you'll see the error in the tool's own event, not in the MCP server event.
Emitted events and monitoring
Every time an MCP client interacts with your server, Tines creates events that you can use for monitoring, debugging, or triggering other workflows.
Understand MCP server events
Your MCP server action will emit events for three types of requests:
initialize: When a client first connects to your server and requests information about it. This event includes details about the client and the connection.tools/list: When a client requests the list of available tools. This happens during initial connection and sometimes periodically afterward.tools/call: When a client invokes a specific tool. This event includes the tool name and the arguments passed to it.
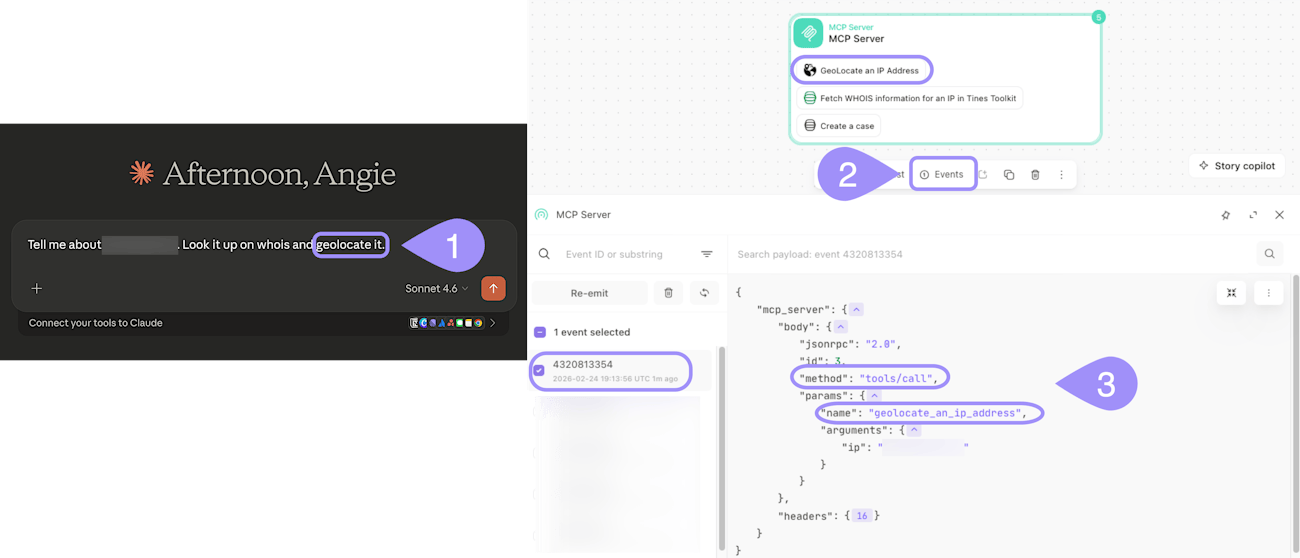
Events example of an MCP server in Tines interacting with Claude Desktop via the tools/call method.
Track tool invocations
When a client invokes a tool, two things happen:
The MCP server action emits a
tools/callevent.The tool itself (whether it's a template, send-to-story, or custom tool) runs and emits its own event.
The tools/call event doesn't include the tool's result (to avoid duplication), but you can always find the result by looking at the tool's own emitted event.
This separation is useful because it lets you:
Monitor MCP server activity separately from tool execution.
Track which tools are being called most often.
Debug issues with tool invocations versus issues with tool execution.
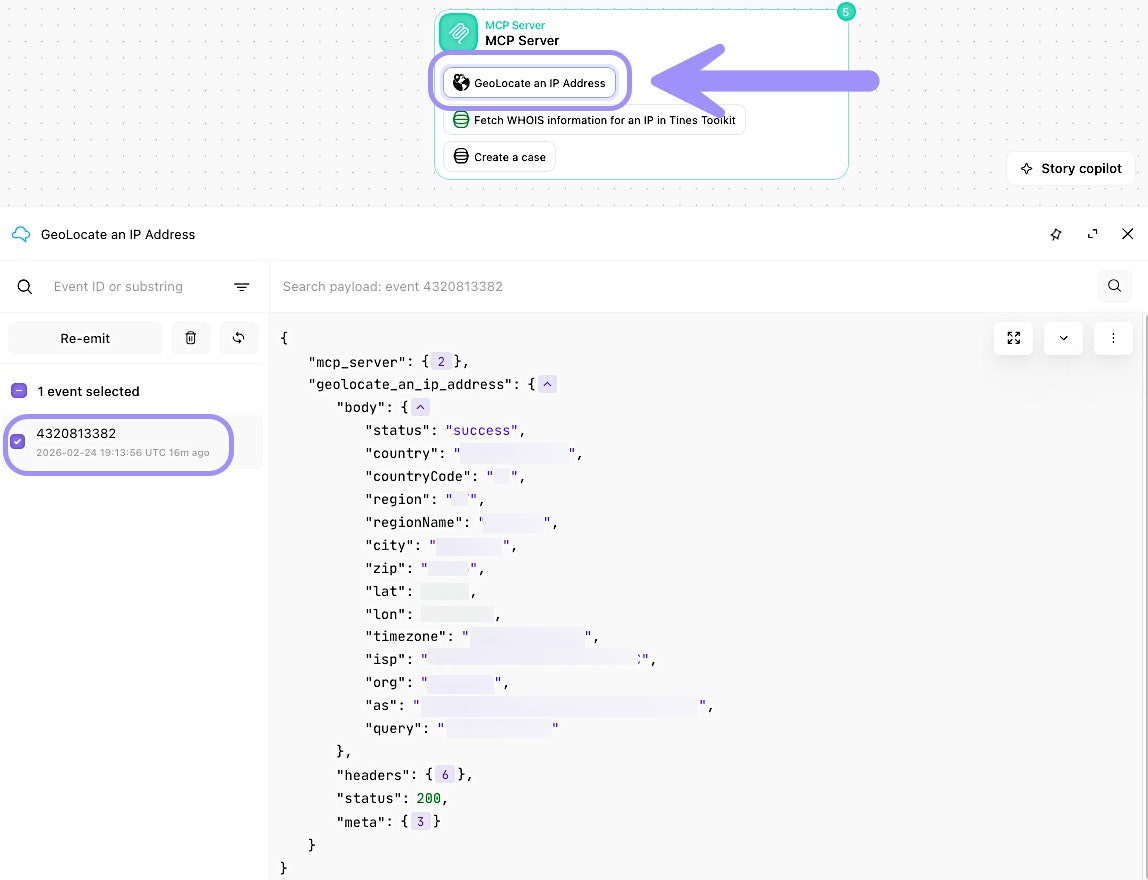
Example of viewing an individual tools/call event. Click on the specific tool within the MCP server action tile to see these details.