

Note: This is part 3 of a 3 part series on security automation for dealing with account compromise. Part 1 covers detection, part 2 looks at enrichment and case management, while part 3 tackles protection and response including prompting the user to acknowledge the incident via a side-channel.
The 2020 Verizon Data Breach Investigations Report (DBIR) contains 157,525 incidents and 108,069 breaches. 100,000+ of those breaches were credentials of individual users having been compromised to target bank accounts and cloud services (amongst others). Closing the window on the efficacy of stolen credentials is paramount and with security automation we seek to do it faster. By having predefined workflows and automatic detection for breached accounts you can rest easier and assure yourself what's next. Breaches are inevitable but negative outcomes are not.
It is now time for our active automated response to the breach. We have seen how we broke our workflow into 3 distinct stages but we now move on to the final “Respond and Protect” phase.
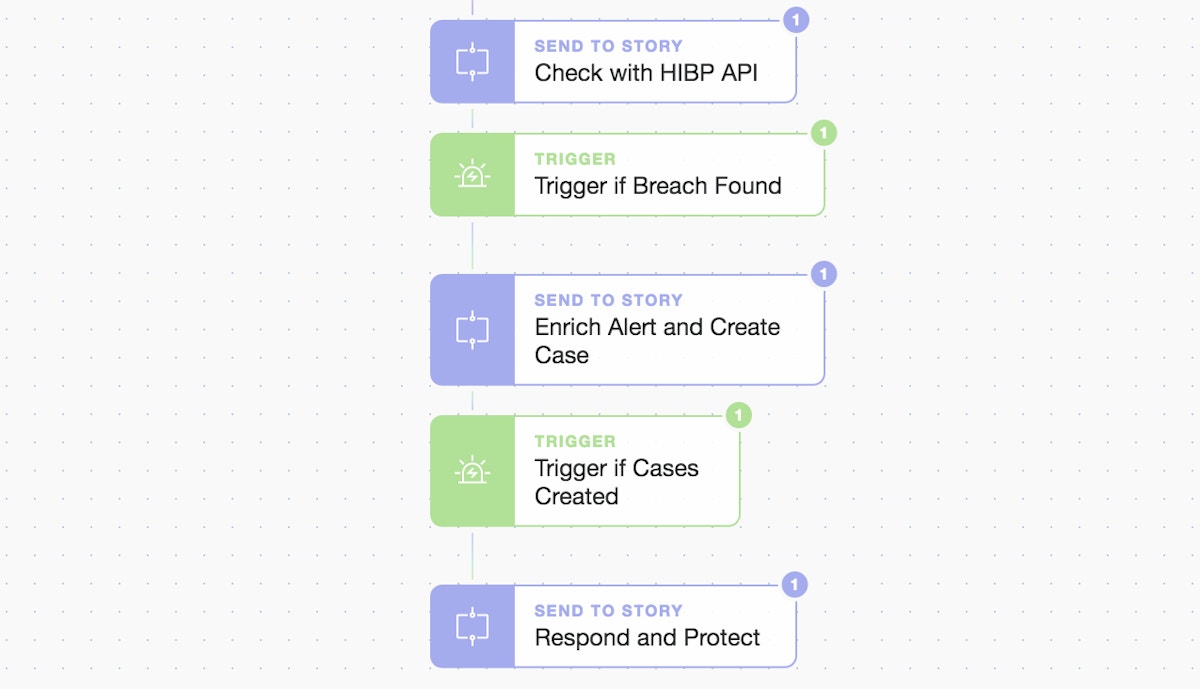
3 part modularity; ingestion/check, enrich/create case, and respond/protect
We again make use of our “Send To Story” Action to simplify our workflow and enable simple but powerful extensibility. From the previous phases we have all the details we need to take rapid action and pass them to our “Respond and Protect” sub-Story. Let's dig into it to complete our automated user lockout, case updates, and interactive (yet automated) user communications which use the highly versatile and powerful prompt widget.
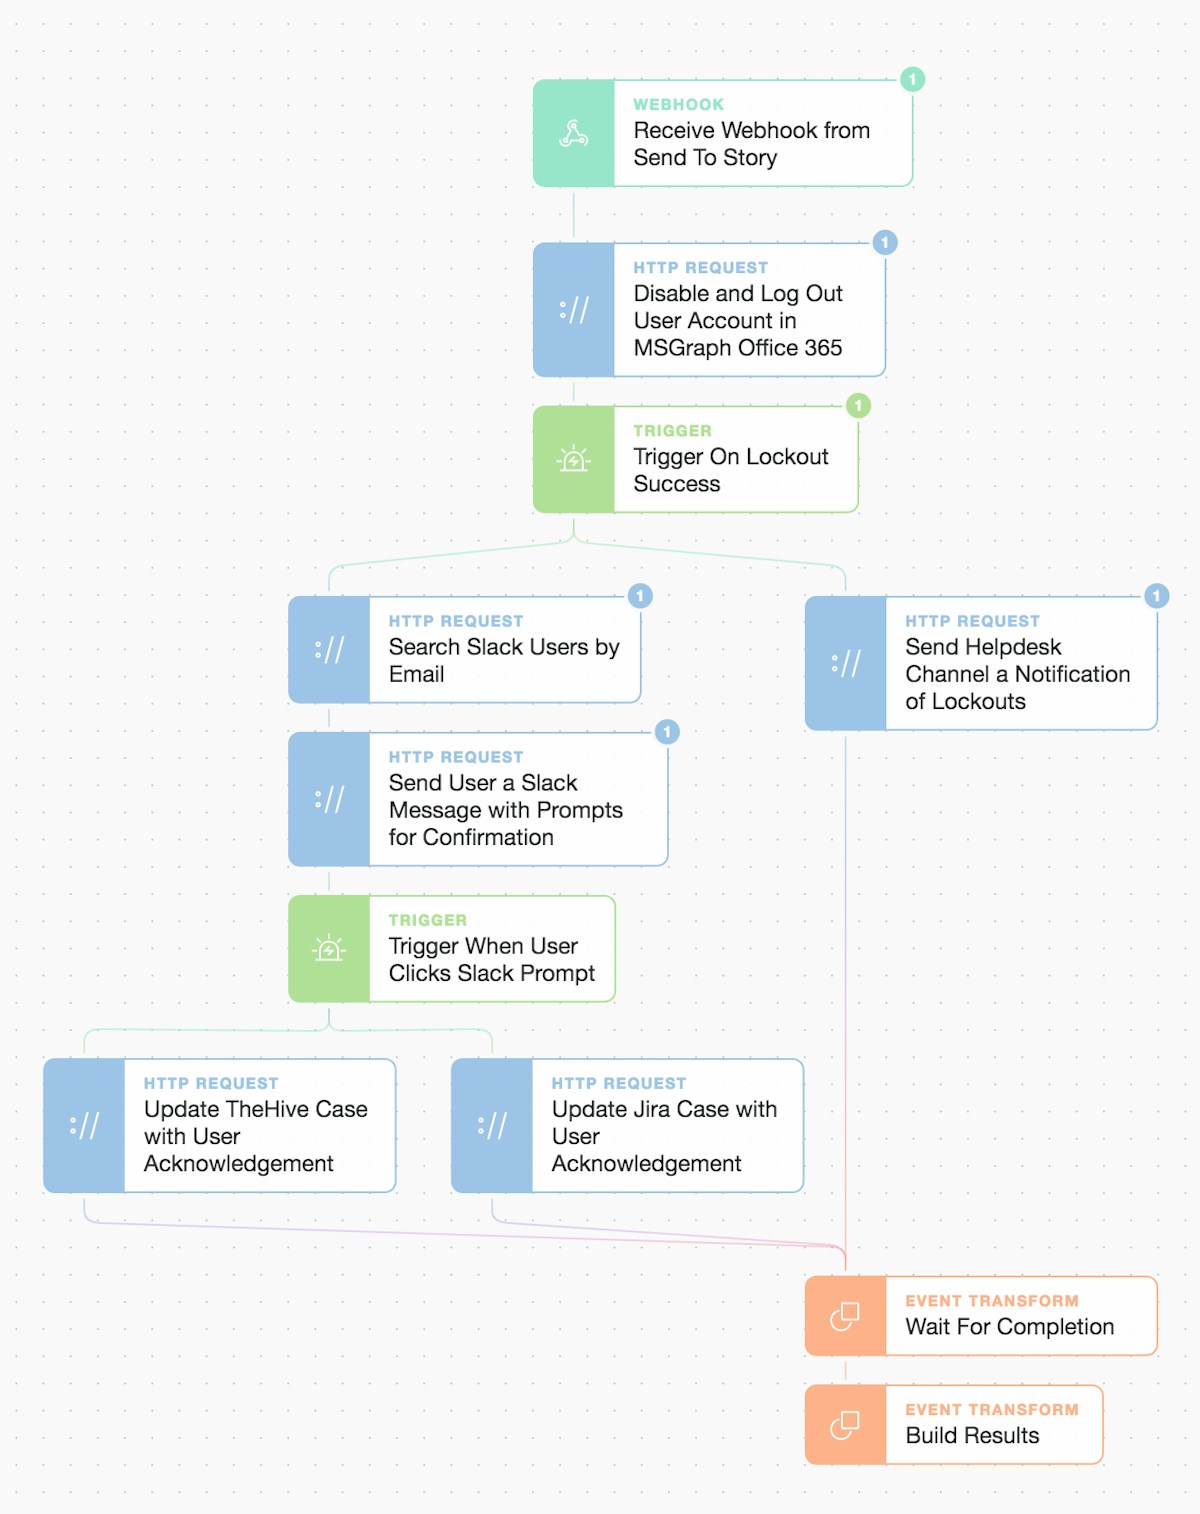
Inside the “Respond and Protect” Story workflow
With the potential for many different response paths, we can only explore a few critical ones but note that the simple drag and drop approach allows you to quickly compose multiple linear or concurrent parallel workflows. These Actions and workflows can be easily tailored to your specific processes or platforms by using prebuilt templates that cover hundreds of applications and platforms. Let’s take a deeper look at the account lockout, user notification prompts, and case updates. Then it's up to you what’s next!
Here we're using the Microsoft Graph (MSGraph) API to initiate a primary lockout of the user from email and other Office 365 / Microsoft 365 based accounts. This is done via OAuth2.0 authentication which only needs to be set up once as a credential. We use the least privilege scope we can to give our automation the ability to disable an account.

Microsoft Security Graph account lockout
Inside the template (below) the payload of "accountEnabled" is being set to “false” which also automatically logs the user out of all other dependent Microsoft services.
Note: In this example, we are going to assume that Slack is not dependent on ADFS/Azure AD for SSO (Single Sign-On) as we will subsequently use Slack as a side-channel for communication.
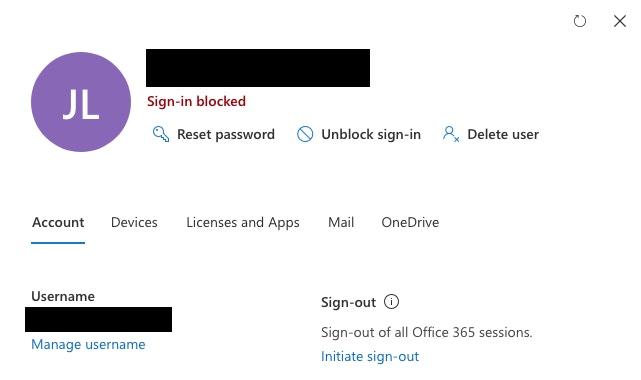
View from https://admin.microsoft.com/Adminportal/Home#/users account management
As you can see, we are now battening down the hatches...
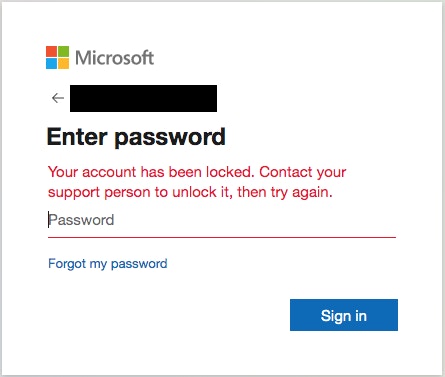
Unable to sign-in further to accounts
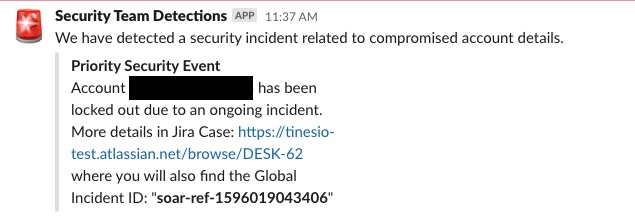
Let’s move on to informing the user that there’s been an issue and then get their confirmation they understand what’s happening. We only do this once we’ve confirmed the account lockout has been successful by using a simple trigger/check.
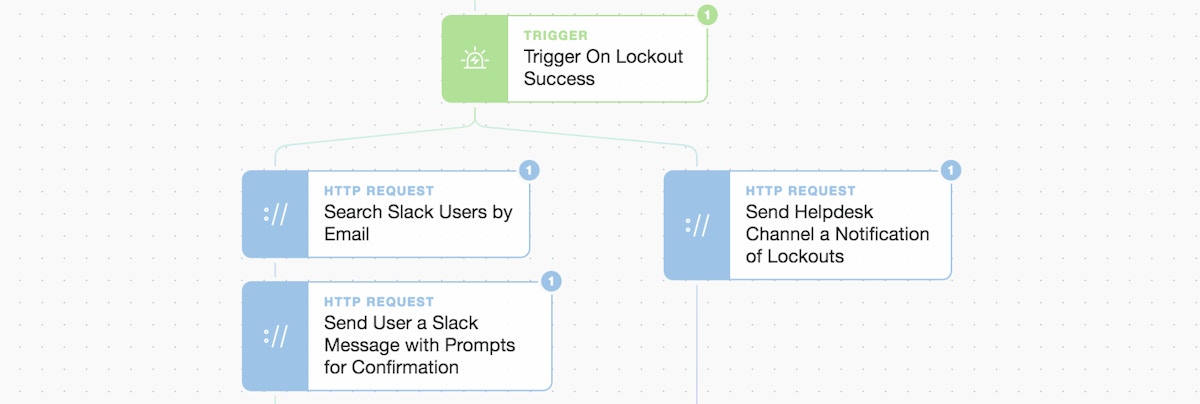
Left-hand side: user lookup and message / Right-hand side: Helpdesk message
First, we perform a simple user lookup (using the email address) in Slack and then send a message that contains a “prompt” button for confirmation of receipt of the message. This “prompt” widget creates a custom link that we embed in our message button below.
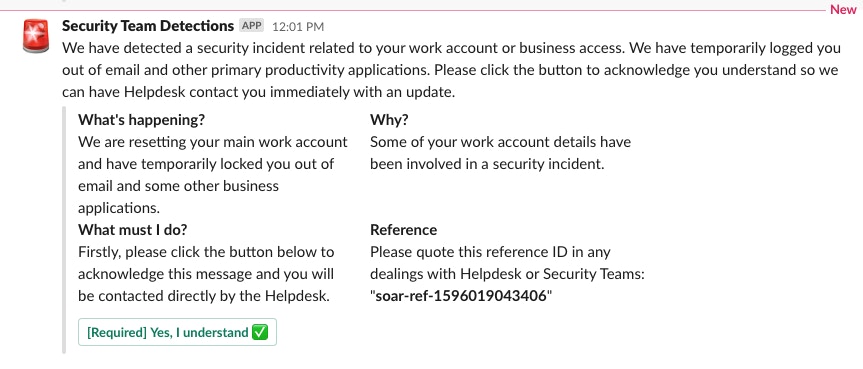
User message via Slack with prompt/button to click
Once clicked it re-starts the automation workflow and emits an event we can wait for and/or match on. This is powerful as it means we can use human responses to gate our automation.
...
"type": "actions",
"elements": [
{
"type": "button",
"text": {
"type": "plain_text",
"emoji": true,
"text": "[Required] Yes, I understand ✅"
},
"style": "primary",
"url": "{% prompt true %}"
}
]
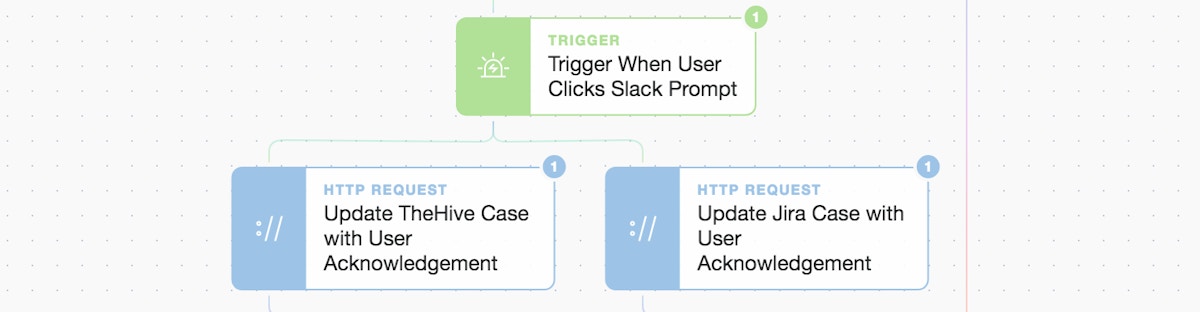
...We then continue the automation and use the user response to trigger the next step. Once the user clicks this button, they have set the automated case management updates in motion.
Left-hand side: user lookup and message / Right-hand side: Helpdesk message
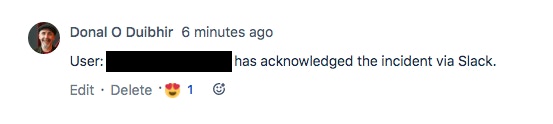
The workflow automatically updates the original Hive case with the user acknowledgment as a completed task.
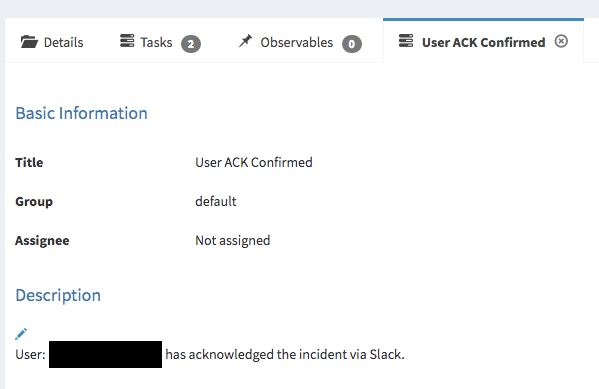
TheHive automated case update to show the user confirmed/acknowledge
The workflow also automatically updates the original Jira case with the user acknowledgment as a comment.
Jira automated case comment to show the user confirmed/acknowledged
We also send a message to the Helpdesk team with pertinent details and include a direct link to the Jira case.
Slack message to the Helpdesk team from right-hand side of Story
Now that we have locked the primary account, informed the user, they have responded, both cases have been updated, and the Helpdesk team has been informed... we finalize the Story workflow - but only once these events have come through to the "Wait For Completion" Event Transformation implode Action.

(Wait for a preset number of events before continuing)
Here we can “wait and gate” in the workflow again. It waits until it sees the right number of events from the preceding workflows (i.e. 3 x events; TheHive update, a Jira update, and a Helpdesk Slack message) before continuing. We have now closed the loop on our detect, enrich / record, and respond / protect automation.

(Embrace defensive automation to regain control and assure yourself what’s next...)
We've completed in seconds and minutes what normally takes hours, days, or even weeks... thus reducing our organization's exposure window and leveraging automation to rapidly de-risk and improve our security posture in the face of an urgent and real threat.
You can download and try these automations using our free Community Edition with these workflow files: Ingest, Check, Enrich, and Respond! What other steps or actions would you take, automate, or link? Maybe some follow-on automated insider threat hunting?
*Please note we recently updated our terminology. Our "agents" are now known as "Actions," but some visuals might not reflect this.*