⚠️Warning
Security teams need access to relevant data and systems to investigate and respond to security threats. As attack vectors have become more diverse, it’s become increasingly common for security teams to require access to systems not owned or operated by Security. In this post, we explore how to automate common Google Workspace (G Suite) security tasks.
Connecting Tines and Google Workspace
Google APIs use the OAuth 2.0 protocol for authentication and authorization. To connect Tines with G Suite, we will use OAuth 2.0 with a service account.
Enable Admin SDK in Google’s API Library
The Admin SDK API allows the programmatic administration of domain resources such as users, groups, and admin settings. Navigate to https://console.developers.google.com/apis/library/ and enable the Admin SDK.
Creating a service account
Detailed instructions for creating a service account are available from Google here.
1) Open the Service accounts page. If prompted, select a project.
2) Click "Create Service Account."
3) Grant the Service Account the “Service Directory Admin” role. This can be done during the Service Account Creation process. Service Account roles can also be added after the Service Account is created by following the steps documented by Google here.
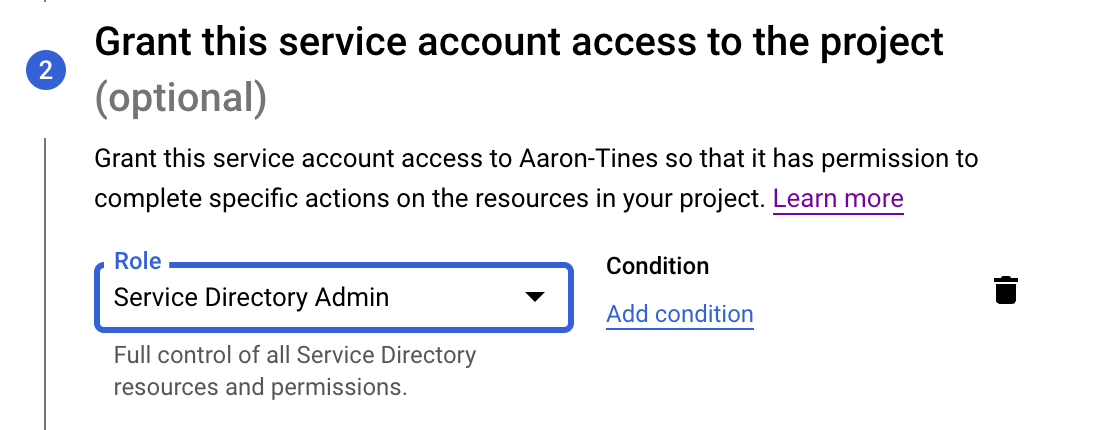
4) In the create service account window, type a name for the service account, and select "Furnish A New Private Key." Ensure that Google Workspace Domain-wide Delegation is enabled. Then click "Create."
Your private key will be downloaded to your computer in JSON format and should look similar to the one below. Keep this file safe, it contains secret information and cannot be downloaded again.
{
  "type": "service_account",
  "project_id": "gsuite-200118",
  "private_key_id": "------3d2e",
  "private_key": "REDACTED",
  "client_email": "tines-2018@gsuite-200118.iam.gserviceaccount.com",
  "client_id": "-----0381",
  "auth_uri": "https://accounts.google.com/o/oauth2/auth",
  "token_uri": "https://oauth2.googleapis.com/token",
  "auth_provider_x509_cert_url": "https://www.googleapis.com/oauth2/v1/certs",
  "client_x509_cert_url": "https://www.googleapis.com/robot/v1/metadata/x509/REDACTED-320%40gsuite-tines.iam.gserviceaccount.com"
}
Authorizing the service account
In order for Tines to access user data in Google Workspace, a Google Workspace administrator needs to authorize the account we just created in the Google Workspace admin console, this is a process known as delegating domain-wide authority.
1) Go to your Google Workspace domain’s Admin console.
2) Select "Security" from the list of controls. If you don’t see "Security" listed, select "More Controls" from the gray bar at the bottom of the page, then select "Security" from the list of controls. If you can’t see the controls, make sure you’re signed in as an administrator for the domain.
3) Select "Show More" and then "Advanced Settings" from the list of options.
4) Select “API Controls" and then "Manage Domain Wide Delegation"

Select "Add New" to add your Client ID and OAuth Scopes.
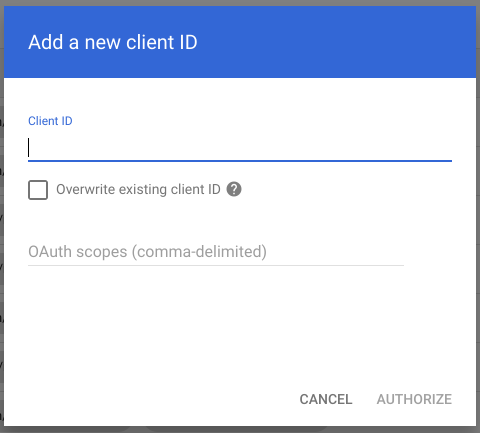
5) In the Client Name field enter the service account’s Client ID. You can find your service account’s client ID in the Service accounts Client ID. This can be found under the “client_id” field in the private key file you downloaded and is typically a long number.
6) Under “One or More API Scopes” enter the scopes that you require. Scopes provide a way to limit the amount of access that is granted to an access token or application. A full list of OAuth 2.0 Scopes for Google APIs is available here. Our credential uses the following scopes:
https://www.googleapis.com/auth/admin.directory.group,
https://www.googleapis.com/auth/admin.directory.user
SECURITY TIP: Only assign the scopes that are absolutely necessary for your automation Story.
7) Click “Authorize.”
Configuring Tines to work with Google Workspace
Now that we have an authorized client and private key, we will configure Tines to connect to G Suite.
Create a JWT credential
Like many services, G Suite uses JSON Web Tokens (JWT – pronounced “jot”) to represent and exchange information between services securely. Before Google provides an access token that we can use to access the required APIs, we need to send a JWT confirming we are who we say we are.
1) Sign in to your Tines tenant and select Credentials -> New
2) Under “Type” chose “JWT”
3) Enter a credential name
4) The only signing algorithm supported by the Google OAuth 2.0 Authorization Server is RSA using SHA-256 hashing algorithm, so, under “Algorithm” choose RSA256.
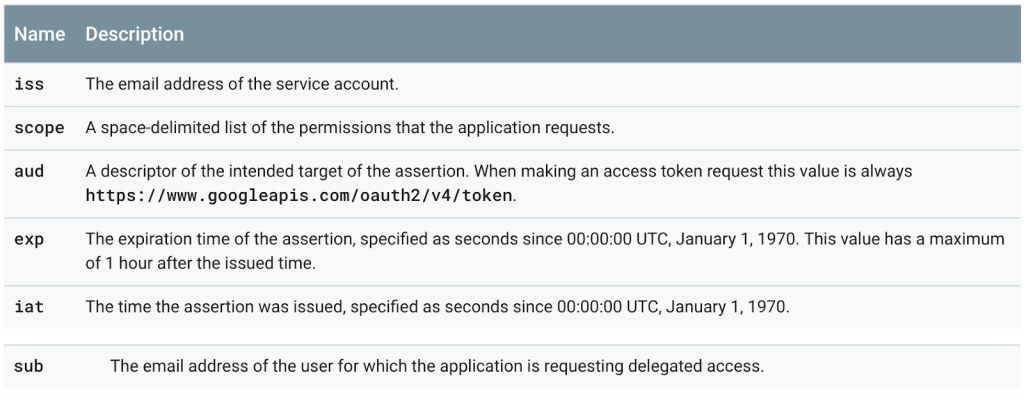
Next, we’ll define a payload for our JWT. The payload component of the JWT is the data that‘s stored inside the JWT (this data is also referred to as the “claims” of the JWT). Google expects us to provide a payload that looks like the below:
The required fields are described below:
{
  "iss":"761326798069-r5mljlln1rd4lrbhg75efgigp36m78j5@developer.gserviceaccount.com",
  "sub":"some.user@example.com",
  "scope":"https://www.googleapis.com/auth/prediction",
  "aud":"https://oauth2.googleapis.com/token",
  "exp":1328554385,
  "iat":1328550785
}
5) For the Tines credential, we will use the following payload:
{
 "iss":"tines-2018@gsuite-200118.iam.gserviceaccount.com",
 "sub":"joe@tines.io",
 "scope":"https://www.googleapis.com/auth/admin.directory.group https://www.googleapis.com/auth/admin.directory.user",
 "aud":"https://oauth2.googleapis.com/token"
}
In our case, “iss” is taken from the “client_email” field in our private key file; “sub” is the email address of an admin in our domain that has access to manage users and groups; and “scope” must be the same as that defined under Step 6 of “Authorizing the service account” above.
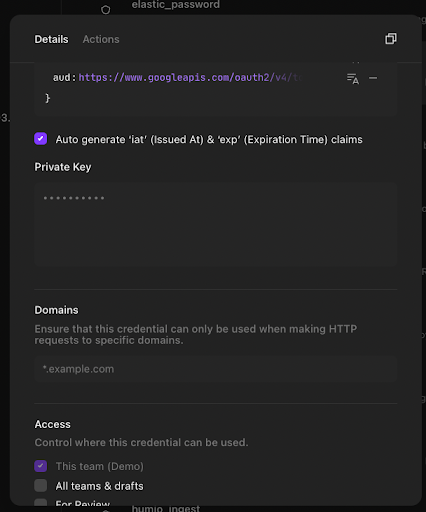
6) By selecting the “ Auto generate ‘iat’ (Issued At) & ‘exp’ (Expiration Time) claims” checkbox. Tines will add “iat” and “exp” claims to the payload according to when the credential is used.
7) Copy and paste the private key from our private key file into the Tines credential.
8) When complete, the credential page should look similar to the below:
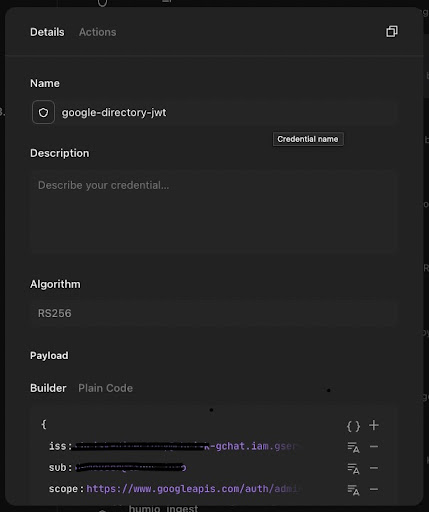
9) Click “Save Credential.”
Creating the Actions
We can now begin automating interaction with Google Workspace from Tines.
Create an Action to fetch an access token
As described previously, before we can call the Google APIs, we need an access token. We will use an HTTP Request Action and the credential we just created to fetch the token.
The HTTP Request Action should use the following config (replace “GSuite”) with the name of your JWT credential:
{
 "url": "https://www.googleapis.com/oauth2/v4/token",
 "content_type": "form",
 "method": "post",
 "payload": {
   "grant_type": "urn:ietf:params:oauth:grant-type:jwt-bearer",
   "assertion": "{{ CREDENTIAL.GSuite }}"
 },
 "expected_update_period_in_days": "1"
}
When you dry-run this Action, it should receive a response similar to the below:
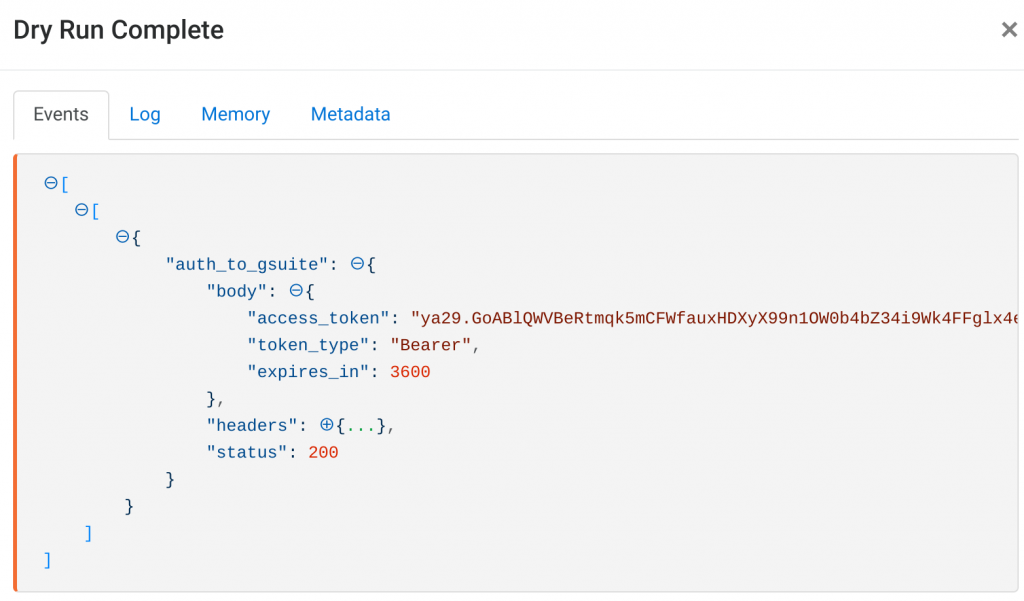
G Suite returns an access token that is valid for one hour.
Save the Action (in this case, the Action was named “Auth to GSuite”)
Create an Action to retrieve all users in Google Workspace
We will now use another HTTP Request Action to call the Google Directory API and list all users on our domain.
The HTTP Request Action should receive events from the “Auth to GSuite” Action created above and be configured as follows (replace “domain” with your domain and “auth_to_gsuite” with whatever you named your authentication Action above):
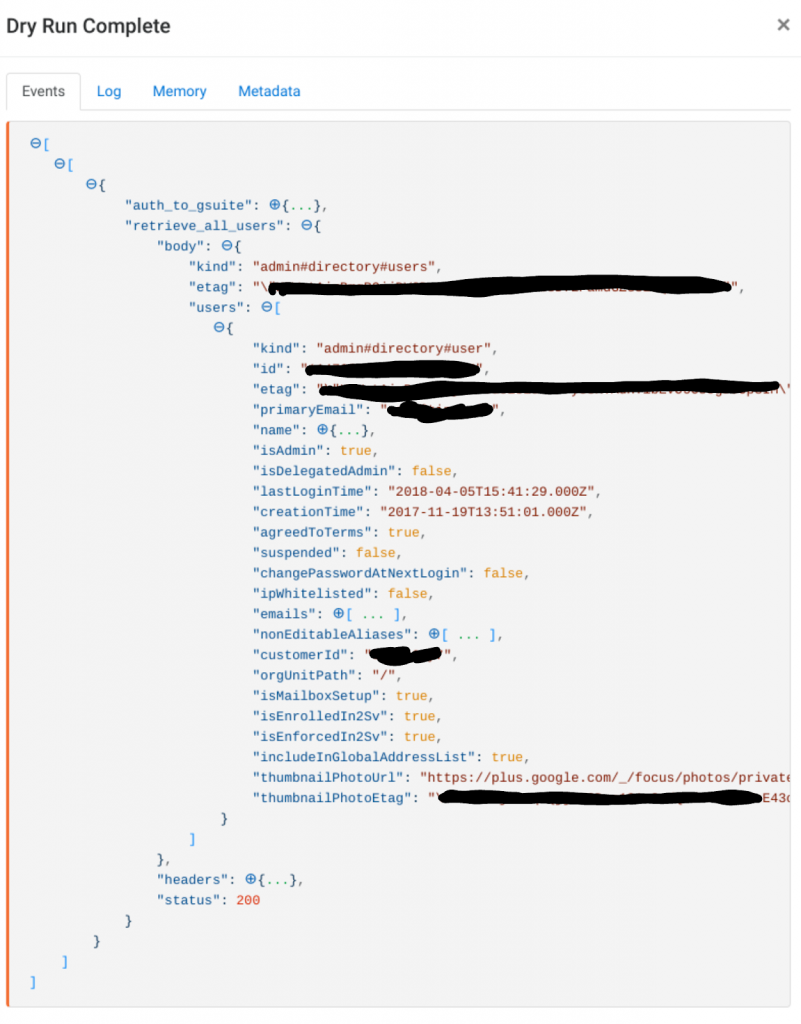
Dry running this Action with an access token from the “Auth to GSuite” Action should return a result similar to the below:
{
  "url": "https://www.googleapis.com/admin/directory/v1/users",
  "content_type": "json",
  "method": "get",
  "payload": {
    "domain": "tines.io"
  },
  "headers": {
    "Authorization": "Bearer {{.auth_to_gsuite.body.access_token}}"
  },
  "expected_update_period_in_days": "1"
}
Conclusion
From retrieving users’ login histories to automating password resets on compromised accounts, combining Google Workspace and Tines provides a powerful way to automate critical parts of a company’s security program. Discover more ready-to-use Google Workspace workflows in our Story Library.