As your workflow needs become more sophisticated, you'll encounter situations that require handling different outcomes based on specific conditions. This is where the story fork (also called branch) design becomes essential.
When to use story forking
When your workflow needs to handle different cases or scenarios.
For implementing "if-then-else" logic in your automations.
When different types of data require different processing paths.
For approval workflows where human decisions affect the process.
When you need to handle errors or exceptions differently from successful operations.
Common story forking patterns
Simple if/else: Basic two-path branching based on a single condition.
Multi-condition routing: Series of conditions to route to multiple destinations.
Error handling: Separate paths for successful operations vs. errors.
Approval workflow: Different paths based on approve/reject decisions.
Data validation: Branching based on whether data meets quality requirements.
Understand the Condition action
While not a requirement for story forks, the Condition action is your primary tool for creating them in Tines:
How it works: The action evaluates a condition and creates two possible paths.
Condition types:
Simple comparisons (equals, contains, greater than).
Existence checks (is present, is blank).
Regular expression matching.
Complex logical combinations (
AND,OR).
Outcomes:
"True" path: Events that run when the condition is met. This path is visualized with the solid connector line from the Condition action.
"False" path: Events that run when the condition is not met (optional). This path is visualized with the dotted connector line from the Condition action.
Practical condition example
Let's examine a practical example: Customer Support Request Router
1. Receive Support Email (Receive Email)
   ↓
2. Extract Request Details (Event Transform)
   ↓
3. Is it a billing question? (Condition)
   ↓                  ↓
   Yes               No
   ↓                  ↓
4. Forward to       4. Is it a technical issue? (Condition)
   Finance Team        ↓                  ↓
   (Send Email)        Yes               No
                       ↓                  ↓
                    5. Create Tech      5. Forward to
                       Support Ticket     General Support
                       (HTTP Request)     (Send Email)
Multiple forks and conditions
There are two primary designs when it comes to forks and conditions:
Cascading conditions
A story fork with cascading conditions is ideal for validation checks. For example, let's take a look at an employee onboarding story that utilizes cascading conditions:
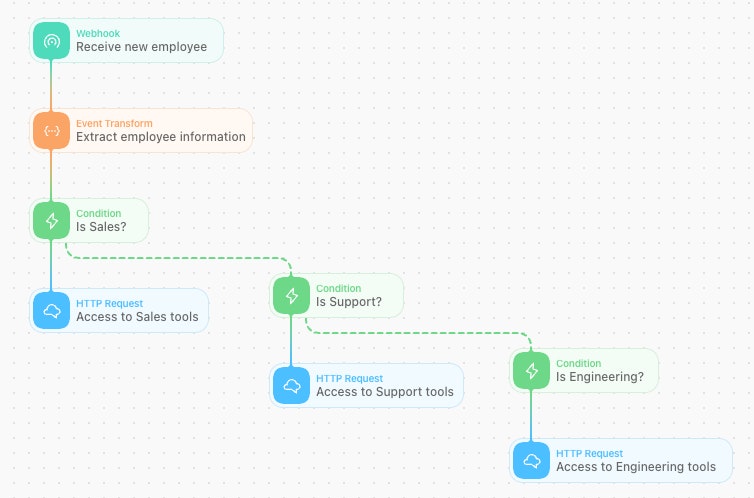
An example of the cascading condition design.
Notice how the story flows into each condition and does a check on the department value before moving forward to the next action/condition check?
Parallel conditions
A story fork with parallel conditions is ideal for scenarios where the data passing through is being categorized. For example, let's take a look at the employee onboarding story that utilizes parallel conditions:
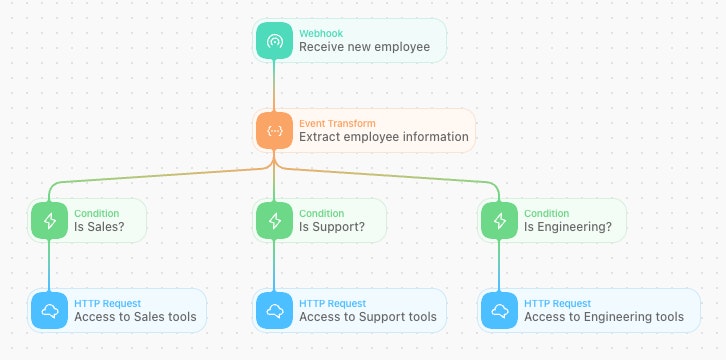
An example of the parallel condition design.
See how the story utilizes conditions to categorize the employee's department and handle the event flow depending on the value?
When should I use each condition design type?
See how we built essentially the same flow with different condition designs? That's on purpose! While both options are almost identical in technicality, the decision is ultimately up to you and your team to decide on what design fits best for your workflows.